

In this article, we will show you how to host your Windows instances on Microsoft Azure and provide web access to multiple concurrent users with Azure Active Directory and secure the access with OAuth 2.0.
This quick guide will show how to integrate our Thinfinity® Remote Desktop with Azure AD and OAuth 2.0:
1. Sign in with your Azure account.
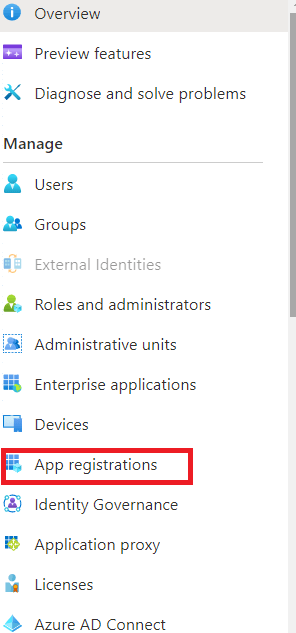
2. Go to Azure Active Directory.

On the left menu, click on “App Registrations”.

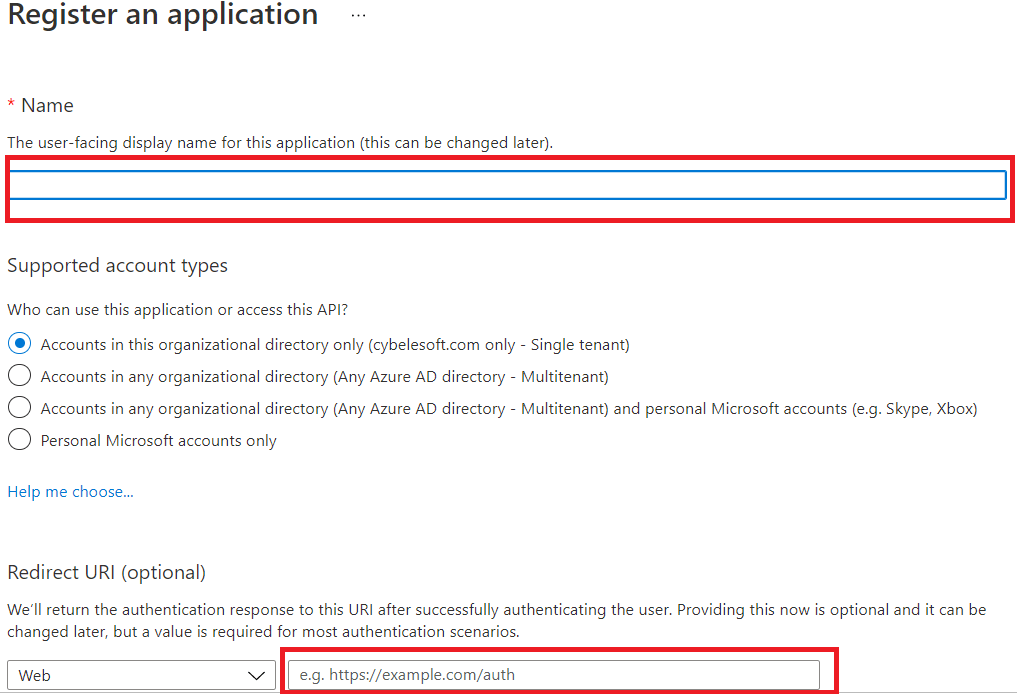
3. To add a new registry, click on “New Registration”.Integrated Thinfinity Remote Desktop 5.0 with Azure Active Directory and OAuth 2.0 – 03
4. Write a name for the application in the text box.
Supported account types: accounts in this organizational directory only (comes by default).
On the redirect URL, you must select “web” and write the URL (must start with https://), followed by the port you choose to use. For example:
https://myThinfinityServer:[Port]/azure
Integrated Thinfinity Remote Desktop 5.0 with Azure Active Directory and OAuth 2.0 – 04
5. Click on “Register”.Integrated Thinfinity Remote Desktop 5.0 with Azure Active Directory and OAuth 2.0 – 05
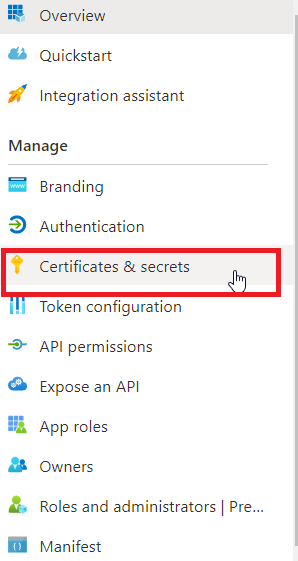
6. Once it is registered, you will be able to see the Essentials. On the left menu, click on “Certificates and Secrets”.Integrated Thinfinity Remote Desktop 5.0 with Azure Active Directory and OAuth 2.0 – 06
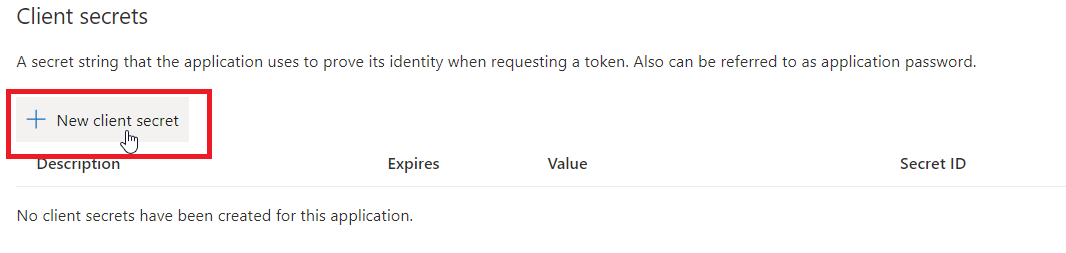
7. You should see Certificates and Client Secrets. Pick “Client secrets”, and click on “New client secret”.Integrated Thinfinity Remote Desktop 5.0 with Azure Active Directory and OAuth 2.0 – 07
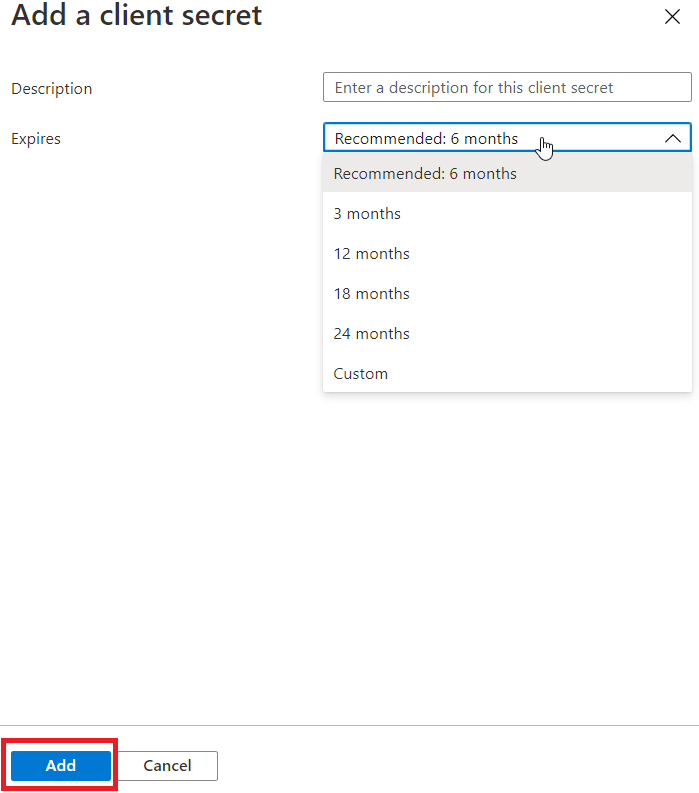
8. Then, type in any description and set the expiration date. When you finish, click on “Add”.
Integrated Thinfinity Remote Desktop 5.0 with Azure Active Directory and OAuth 2.0 – 08
9. Copy the ‘Value’ field once the Client Secret is available. Integrated Thinfinity Remote Desktop 5.0 with Azure Active Directory and OAuth 2.0 – 09
10. Then, go back to the first item on the left menu “overview” and copy the Application (client) ID. Integrated Thinfinity Remote Desktop 5.0 with Azure Active Directory and OAuth 2.0 – 10
11. Once copied, go to your Thinfinity® Remote Desktop Manager, click on the tab “Authentication”, click on the tab “Methods” and then “Add”.Integrated Thinfinity Remote Desktop 5.0 with Azure Active Directory and OAuth 2.0 – 12
12. Choose the option “OAuth2.0”, and then “Azure”.
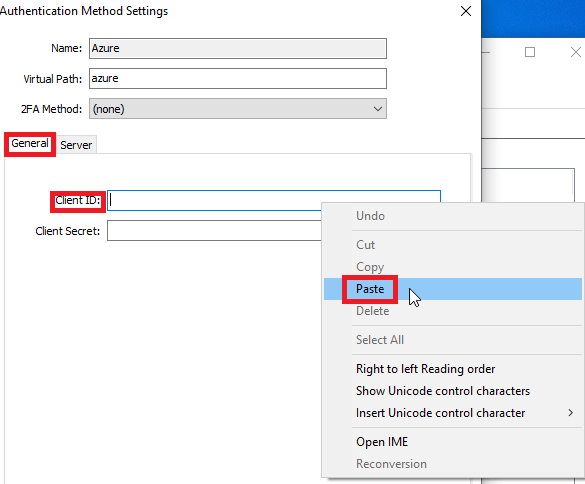
A new window will pop up. Paste the “Application (client) ID” and the ‘Client Secret’ you have previously copied from the portal. Integrated Thinfinity Remote Desktop 5.0 with Azure Active Directory and OAuth 2.0 – 13
13. Then go to the next tab “server” and copy, from the portal, the Directory (tenant) ID and replace [DirectoryID] in Authorization URL and in Token Validation Server URL (remember to erase the “[square brackets]”).Integrated Thinfinity Remote Desktop 5.0 with Azure Active Directory and OAuth 2.0 – 14
Integrated Thinfinity Remote Desktop 5.0 with Azure Active Directory and OAuth 2.0 – 15
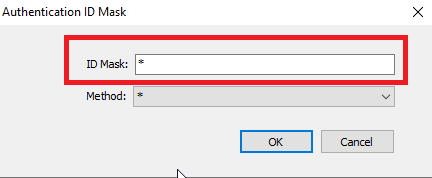
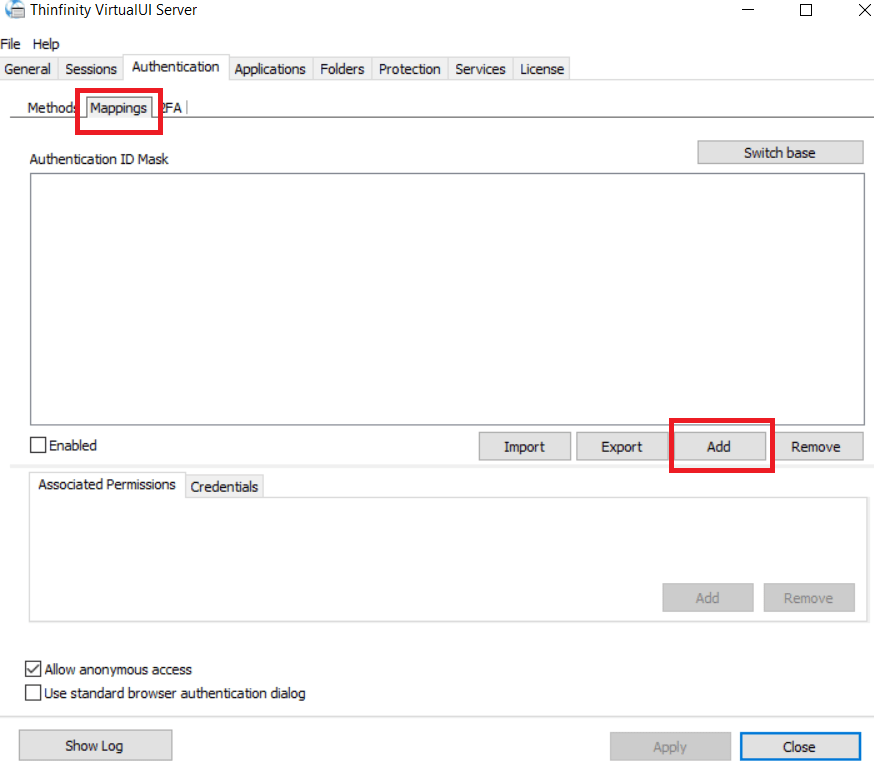
14. Type in “*” on the ID mask to allow all elements, and click ”OK“.
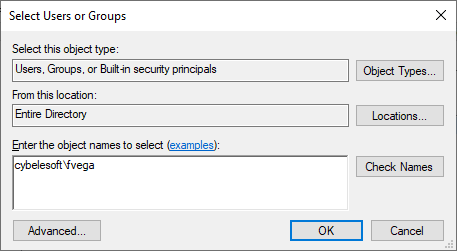
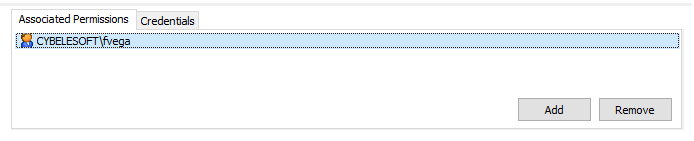
15. Now we need to add the ‘Associated Permissions’. Click on the ‘Add’ button below and add a valid Local / AD user:
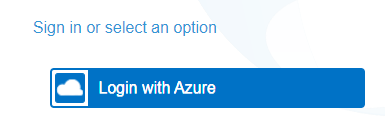
15. Go to your Thinfinity® URL on your browser and finally click on “Log in with Azure”:
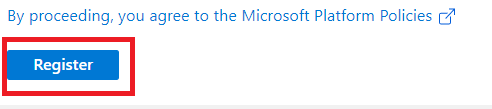
16. Click on “Register”.
17. Once it is registered, you will be able to see the Essentials. On the left menu, click on “Certificates and Secrets”.
18. You should see Certificates and Client Secrets. Pick “Client secrets”, and click on “New client secret”.
19. Then, type in any description and set the expiration date. When you finish, click on “Add”.
20. Copy the ‘Value’ field once the Client Secret is available.

21. Then, go back to the first item on the left menu “overview” and copy the Application (client) ID.

22. Once copied, go to your Thinfinity® Remote Desktop Manager, click on the tab “Authentication”, click on the tab “Methods” and then “Add”.
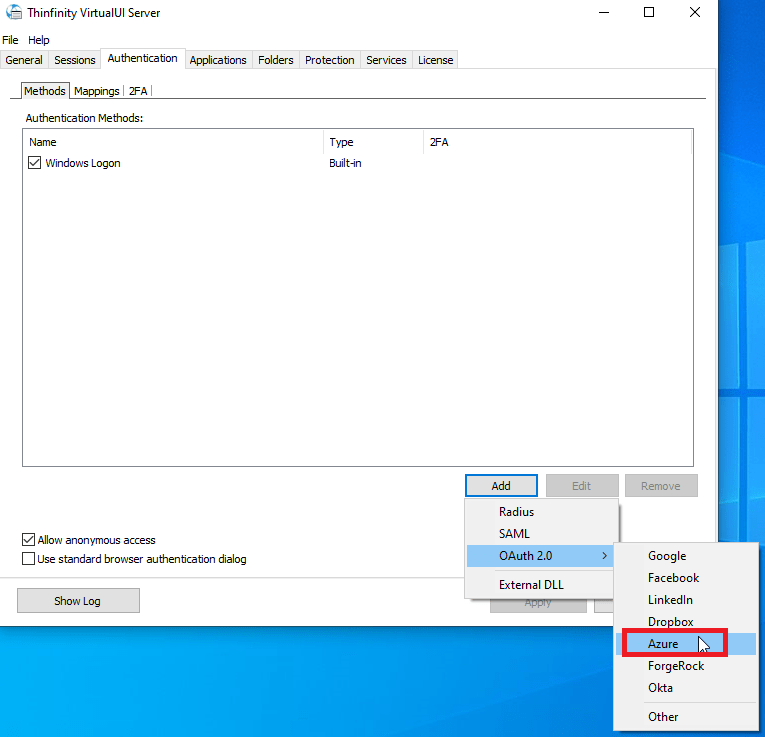
23. Choose the option “OAuth2.0”, and then “Azure”.
24. A new window will pop up. Paste the “Application (client) ID” and the ‘Client Secret’ you have previously copied from the portal.
25. Then go to the next tab “server” and copy, from the portal, the Directory (tenant) ID and replace [DirectoryID] in Authorization URL and in Token Validation Server URL (remember to erase the “[square brackets]”).

Now you should be able to log in with Azure. Let us know how it worked for you!
3 Comments
Two tips
1. The Authorization URL and Token Validation URL can be copied from the Endpoint screen in the Azure Portal (under the created app). Be sure to use the v1, the newer v2 does not work. Gives a scope-related error.
2. Configure the Redirect URL in Azure. This is https://servername/virtualpath where virtualpath is the Virtual Path you set in Thinfinity’s Authentication Method Settings dialog
Hi Leon! Please send me a screenshot so I can review it: [email protected]
My Azure AD is not linked to Office 365 and my users don’t have an email address.
In the Authentication Method Settings dialog, the login username (the claim in the JWT token) is named upn, not mail