
Single sign-on (SSO) has lots of advantages for users, and IT admins love it as well. While password management gets simplified, users get an easy and faster way to log in.
This quick tutorial will help you configure SalesForce as an Identity Provider for Thinfinity, using SAML.
For those who are not familiar with SalesForce, this is a customer relationship platform (CRM ) solution to manage sales, marketing, customer service, and more in one central location.
It seems to be growing popularity and as many of our customers reported using it, we decided to integrate it’s login system to ours to allow Thinfinity users a secure login to our web solutions with SalesForce’s credentials.
How to use SAML to login with SalesForce’s credentials into Thinfinity web apps
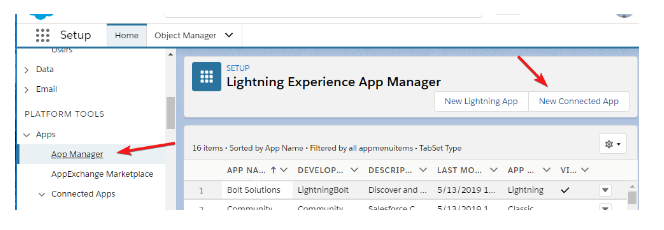
1) Navigate to your Salesforce Setup manager. Create a connected app in the App Manager:
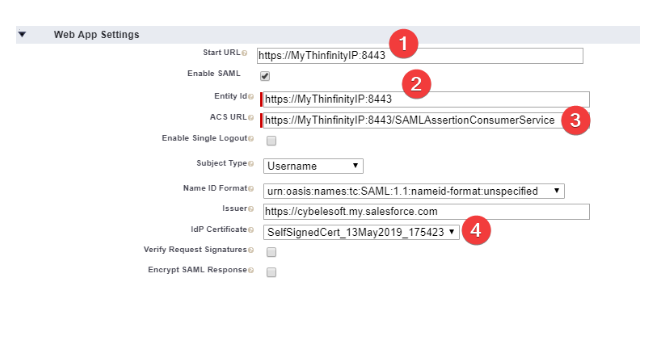
2) Configure the following fields like this:
(Replace MyThinfinityIP:PORT with your own URL)
3) Click on Save.
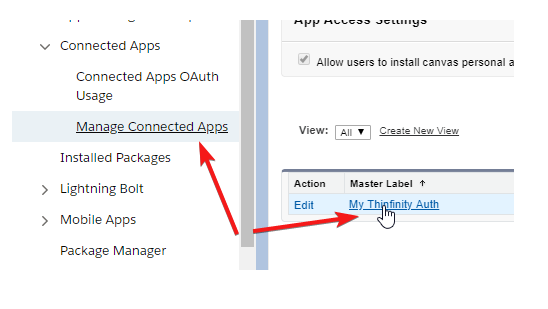
4) Open the “Connected Apps” menu, click on “Manage Connected Apps”, and then in the application you just configured:
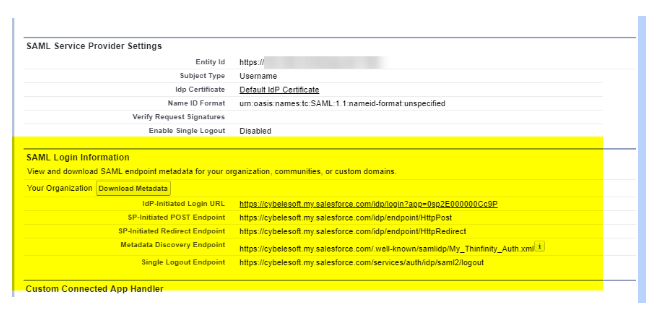
5) Over here, you’ll see the metadata required for the Thinfinity Configuration:
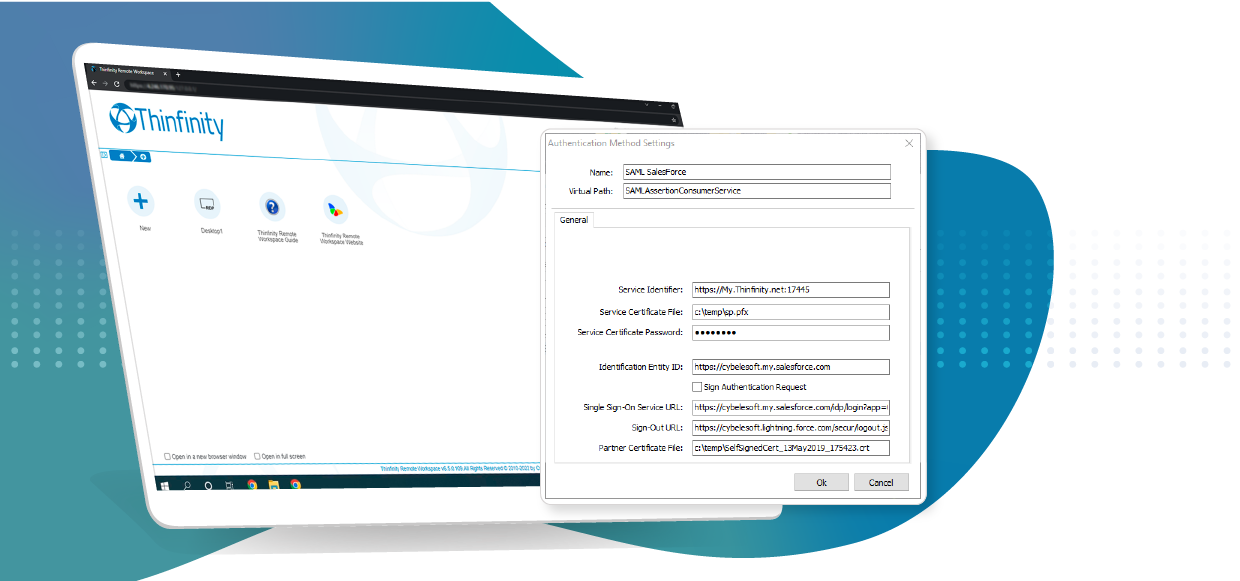
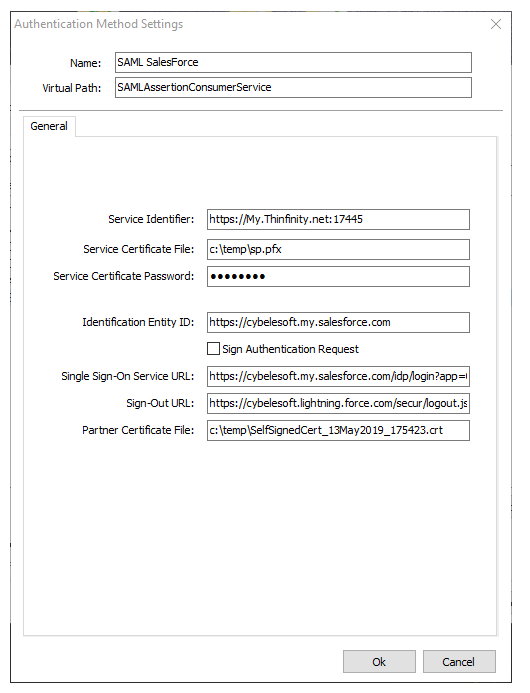
6) Copy that information to the Thinfinity manager, below you’ll find my own configuration for reference:
Service Identifier = Your Thinfinity URL :
Service certificate file = Your own certificate required to validate the exchange.
Service certificate password = The certificate password.
Identification Entity ID = Your Salesforce domain.
Single Sign-On Service URL = IdP initiated login URL
Sign Out URL = Single logout endpoint . In this case, I’m using the “secur/logout.jsp” URL, as the endpoint wasn’t working correctly.
Partner Certificate File = IdP Certificate provided by SalesForce.
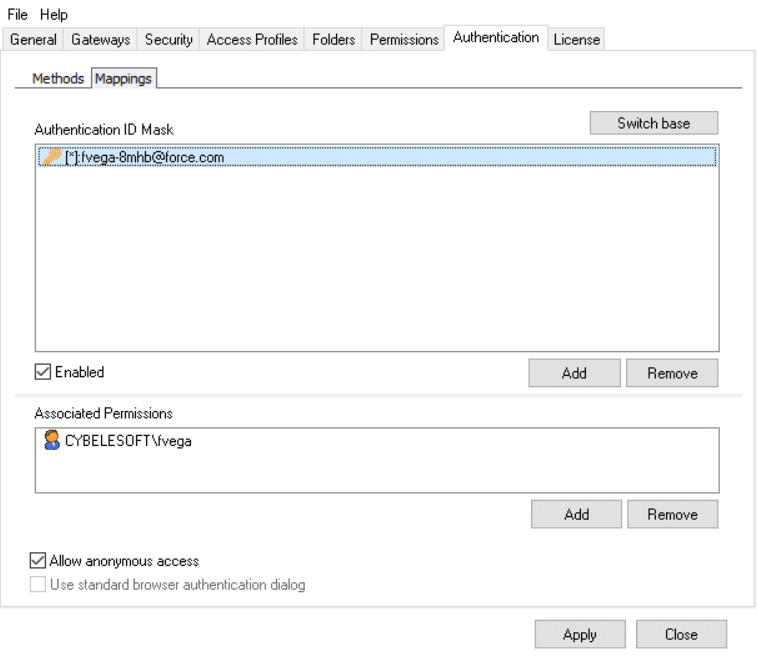
7) Add the Salesforce user in the mappings tab, and map it to an Active Directory user:
You can use an ” * ” for testing purposes:
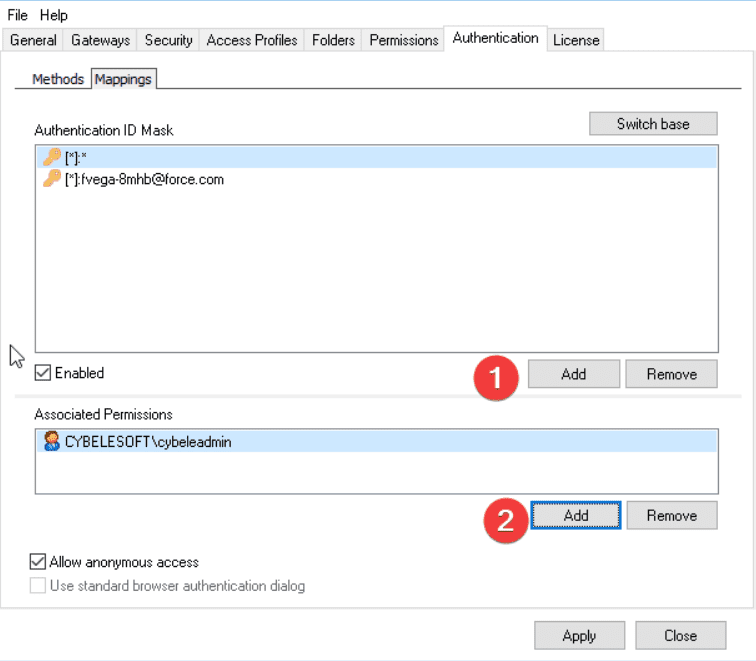
This will validate all incoming users from Salesforce, and assign them the Profiles with the “Permissions“ of the Active Directory user.