
Thinfinity comes in four types of licenses: Essentials, for small deployments; Standard, for mid-size deployments and Enterprise, for big deployments. Check here the available Thinfinity remote desktop plans.
To install Thinfinity Remote Desktop Essentials follow these steps:
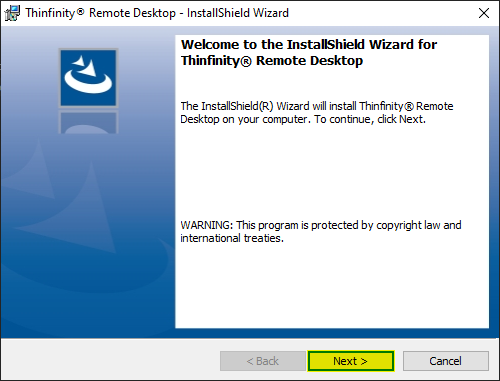
1. Open the installation setup for Thinfinity Remote Desktop and click on “Next”.
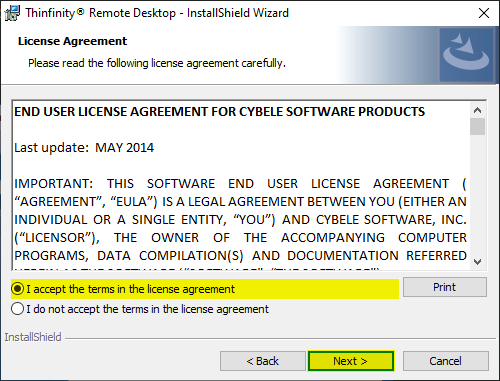
2. Click on the option to Accept the terms in the license agreement and click “Next”
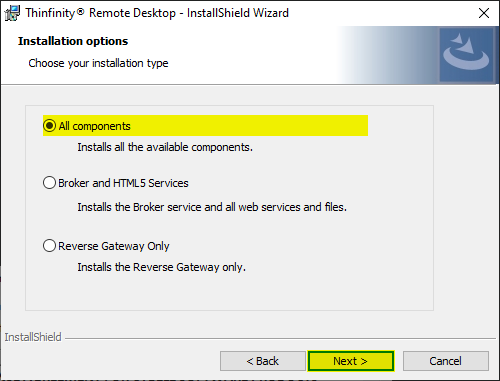
3. In the next screen keep the option “All components” selected and press ‘Next’. This will install both the Gateway and Broker components on the same server.
Click on this link for more information regarding Load Balancing.
Bear in mind that Load Balancing is an ‘Enterprise’ feature, not included in the Essentials edition.
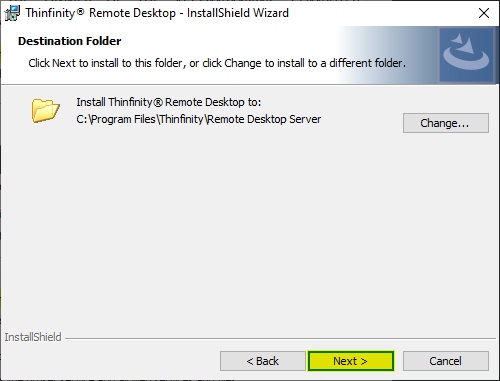
4. Choose the folder where to install Thinfinity Remote Desktop by clicking the “Change” button, otherwise click “Next”.
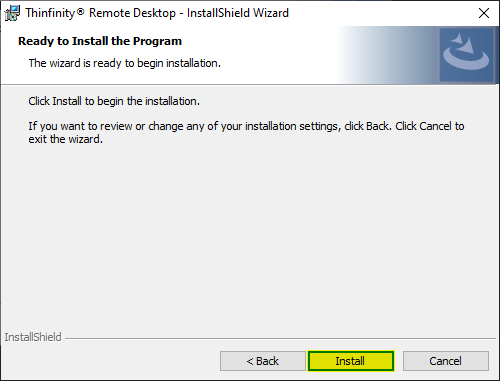
5. Click ‘Install’ to continue with the installation.
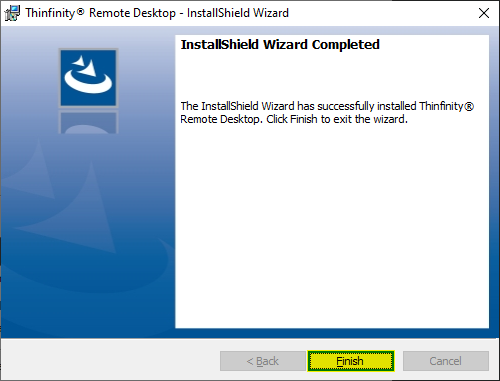
6. When the installation is done, you will get the following dialog. Click “Finish” to finalize the installation.
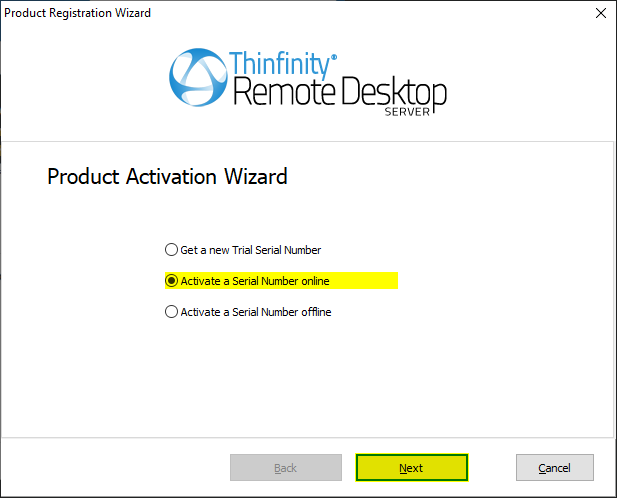
7. After opening the Remote Desktop Essentials Manager for the first time you’ll be prompted to register your license. Select the option “Activate a Serial Number online” and click “Next”.
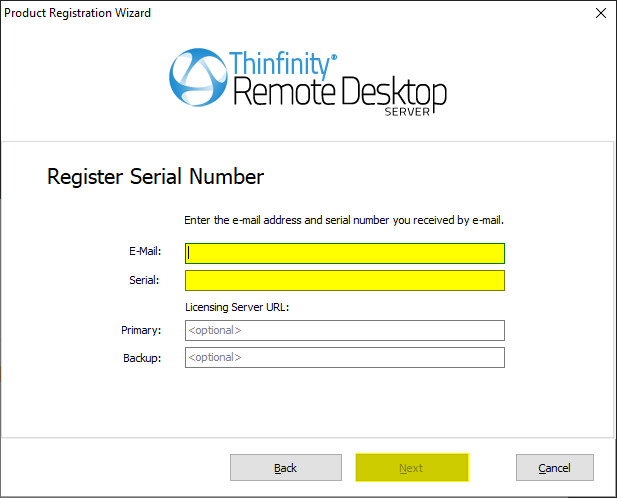
8. Now you can fill out the form with the email and serial number you received via email to register your license and Click “Next”.
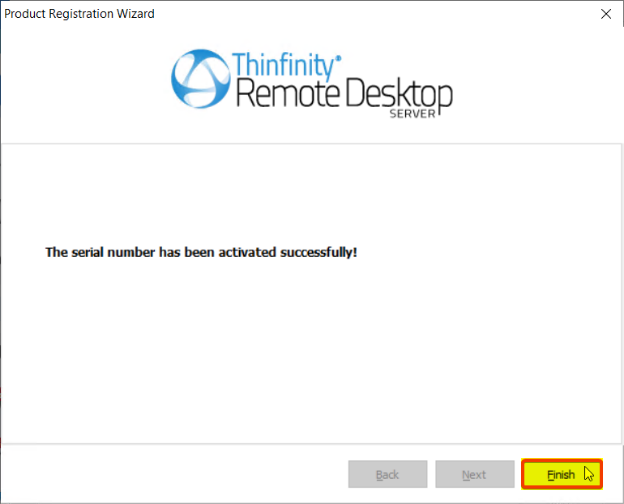
9. Click Finish and the registration will be complete.
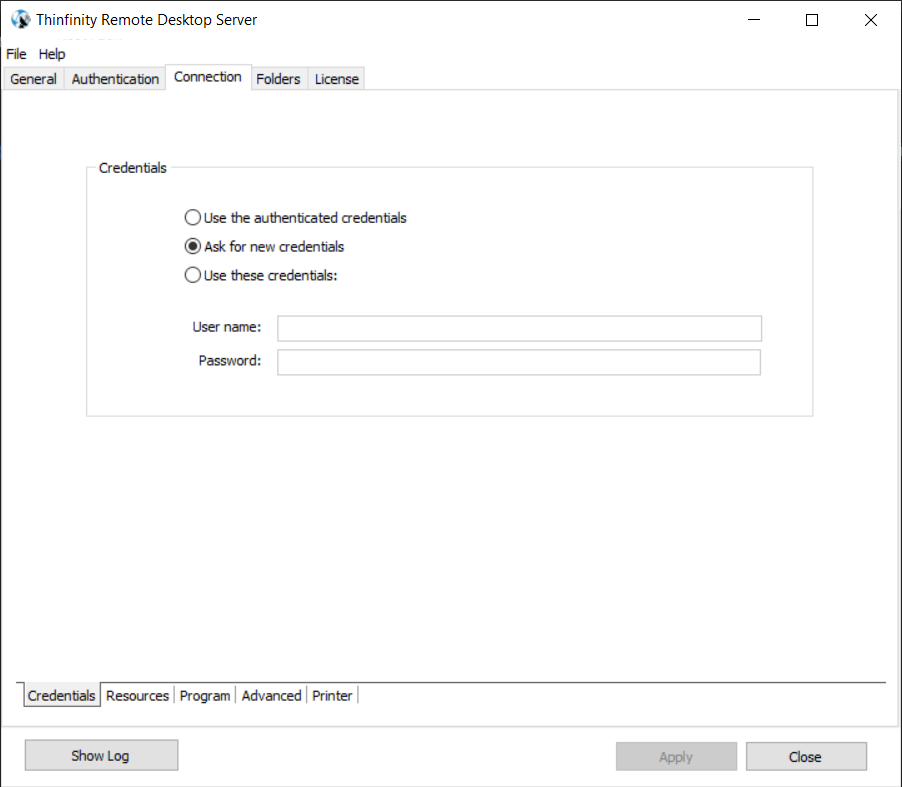
10. Now that Remote Desktop is installed, open it and go to the Connection tab, where you will have three options to configure the authentication.
a. “Use the authenticated credentials” allows you to create a session using the user currently logged in on the server.
b. “Ask for new credentials” will prompt the user to specify the credentials on the browser before connecting.
c. “Use these credentials” allows you to specify the credentials so the users will not have to enter the credentials on the browser.
11. After you set up the Connection method of your choice, you can open Thinfinity Remote Desktop on the browser by either going to the General tab, clicking on the HTTP and then click on Browse:
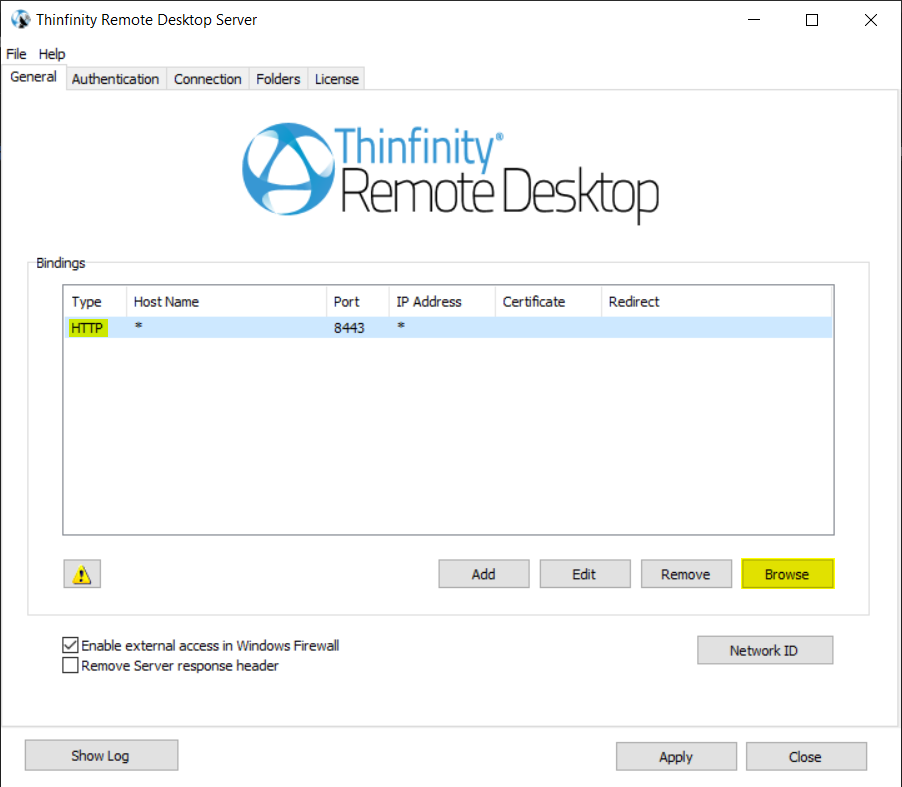
Or you can open Remote Desktop on the browser by going to these address: http://localhost:8443
Please note that both the Protocol (HTTP or HTTPS) and the Port (default 8443) can be modified on the Bindings window on the General tab.
And that’s it! You have configured Remote Desktop Essentials!
If you need any assistance configuring Thinfinity Remote Desktop Essentials please contact [email protected].
Regards!