As a first step for moving your terminal-based application to the web, you may want to replace an authentication screen. For instance:
- the standard CICS/IMS/TSO sign-on
- the AS/400 standard authentication screen
- a VMS/Unix login prompt
- your host application login screen
In this tutorial we’ll guide you to create a simple HostSurfer application with a Login HTML page, fully synchronized with your host application.
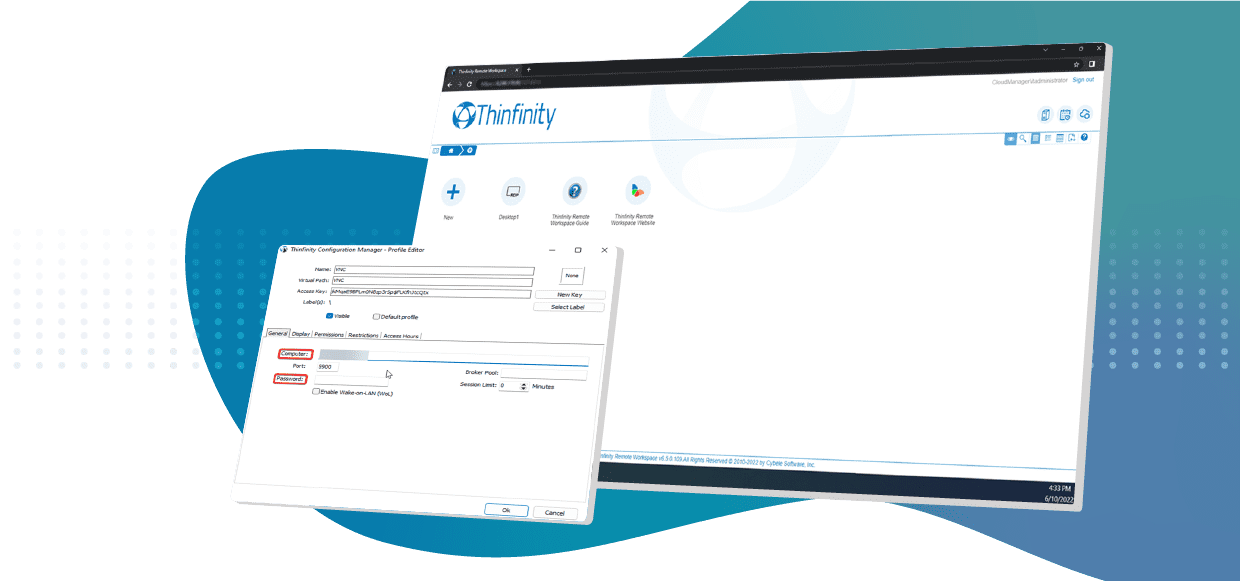
Remember that this and all the Hostsurfer legacy modernization tools are available with your z/Scope Anywhere Permanent license.
How to declare HostSurfer and associate a Terminal emulator
Firstly, you need to create a HostSurfer object. You do it this way:
hs = new zScope.HostSurfer();
Additionally, you need to associate this HostSurfer object to a Terminal Emulation. When the HostSurfer application runs under the z/Scope Anywhere web environment, the HostSurfer object gets automatically associated with the terminal which fires the application. If your HostSurfer application runs as an isolated web application, you need to create a Terminal Emulation running in an iframe on the same page. The easiest way to do the latter, is to pass the “term” parameter in the object creation, and HostSurfer will create the iframe for you:
hs = new zScope.HostSurfer({
    term: {
        url: "https://zanywhere.cybelesoft.com/hsdemo/"
    }
});
You can check further parameters in the online Help.
Now let’s see how to define and register rules for the screen identification.
How to identify a screen
To identify a host screen, HostSurfer uses the rules you declare and register using Javascript.
For this tutorial, we’ll use our demo app that already contains a host screen that allows users to authenticate themselves by entering their username and password.The identification is accomplished by matching the text on the screen; therefore we will add as many text matches as needed to uniquely identify this screen.
The rule definition is very simple. You can just specify the text you are expecting to see anywhere on the screen, or you can be more precise and specify the exact position. As in the screen below…

… we’ll use “USERNAME” and “PASSWORD” on lines 19 and 20 to identify the screen. The following code shows how to register this screen on HostSurfer:
hs.register({
    id: 'bluecardLogin',
    match: [
      { text: "USERNAME", row: 19, col: 55 },
      { text: "PASSWORD", row: 20, col: 55 }
    ]
});
Besides recognizing the screen we’ll do a few more things. Since we are looking to replace the screen for an HTML page, we must provide HostSurfer with all necessary data to do its job.
How to declare the fields
The first thing we’ll do is to name both editable fields we are interested in (these are the fields where your users input their username and password):
fields: [
          { name: 'username', row: 19, col: 67, len: 6 },
          { name: 'password', row: 20, col: 67, len: 6 }
        ]
This will dynamically “tie” both fields of the host screen with the editable fields that will be their counterpart at the HTML level.
The declaration of these fields isn’t intrinsic to the editable fields; you can also apply it to visualization fields (tags). For instance, we can take both dates in the screen to show them differently:
fields: [
          ...
          { name: 'shopsUpdate', row: 18, col: 29, len: 8 },
          { name: 'accountsUpdate', row: 18, col: 62, len: 8 }
        ]
Assign an HTML screen template
The second thing we’ll do is to indicate HostSurfer which is the HTML template we’ll use to replace the login screen. In our example, the HTML template is embedded on the same login page. The value of its “id” is “loginForm” and when it’s shown it should look like this:
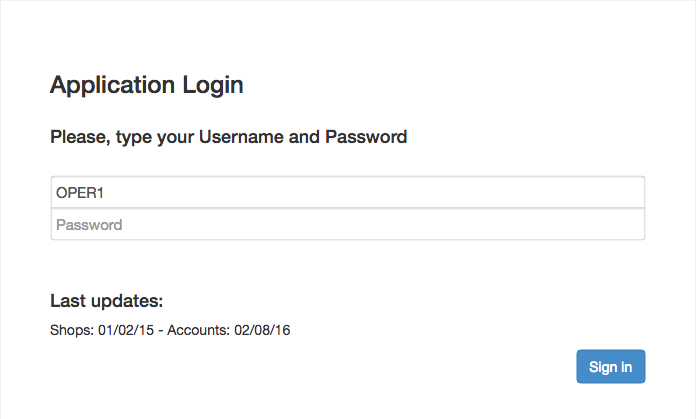
You will be able to see both editable fields here. These will be associated with HostSurfer’s fields (username and password) and both date fields of the last update of the shops and accounts.
You will also see a “Sign In” button (this will trigger the processing of the login screen).
To associate the template with the screen we’ll declare a view in the rule, like this:
    render: {
        view: { template: "#loginForm" }
    }
Now we’ll see how this template interacts with the screen it was assigned to.
Screen Fields processing and user interaction
To allow a two-way, host-screen/login-page binding, we must include some code in the HTML template to associate screen’s fields with the correspondent HTML elements in the page.
You link editable screen’s fields with their counterpart in HTML, using the hs-field attribute:
<input type="text" class="form-control" name="username" placeholder="Username"
required="" maxlength="6" hs-field="hs.data.username"/>
Any change in the HTML edit element or in the screen’s field will replicate on each other automatically.
For the visualization fields (as the dates that show up in this screen) it isn’t required to maintain the bidirectional link. We’ll use double curly brackets for this:
<p>Shops: {{ hs.data.shopsUpdate }} - Accounts: {{ hs.data.accountsUpdate }}</p>
When making the final rendering, both declarations will be replaced for the corresponding value.
As to the screen, we just need to send ‘ENTER’ when pressing “Sign In” in order to process the data on the screen.
<button class="btn btn-primary" tabindex="0" onclick="hs.send.enter()">Sign In</button>
How to set the navigation start
To conclude the example we have to define a couple of actions that will determine the navigation’s logic in the app.
In this example, the first screen coming up isn’t the login screen we want to replace, but the authentications screen of CICS:
This is just a small sample of the potential which z/Scope Anywhere can achieve using HostSurfer.js. Give it a try and you’ll see how easy it is to modernize your mainframe application.

You will be able to skip this screen with ‘ENTER’. To save the user of doing so, we’ll define a new identification rule that will send ‘ENTER’ right after this screen is detected, in order to go to the next screen that we are actually waiting for. Below is the complete rule with its identification field (that is only in this screen) and the associated action:
hs.register({
    id: 'cics',
    match: [{ text: "CICS", row: 5, col: 1 }],
    apply: {
        handler: function (hs) {
            if (hs.screens.length == 1) { hs.enter(); }
        }
    }
});
Notice the condition in the handler, it sends ‘ENTER’ in the first screen. If it goes back to this screen from the CICS, for any reason, it won’t send ‘ENTER’ again.
We now have all it takes to test our new login. Below you will find the entire code implemented on JSFiddle: