
In this tutorial, we’ll show you how to configure RemoteFX™ Microsoft® feature, in order to have an enhanced experience when working with high demanding graphic applications.
The RemoteFX Codec implemented in Thinfinity® Workspace Server enables Microsoft® RemoteFX™, which is an RDP extension. RemoteFX™ attempts to provide an experience similar to a local computer, enabling the delivery of a full Windows user experience. This grants end-users the possibility to run graphical applications on a virtual machine: YouTube videos, games, animations or moving images can be seen with much more fluidity than when using the RDP traditional mode.
Note that this feature is only available for Windows Server 2008, Windows Server 2012, Windows Server 2016 and Windows 10 Enterprise.
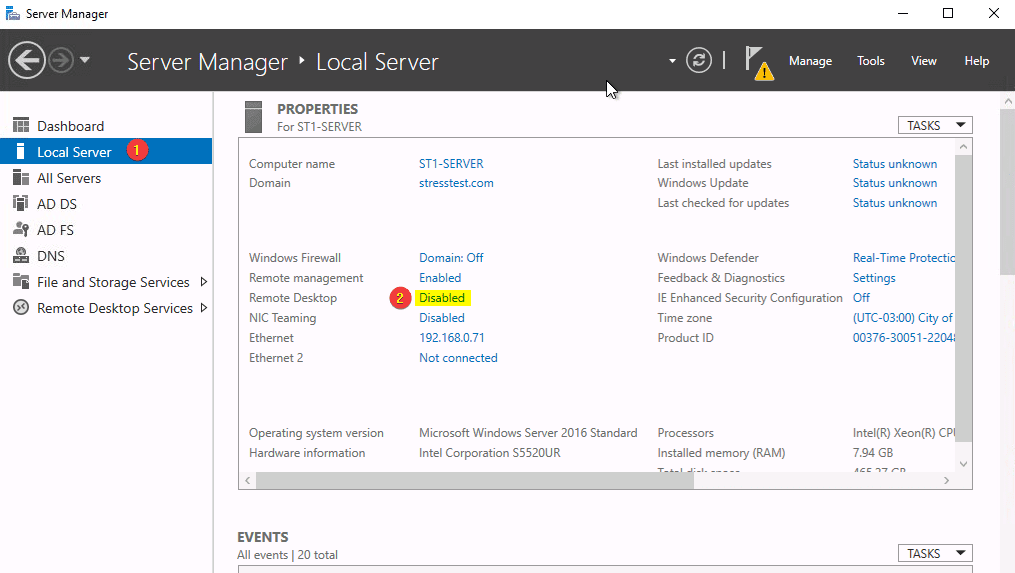
First, you’ll need to enable the Remote Desktop Services feature. In order to do this, you’ll have to open the Server Manager, click on “Local Server” and click on the “Disabled Remote Desktop” option.
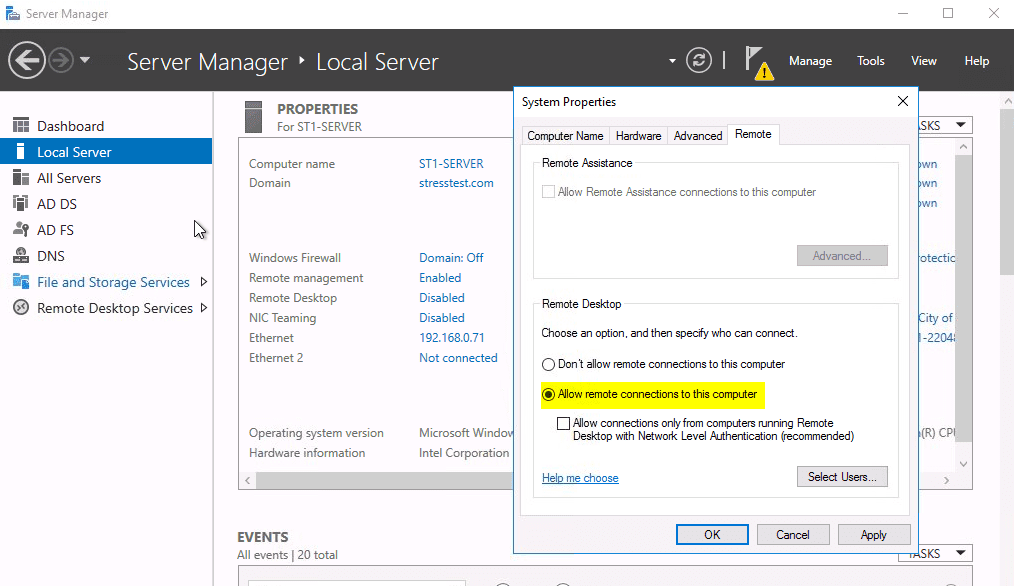
A pop-up will appear, and you just have to check where it says “Allow remote connections to this computer”.
Now that we have the Remote Desktop Services enabled, we can start configuring RemoteFX.
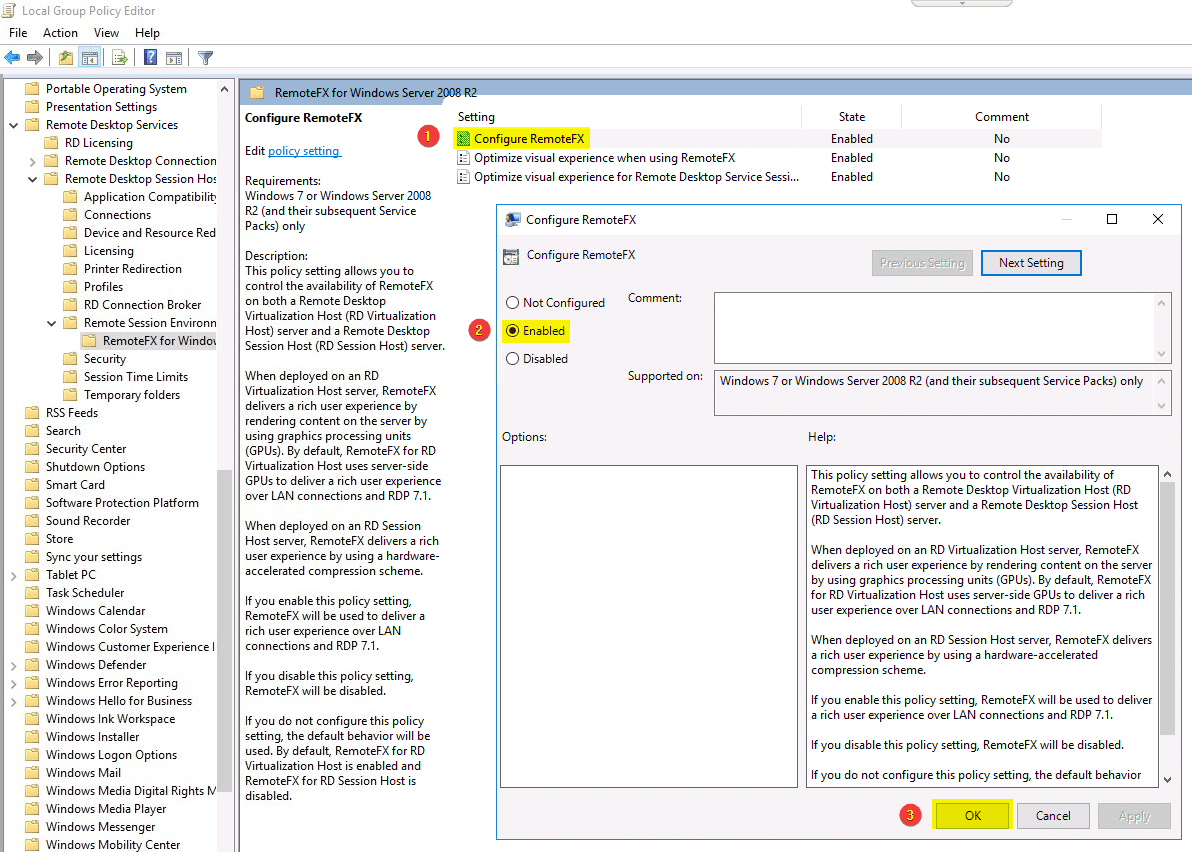
In order to do this, you have to open the Group Policy Editor. Click “Start”, then click “Run”, type gpedit.msc and then click “OK”.
Navigate to: Computer Configuration\Administrative Templates\Windows Components\Remote Desktop Services\Remote Desktop Session Host\Remote Session Environment.
Now double-click “Configure RemoteFX”, then click “Enabled”, and finally click “OK”.
Once you click “Ok”, you just have to run CMD and type gpupdate /force in order to update Windows Policies.
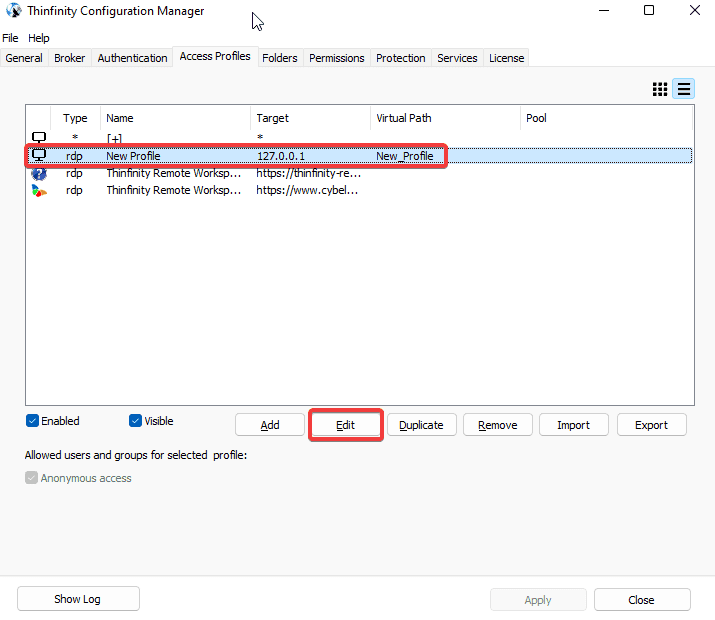
Now we’ll configure the Thinfinity Desktop Server in order to enable RemoteFX from the client-side.
This can be accomplished by editing our RDP profile under the “Access Profiles” tab.
Now we just have to click on the Experience tab and check the “RemoteFX” option.
Note, that if you check the “RemoteFX” feature, all other graphics options will be overwritten.
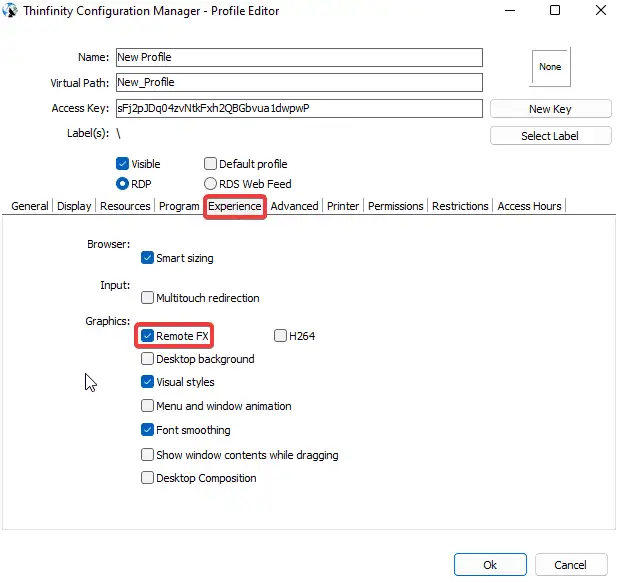
Now we click “OK”, and we have configured “RemoteFX” functionality for our RDP connection!
Finally, if you want to verify if RemoteFX is enabled, we have to open the Microsoft “Event Viewer” Once here you just have to enable the “Show Analytic and Debug Logs” option:
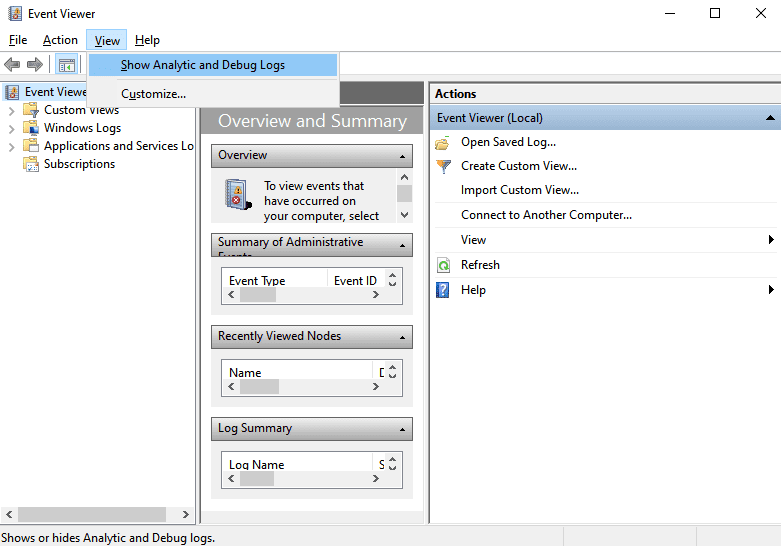
And then browse to “Application” and Services\Logs\Microsoft\Windows\RemoteDesktopServices-RemoteDesktopSessionManager. (This varies under different Windows versions.)
If the computer is connected to the RD session host by using RemoteFX for Remote Desktop Session Host, Event ID 1000 will be shown.
If the RemoteFX hardware compression was used, “Event ID 1001″ will be shown.