
In this article, we will describe how to install your SSL Certificate on Thinfinity® VirtualUI.
An SSL certificate is an effective way to secure a website against unauthorized data interception. At its simplest, an SSL Certificate is used to identify the website and encrypt all data flowing to and from the Certificate holder’s Website.
Thinfinity VirtualUI supports the PFX format for SSL certificates.
PEM certificates usually have extensions such as .crt, .cer, and .key.
They are Base64 encoded ASCII files and contain “—–BEGIN CERTIFICATE—–” and “—–END CERTIFICATE—–” statements.
You can use an SSL converter, like https://www.sslshopper.com/ssl-converter.html, to convert the certificate file (PEM format), private key and CA file (chain certificate) along with a passphrase into a single PFX type of certificate.
Here are the steps to create the certificate:
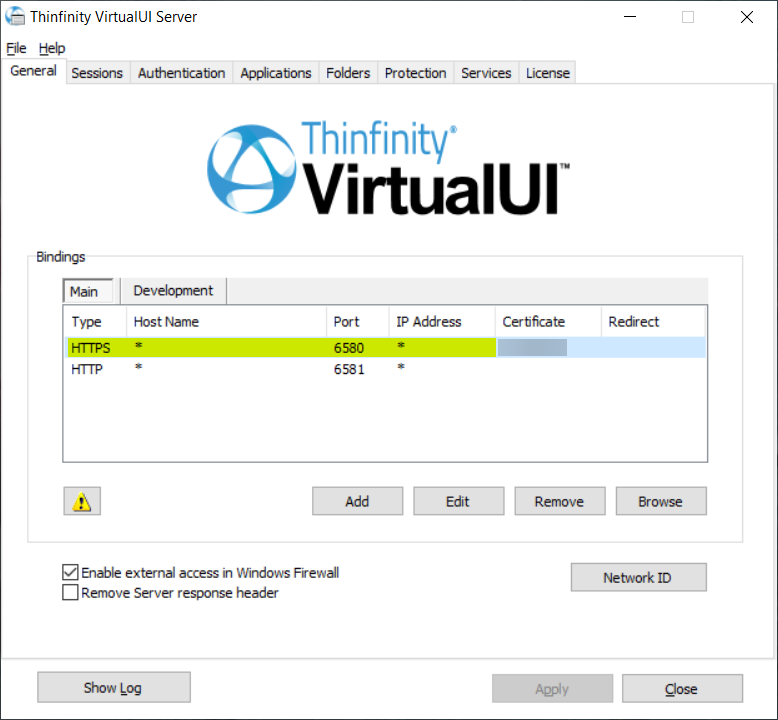
- Open the VirtualUI Server Manager and if you have an HTTPS protocol already set up, double-click on it, otherwise create one by clicking on “Add”.
- Once the Binding window appears, click on “New”.
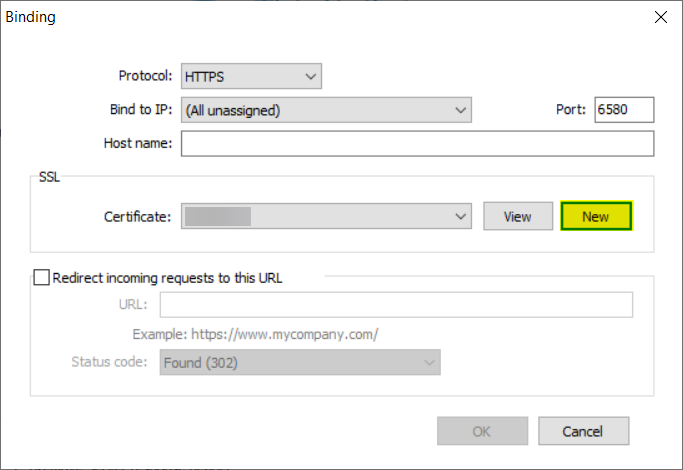
- Here you have the following options: to create your own self-signed certificate, create a certificate request or import a certificate.
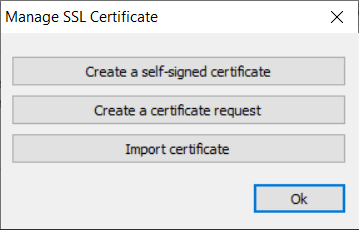
CREATE A SELF-SIGNED SSL CERTIFICATE
- Click on ‘Create a self-signed certificate’ and the following window will display.
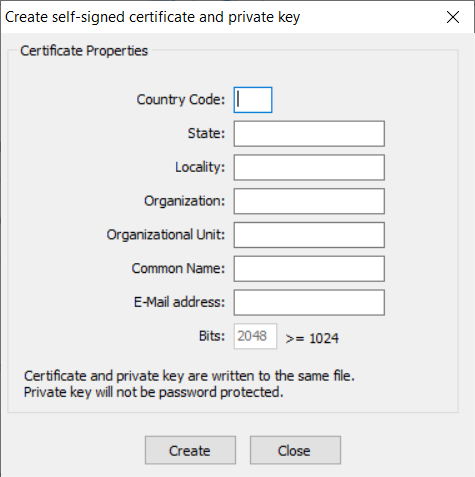
- Country Code: The two-letter country code of the International Organization for Standardization (ISO 3166)
- State: Full unabbreviated name of the state or province your organization is located.
- Locality: Full unabbreviated name of the city where your organization is located.
- Organization: The name your company is legally registered under.
- Organizational Unit: Use this field to differentiate between divisions within an organization.
- Common Name: The domain name or URL you plan to use this certificate with.
- E-Mail Address: Company email address.
- Bits: We recommend using a 2048 length key.
IMPORTANT: Keep in mind that this certificate has not been issued by a known Certificate Authority (CA), hence the web browsers will warn you that they cannot verify its authority.
Since this is not a certificate issued by a known Certificate Authority, you will receive a warning when accessing the landing page, to avoid this, you can add it as a trusted certificate on the Certificate Store from Microsoft. This certificate would need to be installed on all devices that wish to connect.
CREATE A CERTIFICATE REQUEST
- After clicking on Create a certificate request, you’ll need to fill out the following form:
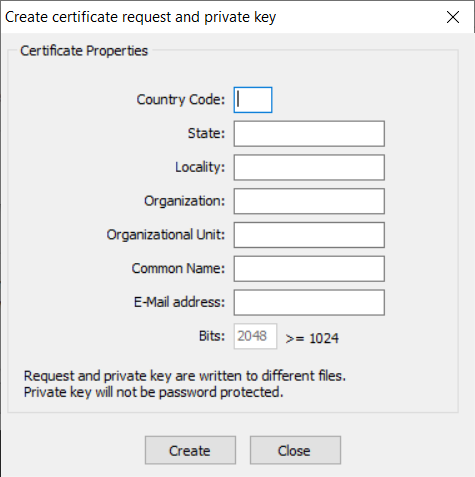
- After finishing the certificate request procedure, two files will be created: “Request key” and “Private key”.
- Request key: This information needs to be sent to the Certificate Authority (CA)
- Private key: You should save this information, in case you need it in the future.
- Afterwards, you can get your certificate from GoDaddy, VeriSign, Thawte, GeoTrust, Let’s Encrypt or a similar provider.
- Once you acquire the certificate, you must import it into Thinfinity VirtualUI.
We recommend using the PFX format for your certificate.
IMPORT CERTIFICATE
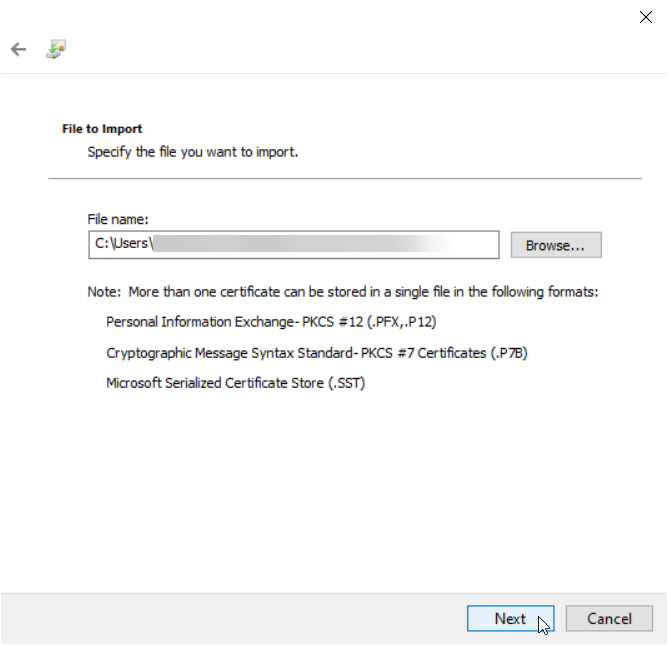
- When you click on “Import certificate”, the Certificate Import Wizard will open. On it, click on “Next”
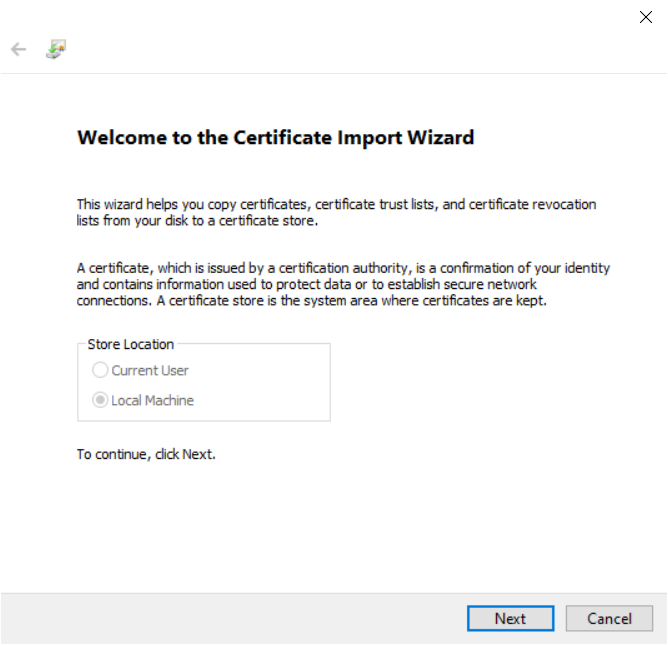
- Select the certificate to import and then press “Next”
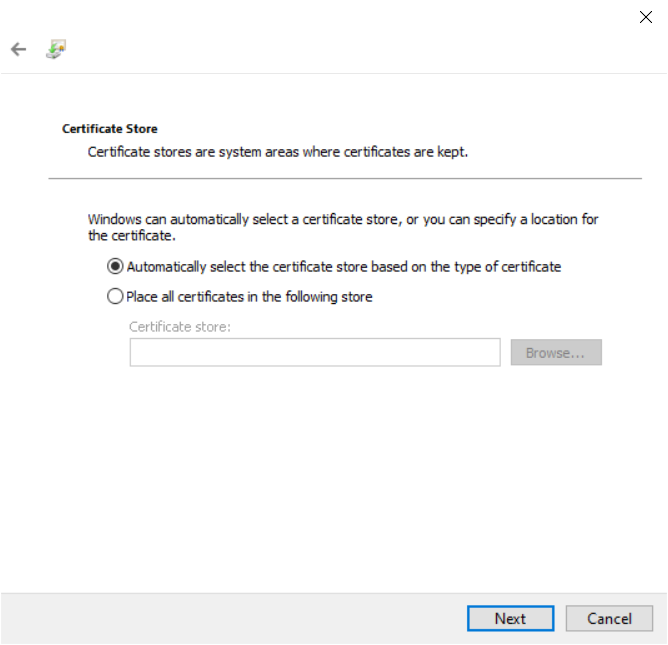
- After this, select the option “Automatically select the certificate store based on the type of certificate”
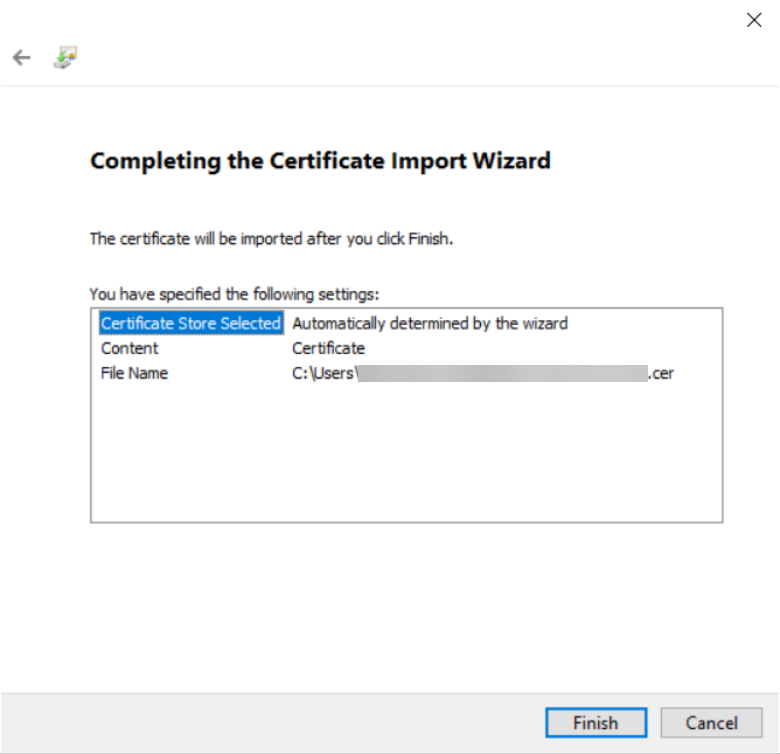
- Check that the right selections are displayed and then, click on “Finish”.
Now you are all set up! You have configured your SSL certificate.
If you have any questions regarding the SSL certificate management, you can leave a comment below or contact us.
Regards!