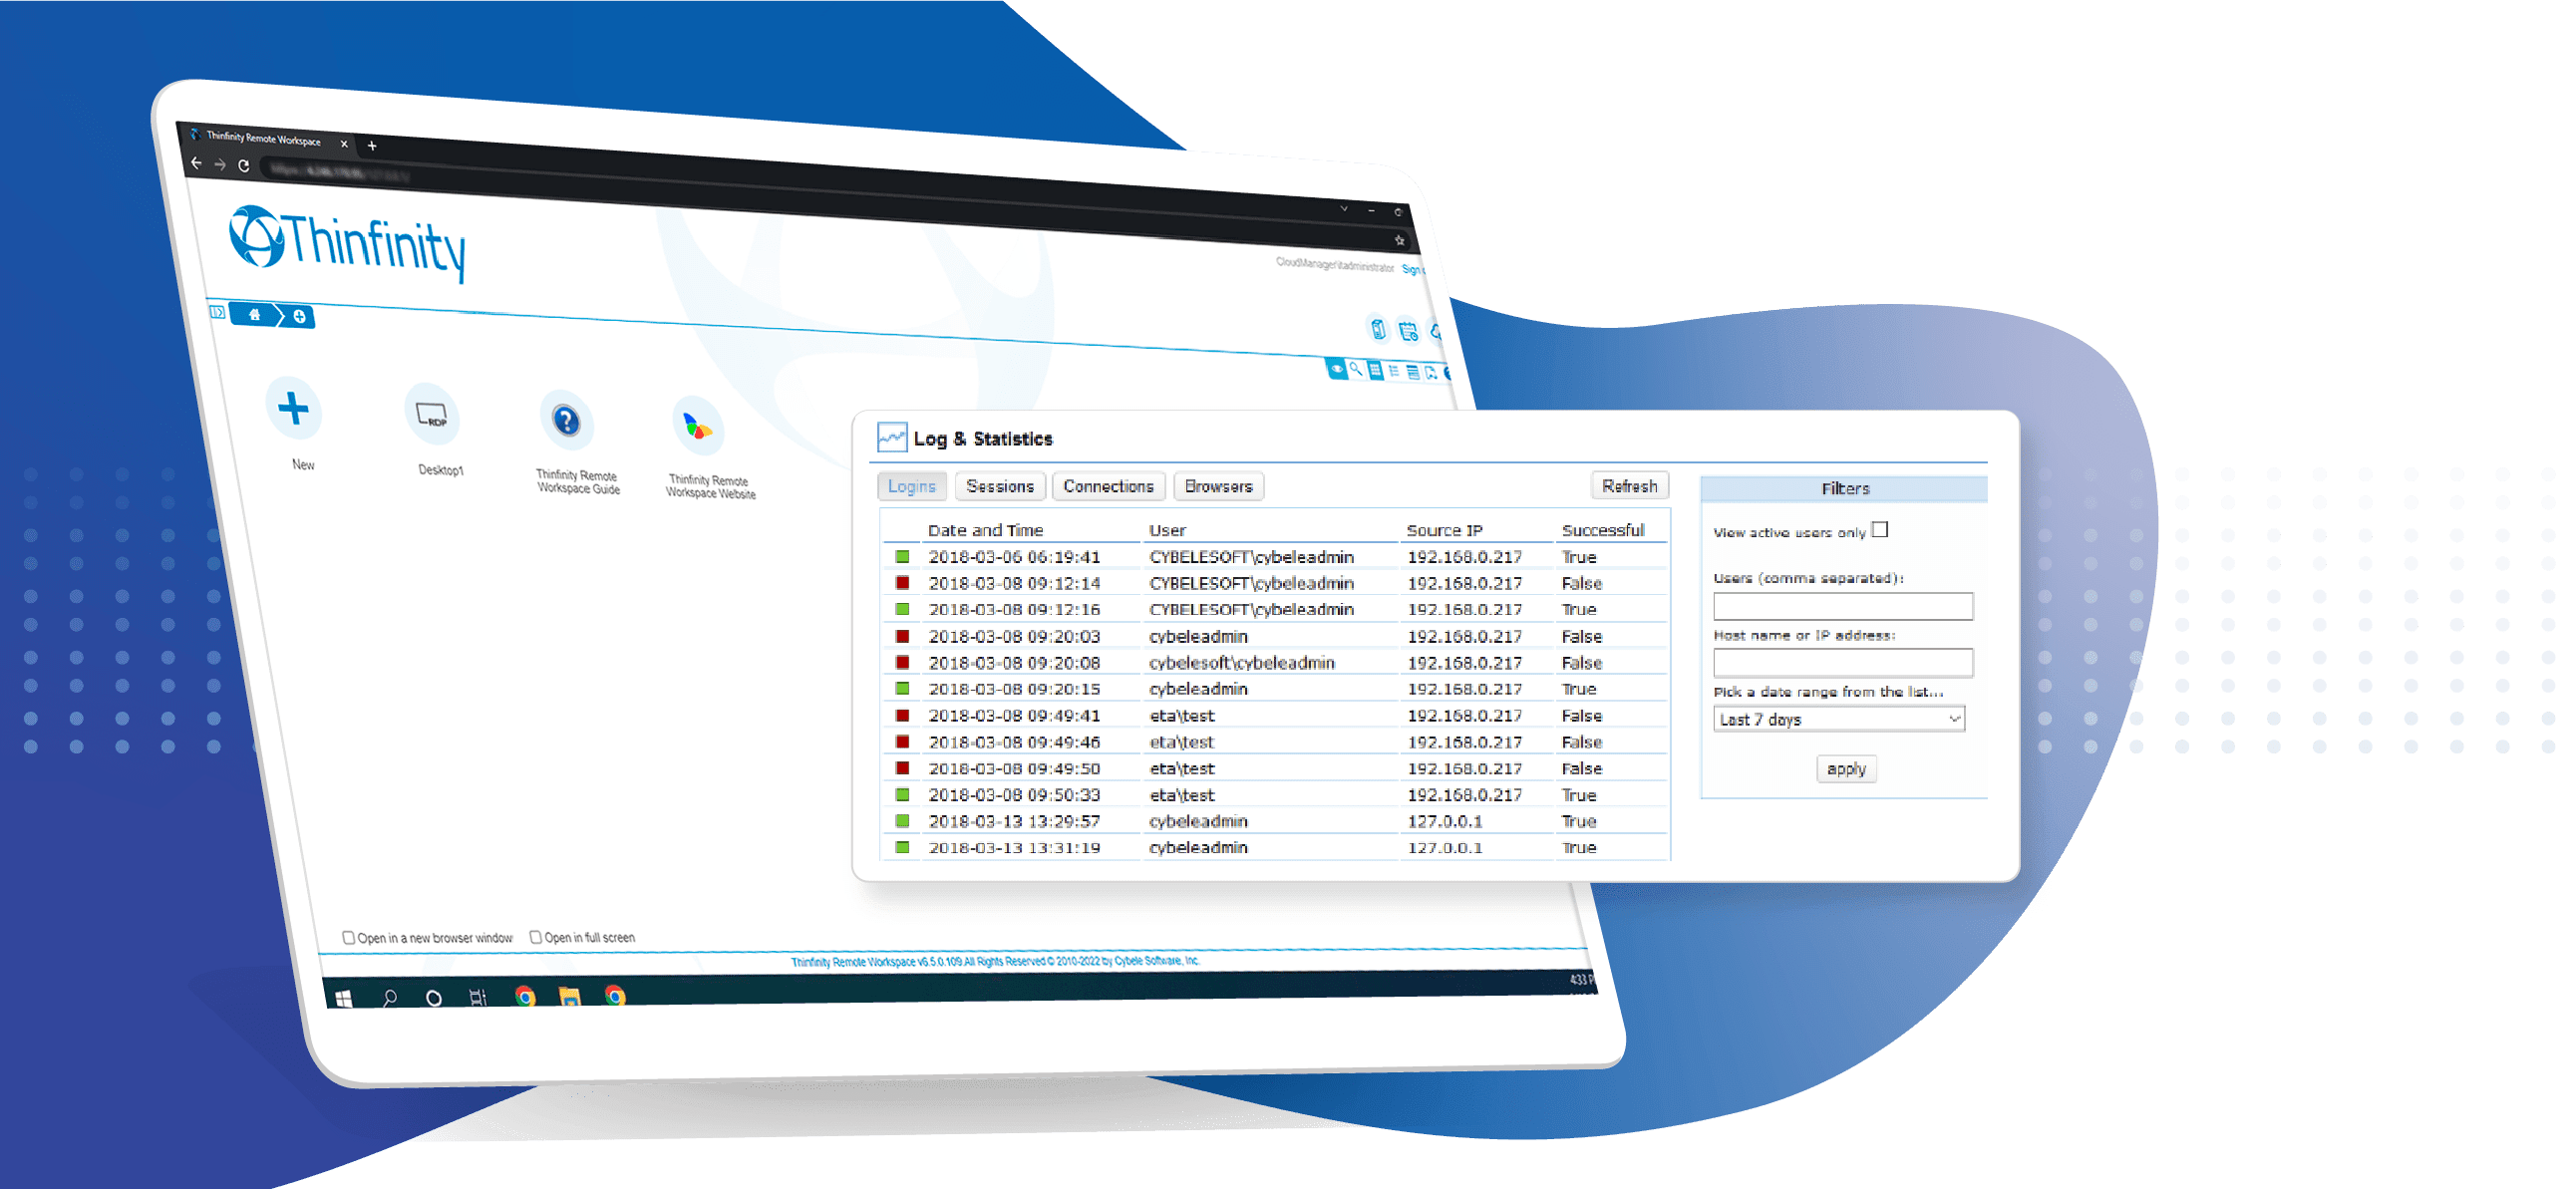

One of the multiple improvements of Thinfinity® Workspace v6.0, is that you can monitor remote access sessions easier than ever.
This tutorial will guide you to configure the remote access Analytics with Microsoft SQL Server.
Before setting up this monitoring tool, it is mandatory to have installed Microsoft SQL Server 2012 or later (the Express edition is also supported).
Once MS SQL Server is configured, the next step is setting up Thinfinity® Workspace v6.0 or superior to retrieve the stored data.
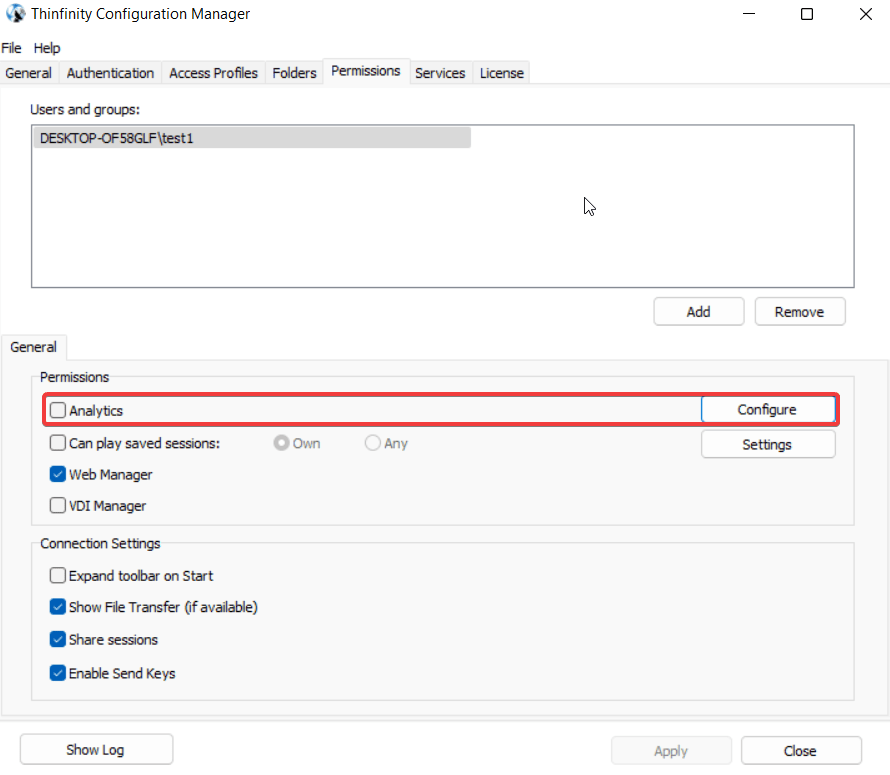
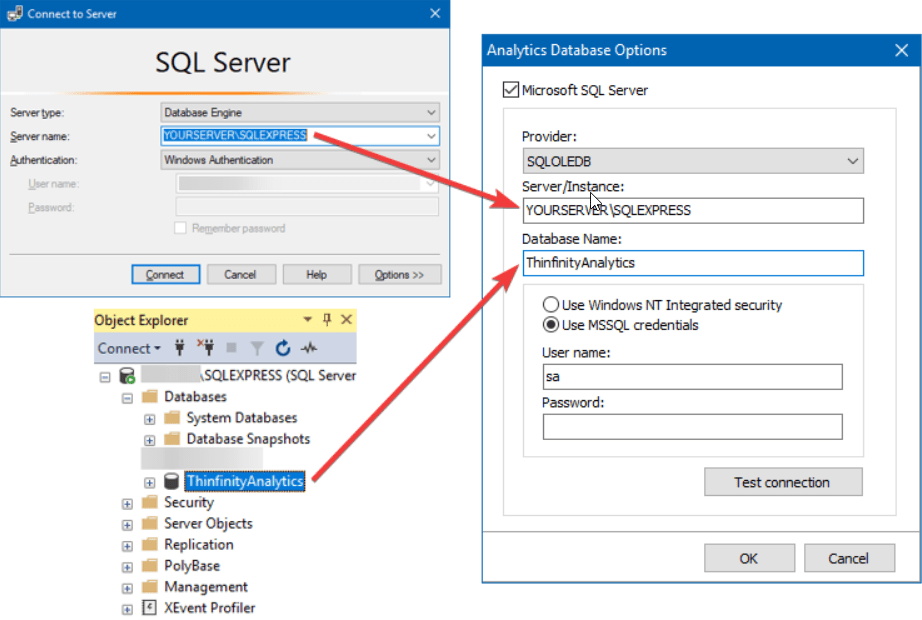
In order to do that, open the Configuration Manager and click on the ‘Permissions’ tab and then click the ‘Analytics’ button located below the ‘Users and Groups’ section:
The ‘Analytics Database Options’ windows is displayed:
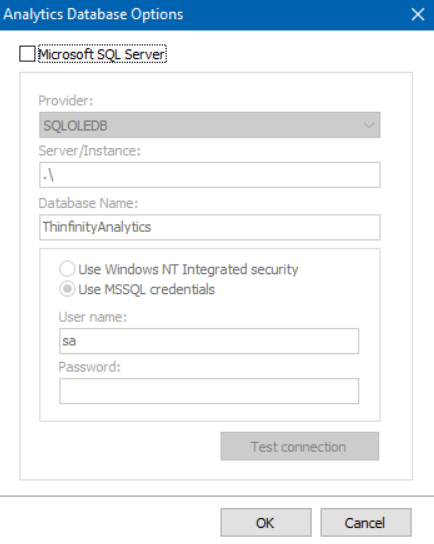
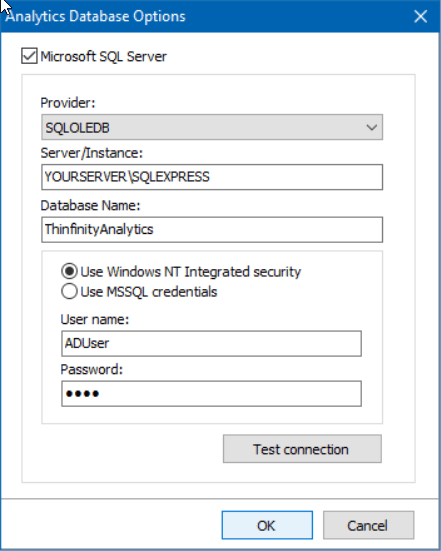
Check the tick-box adjacent to ‘Microsoft SQL Server’ to enable the configuration fields:
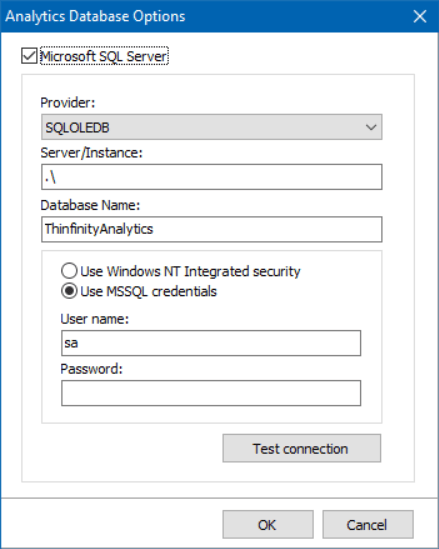
For ‘Provider’, select ‘SQLOLEDB’ (comes by default):

Into the fields ‘Server/Instance’ and ‘Database Name’, type the values corresponding to your SSMS configuration (‘ThinfinityAnalytics’ comes by default):
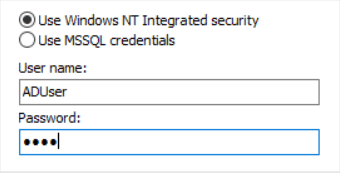
Click on ‘Use Windows NT Integrated Security’ to use an AD user, or click ‘Use MSSQL credentials’ to use an SQL user.
To check that all the information provided so far is properly configured, click on ‘Test connection’:

The confirmation alert let us know that everything’s set correctly. Any other message will include information regarding the possible error in order to correct it.
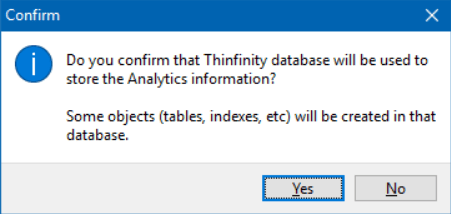
Click on ‘Yes’ to close it, then on ‘OK’ to complete the configuration process:
The last step is clicking on ‘Apply’ on the ‘Permissions’ tab to save the configuration:

Once Analytics is configured, the next step is assigning permissions to Users or Groups to access the Analytics.
Let’s start opening Thinfinity® Workspace v6.0, then selecting the ‘Permissions’ tab and click on ‘Add’ below the ‘Users and Groups’ section and select an AD User or Group, then click ‘OK’:
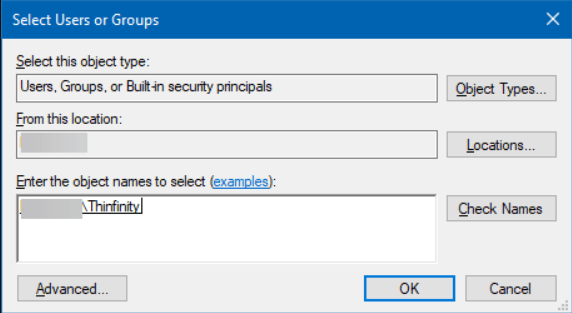
The selected User/Group is now on the list, now click on it and the ‘Permissions’ section will be enabled to be configured:
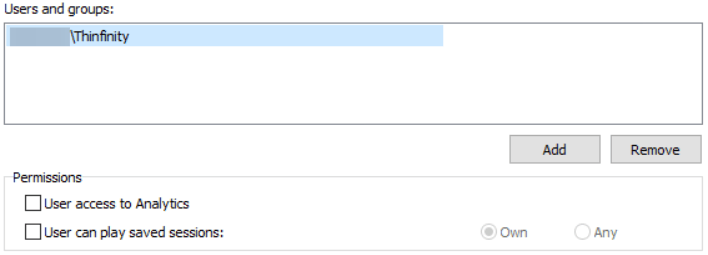
Click the ‘User access to Analytics’ check-box, then click on ‘Apply’.
Now the User/Group who was given permission to Analytics, will be able to access the data once logged in.