

This guide walks through creating a Windows virtual machine on Oracle Cloud Infrastructure (OCI) that is ready to host a Thinfinity Workspace installation. It covers the compute instance itself, the networking rules that make it reachable, and the first RDP login — the point at which you can start the Thinfinity installer.
If you have used any other cloud console before, none of this will surprise you. The parts worth slowing down for are the shape, the boot volume performance setting, and the ingress rules, because those three decisions are the ones that are annoying to change later.
Time required: roughly 15 minutes, plus a few minutes for the instance to provision.
Before you start
Make sure the following already exist in your tenancy:
- A compartment to hold the instance. Using the root compartment works but makes access control harder later.
- A Virtual Cloud Network (VCN) with at least one subnet. A public subnet gives the VM a public IP; a private subnet requires a bastion, VPN or FastConnect for access. Either is valid — pick based on how users and admins will reach the server.
- An internet gateway and a route rule if you are using a public subnet, otherwise the VM will have a public IP that nothing can reach.
- IAM permissions to manage instances, VCNs and volumes in that compartment.
- Service limits with enough room for the Windows shape you plan to use. Windows shapes and OCPU quotas are limited per region, and a launch will fail late if the limit is already consumed.
You will also want to know, before you start, whether you are using Oracle-provided Windows licensing or BYOL. The two options are priced differently and are selected at image time. Oracle documents the BYOL rules here: Microsoft licensing on OCI.
Step 1: Create the compute instance
1.1 Open the instance wizard
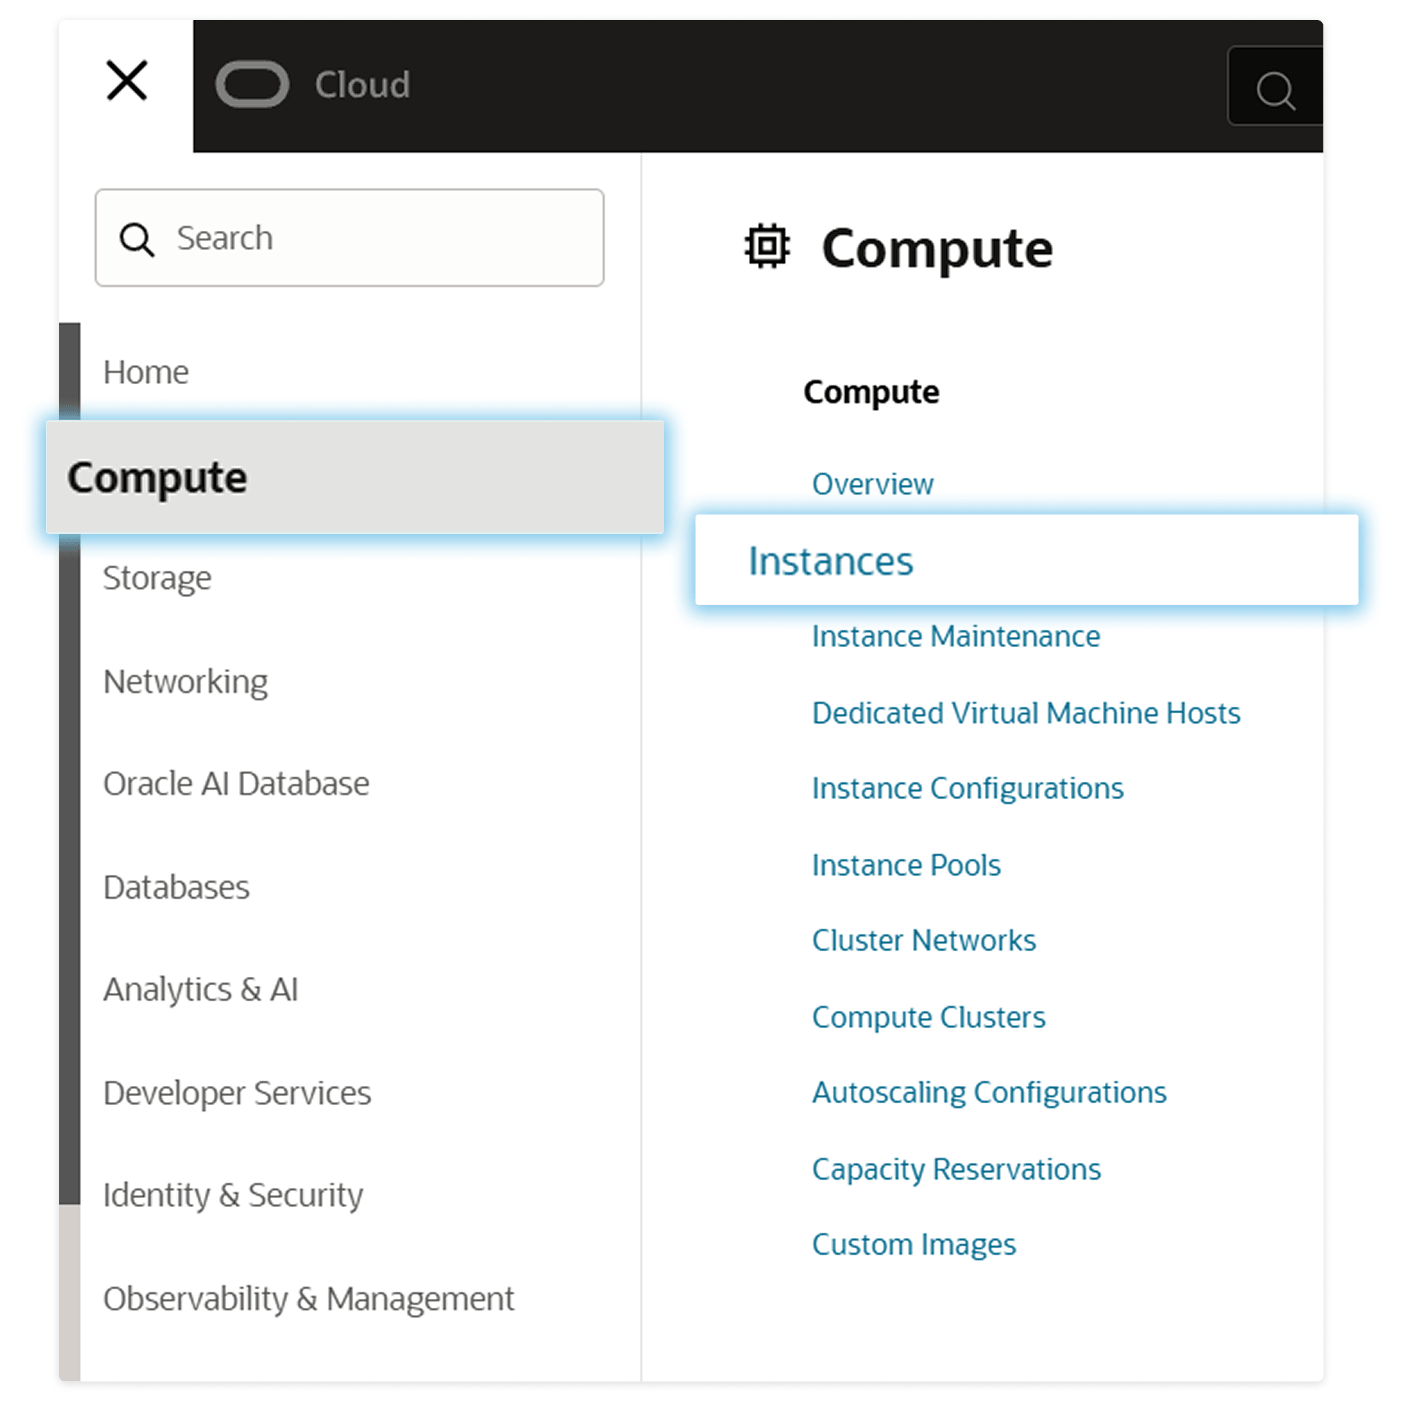
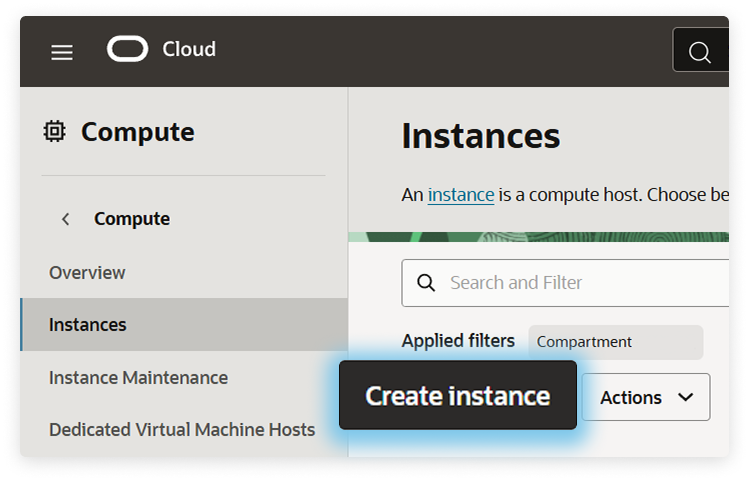
In the OCI Console, go to Compute > Instances, then click Create instance.
1.2 Basic information
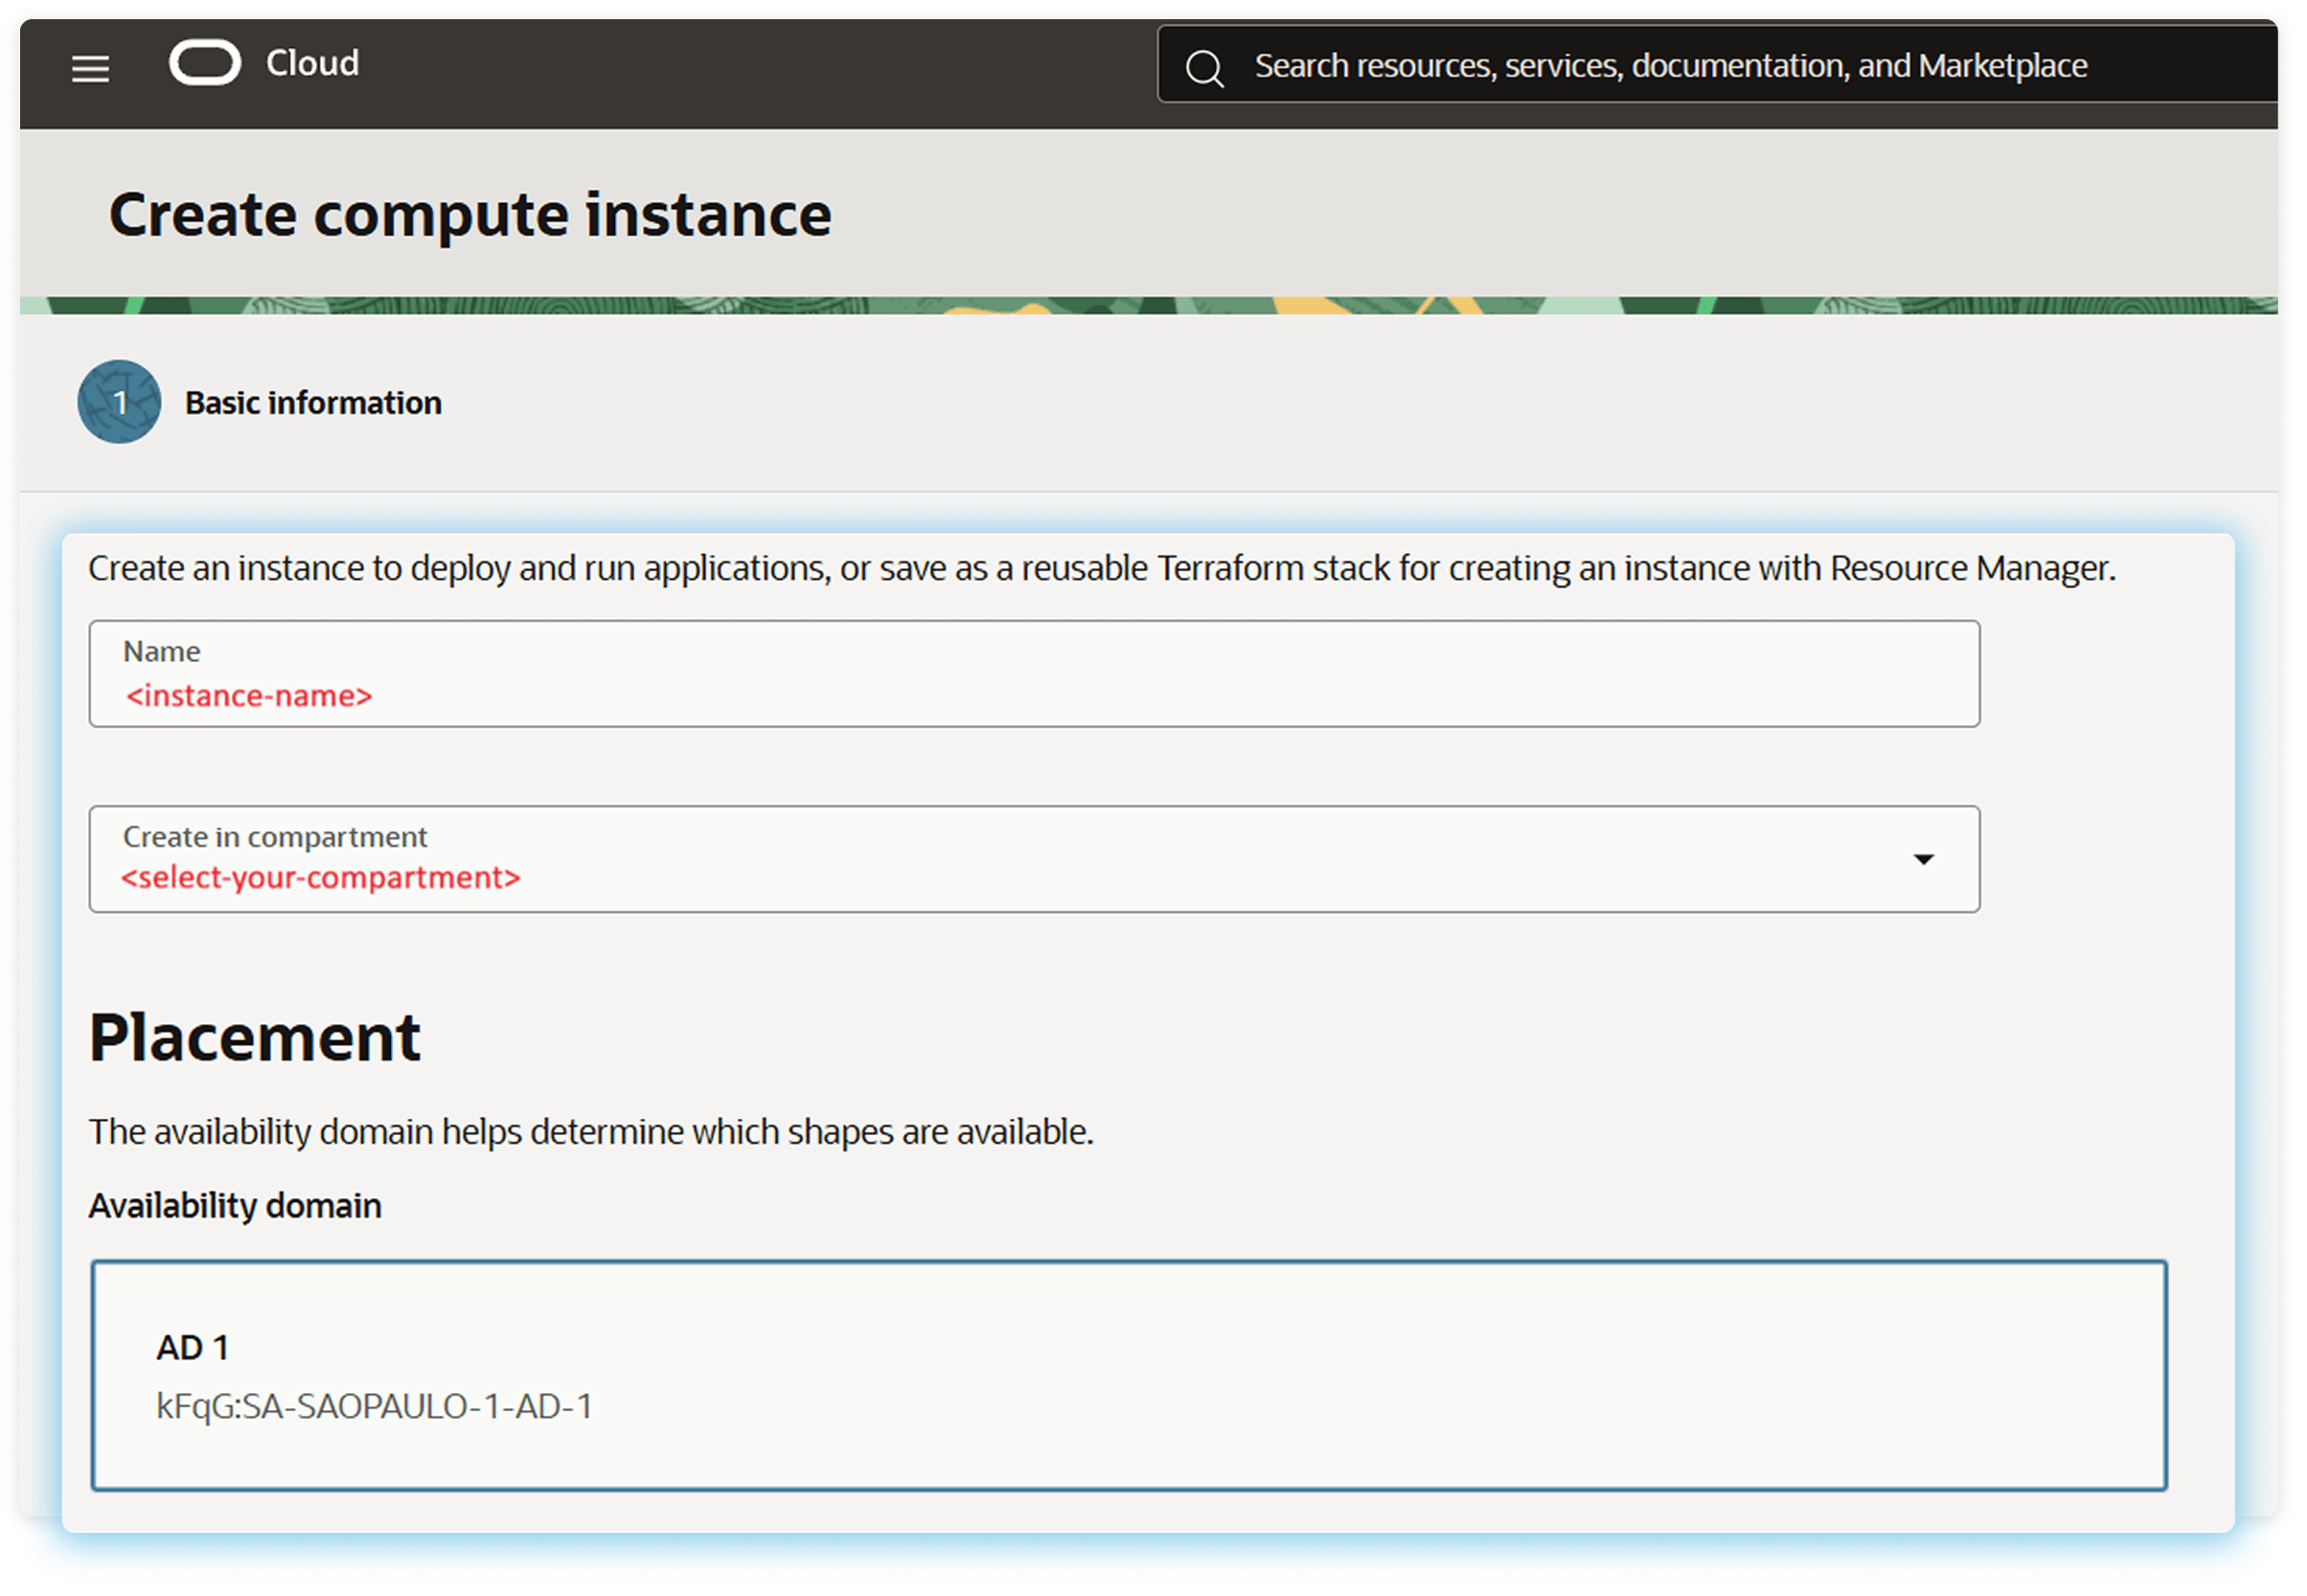
Give the instance a name, select the compartment, and choose an availability domain.
The availability domain matters more than it looks: it determines which shapes are offered to you, and capacity for a given shape can be available in one AD and exhausted in another. If the shape you want does not appear in the list, try a different AD before assuming it is unavailable in the region.
1.3 Select the image
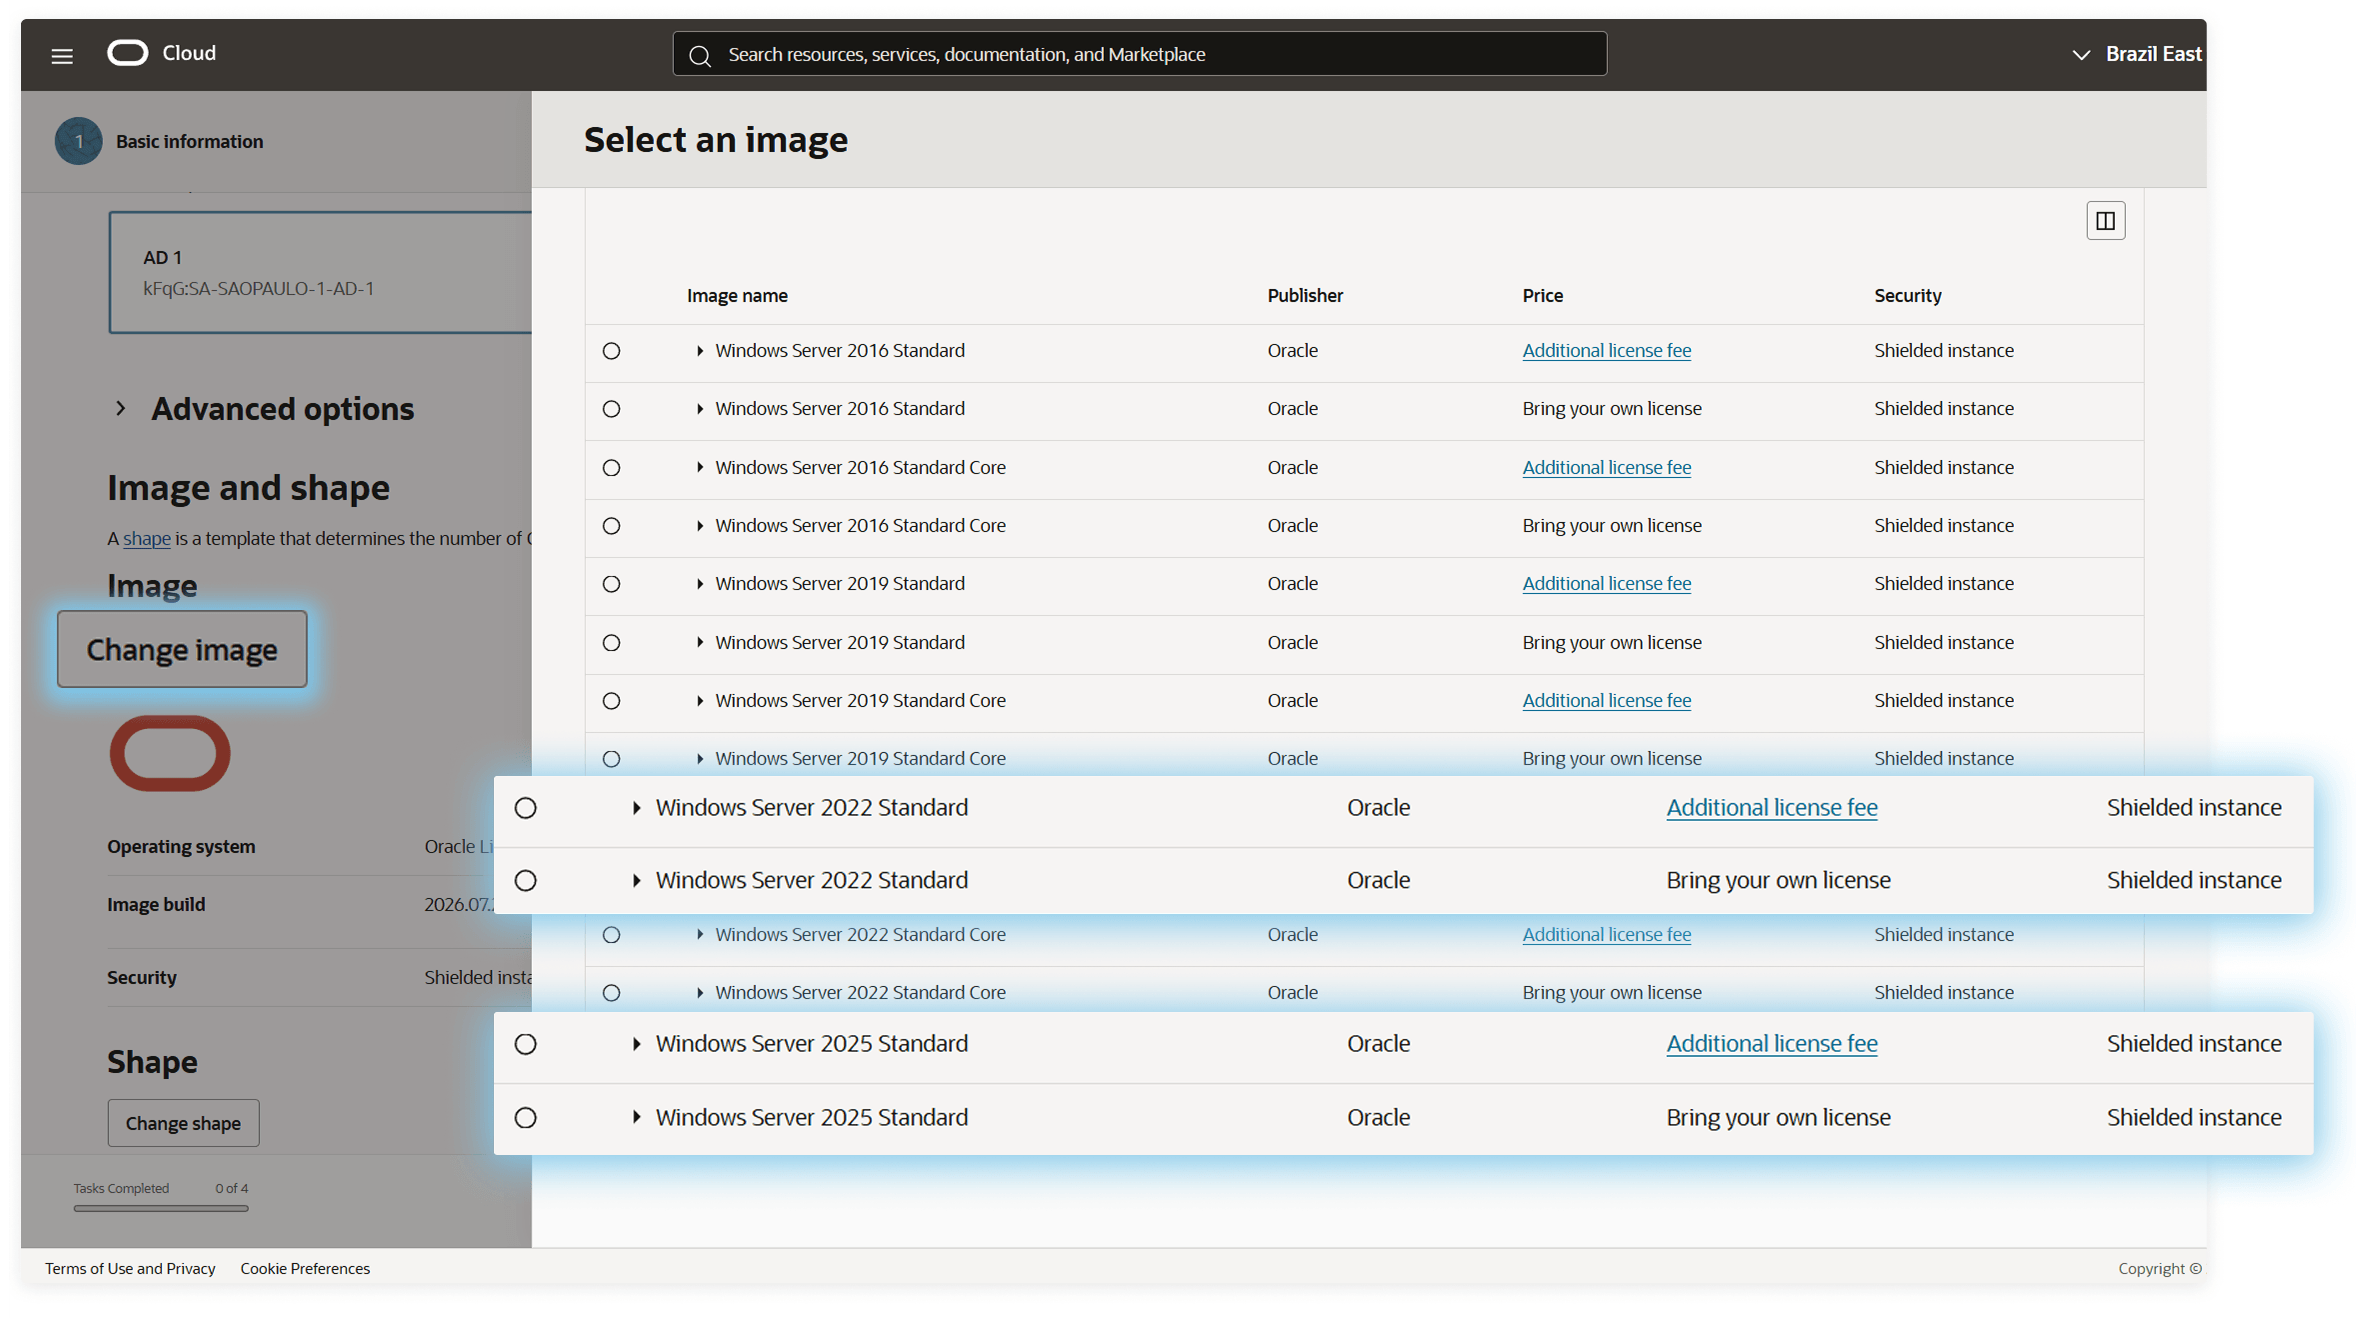
Click Change image and pick a Windows Server release.
We currently recommend Windows Server 2022 for Thinfinity Workspace deployments on Oracle Cloud. The OCI image catalog also offers Windows Server 2025, but 2022 is the newest release listed on the Thinfinity Workspace requirements page, so it is the safe default for a production install. If you specifically need 2025, check with support first.
Each Windows image appears twice in the list:
1.4 Select the shape
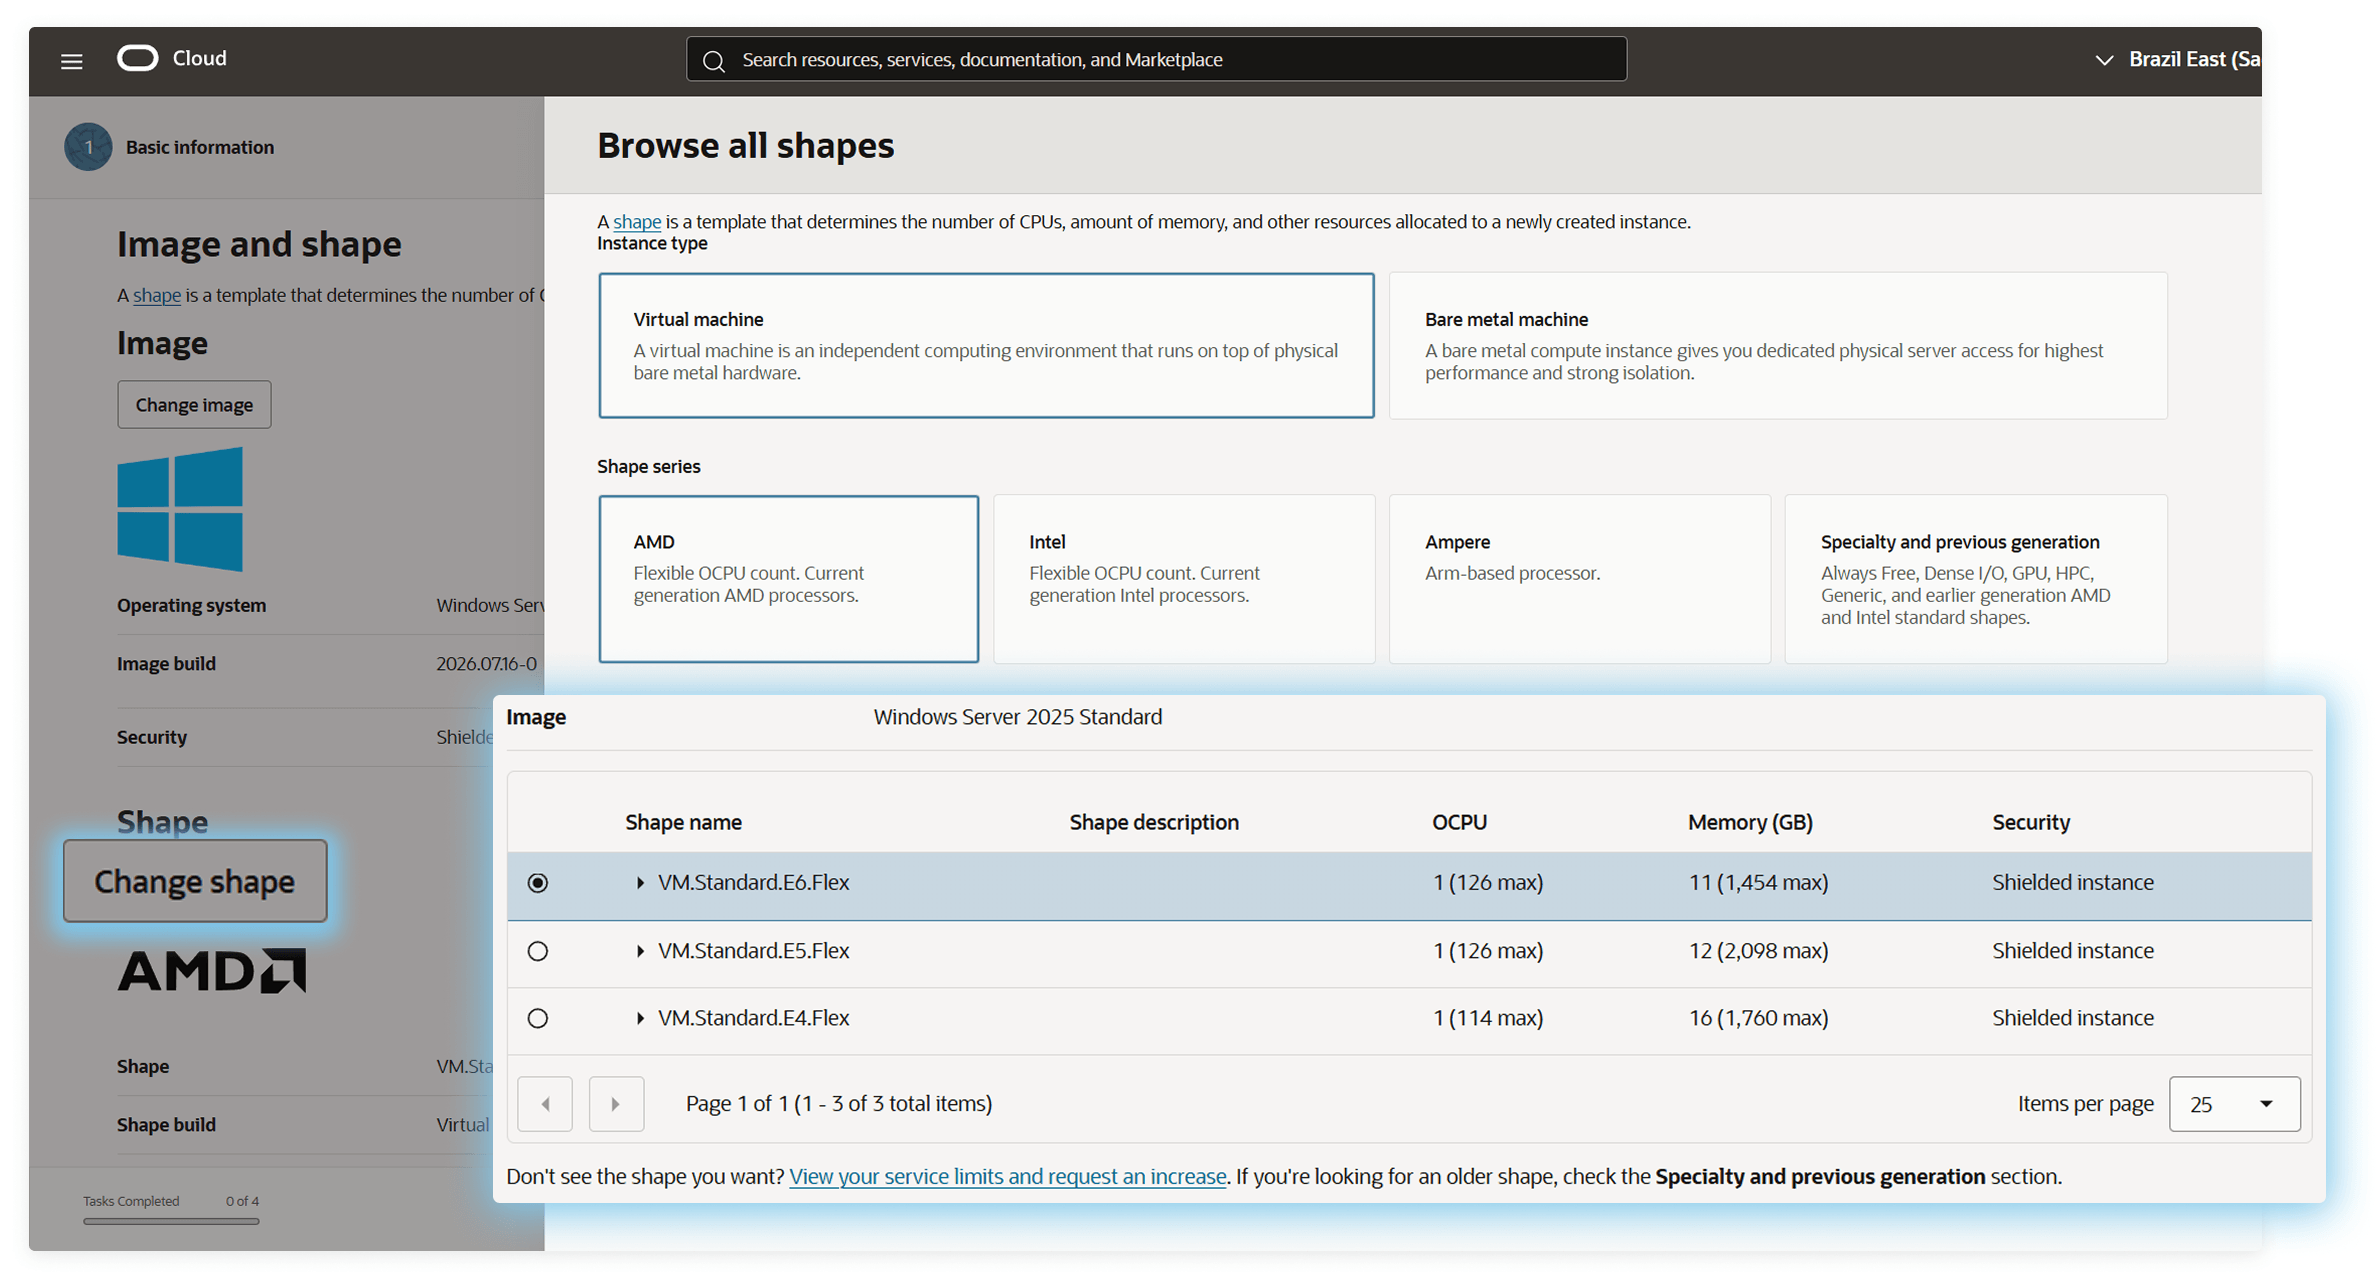
Click Change shape and choose a Virtual machine shape. The flexible AMD and Intel shapes (the .Flex series) let you set OCPU count and memory independently, which is what you want here — you can raise both later without rebuilding the instance.
Sizing depends on the role this server will play. A gateway-only node, an all-in-one node and a session host serving concurrent desktops have very different profiles, so size against your expected concurrency rather than a generic default. Start by checking the Thinfinity Workspace requirements; flexible shapes let you adjust OCPU and memory later if you get it wrong.
1.5 Networking
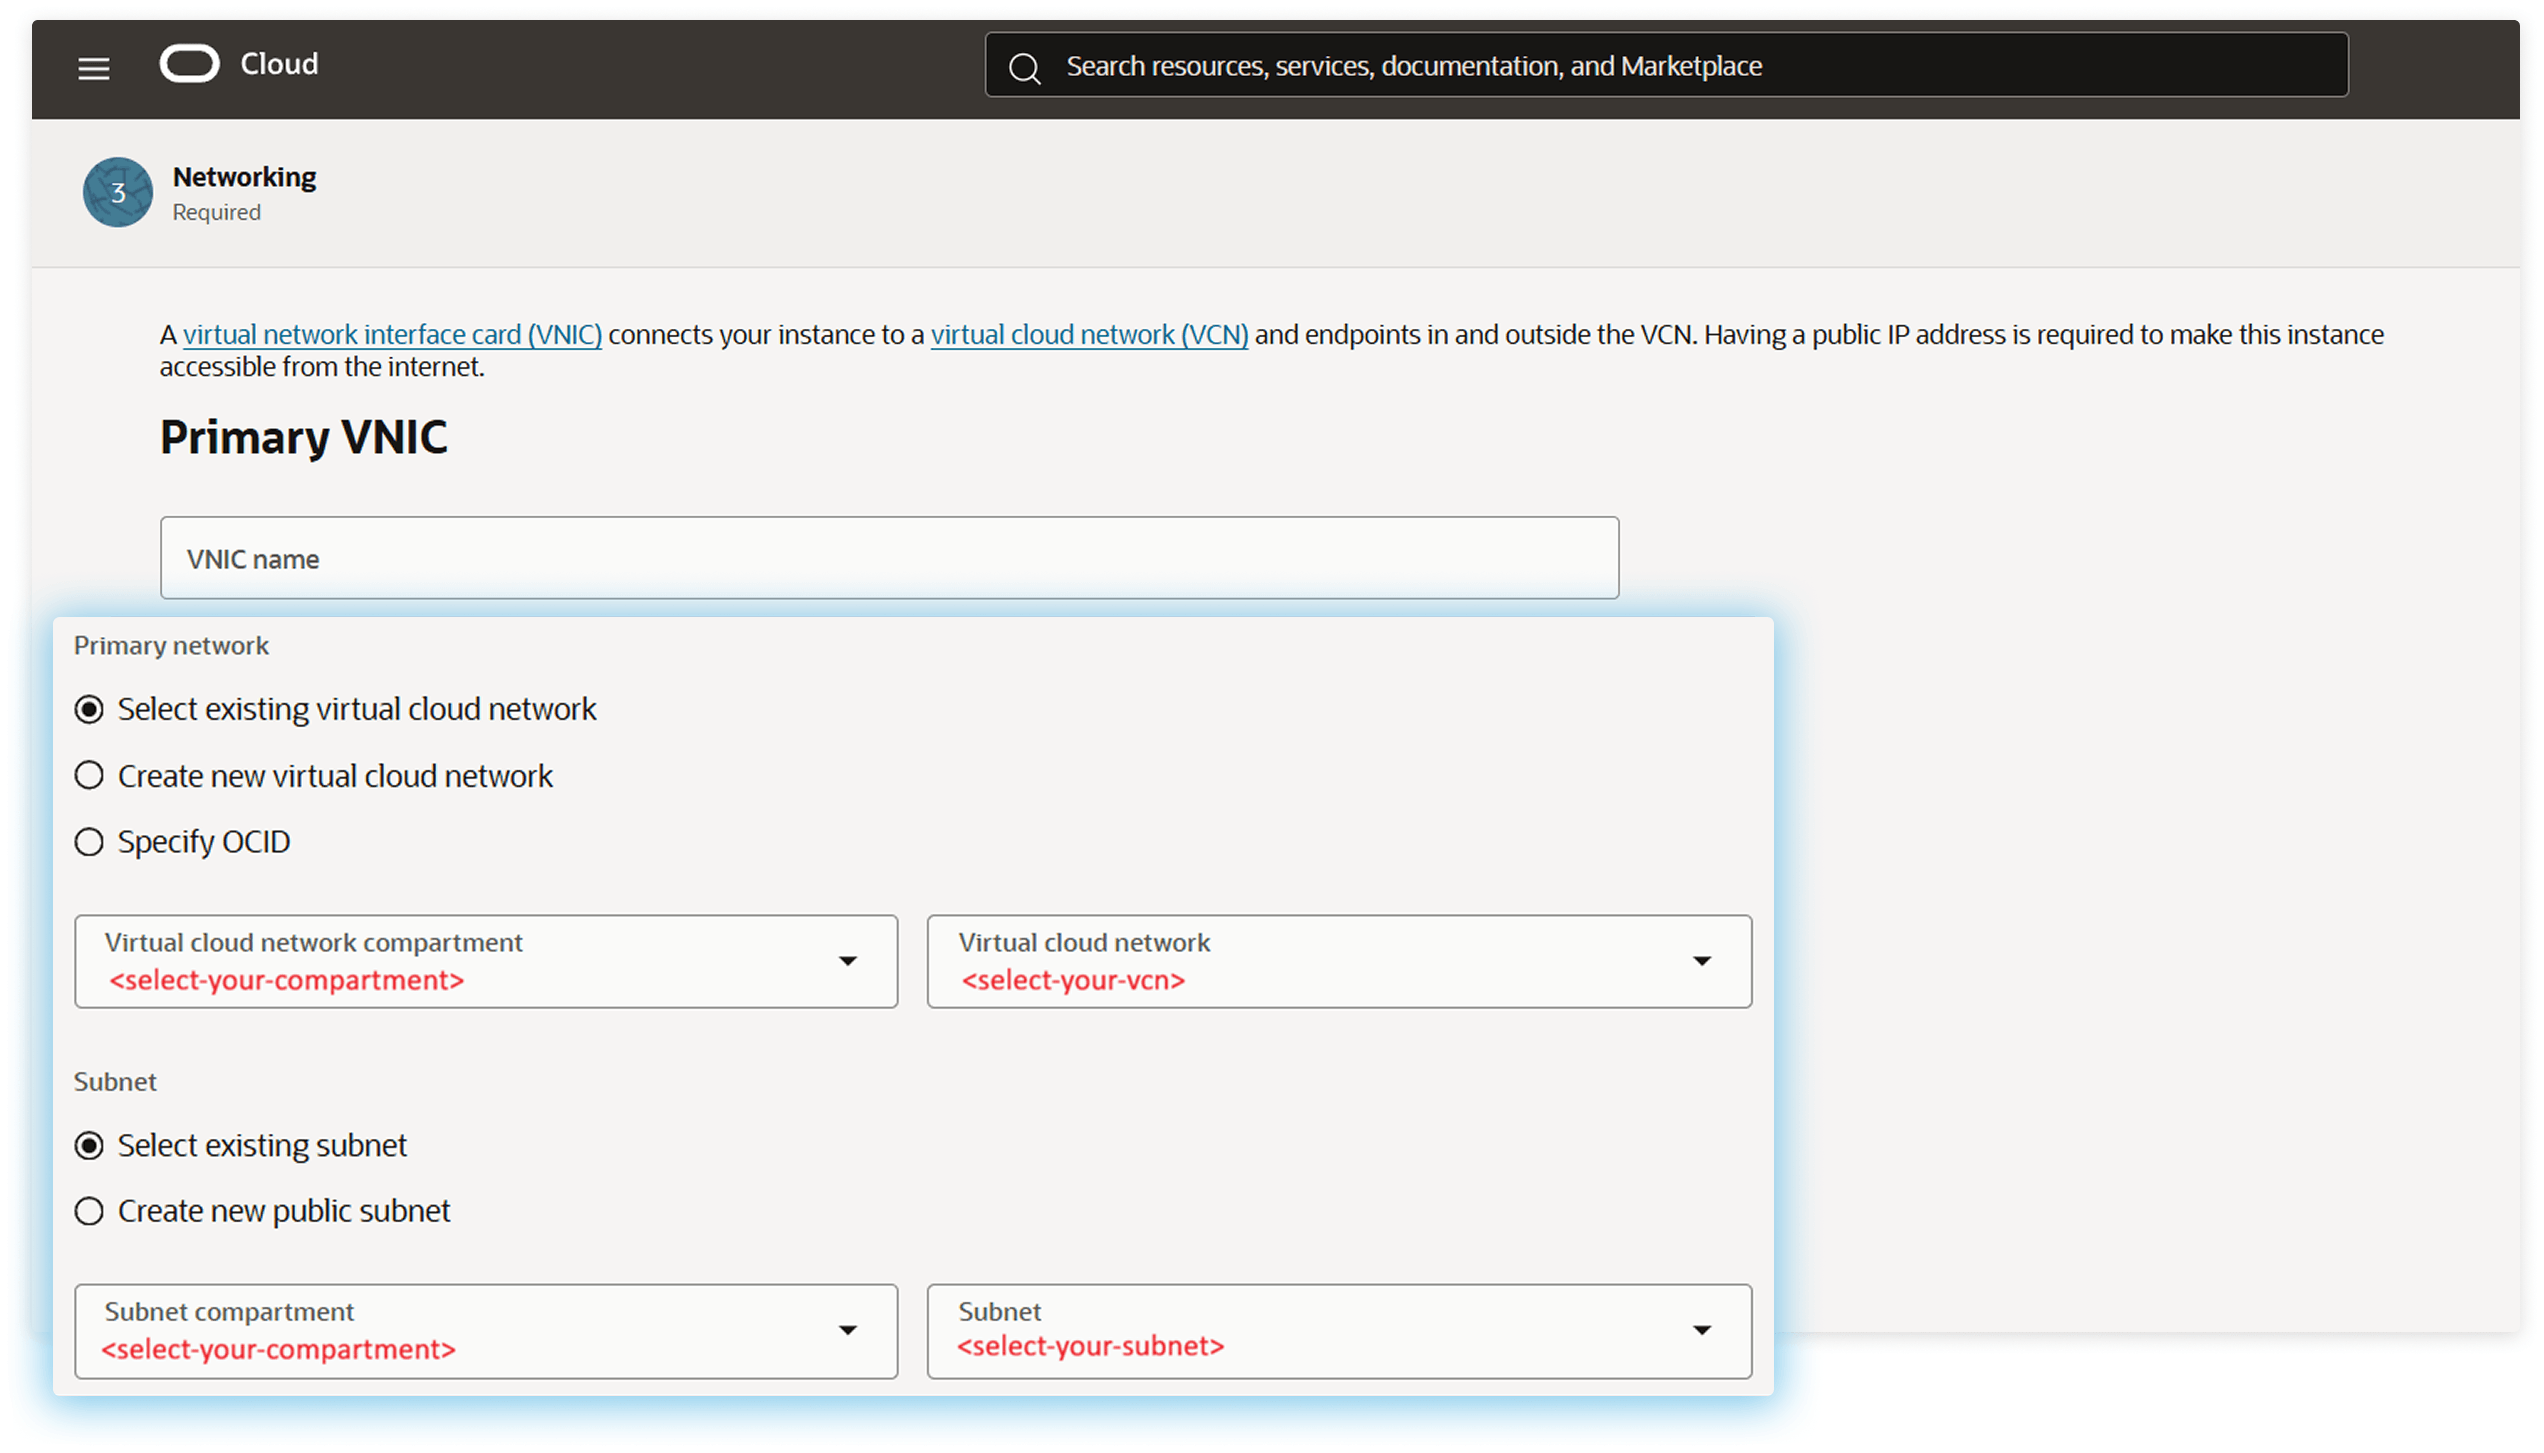
Under Networking, select the existing VCN and subnet, or create them at this step.
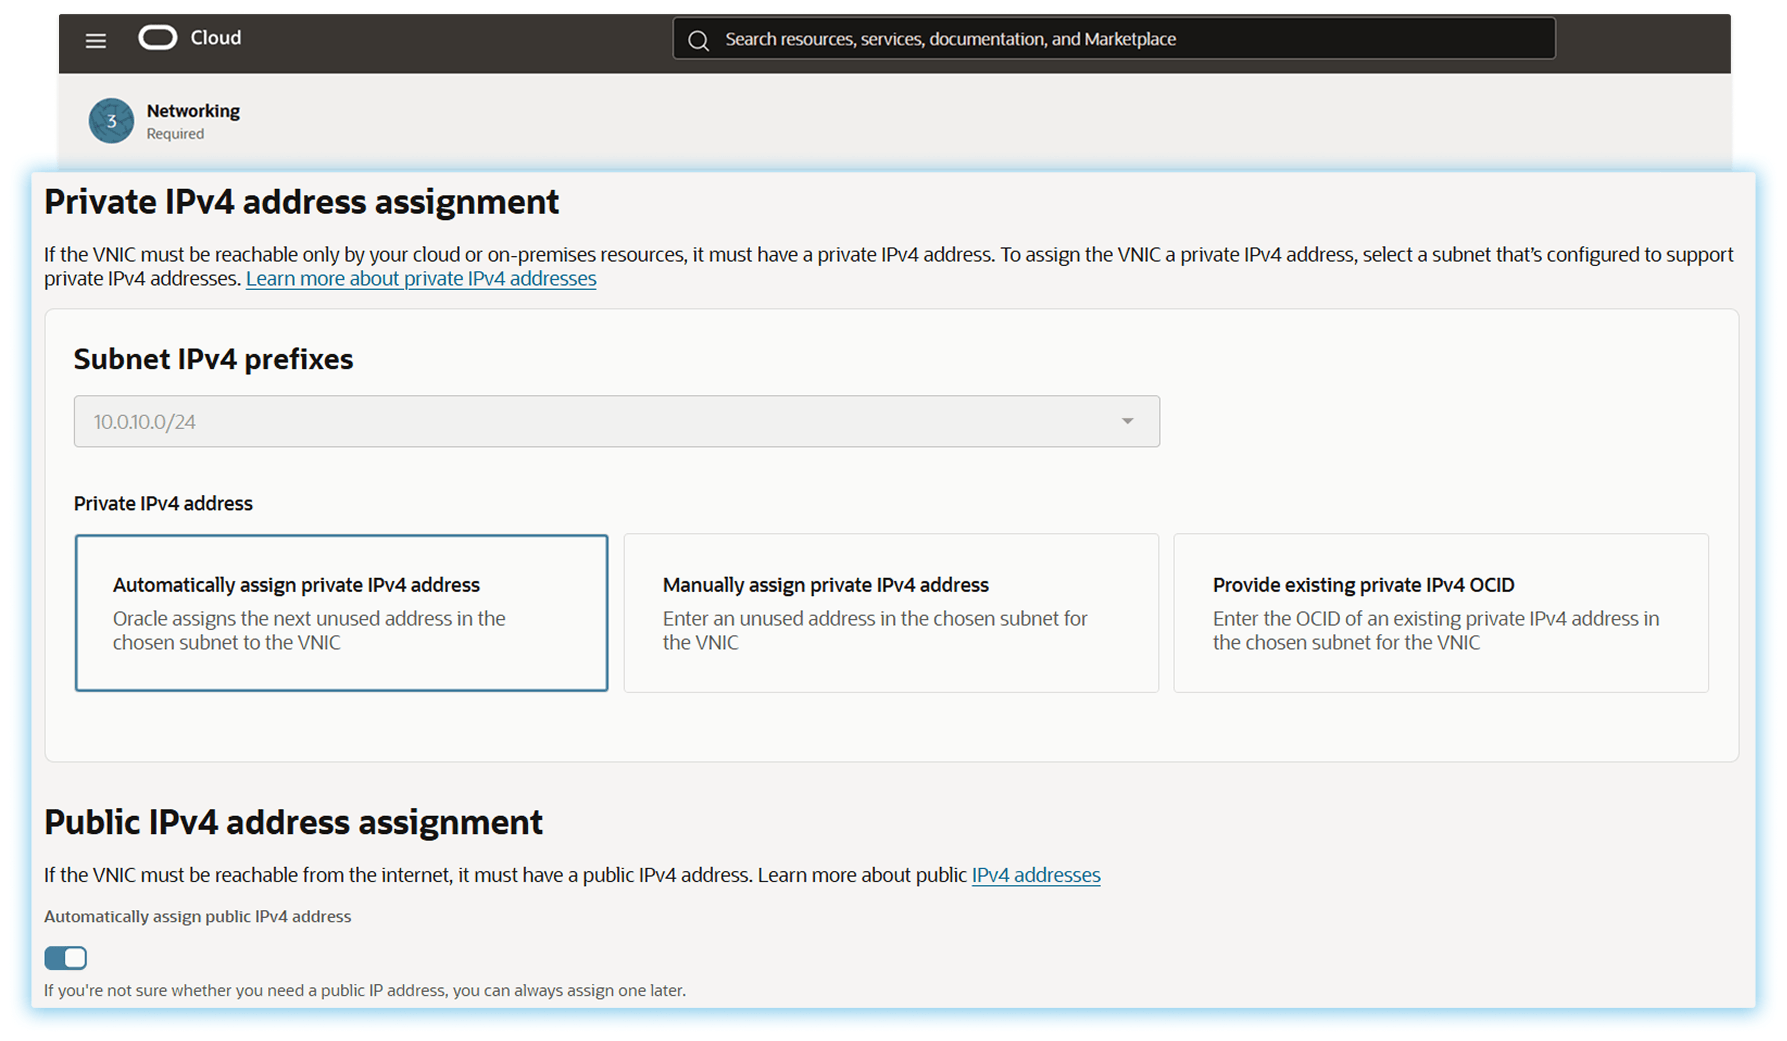
Then choose how the private IP is assigned (automatic, manual, or from an existing OCID). If the instance sits in a public subnet and you want it reachable from the internet, enable Automatically assign public IPv4 address here.
1.6 Storage
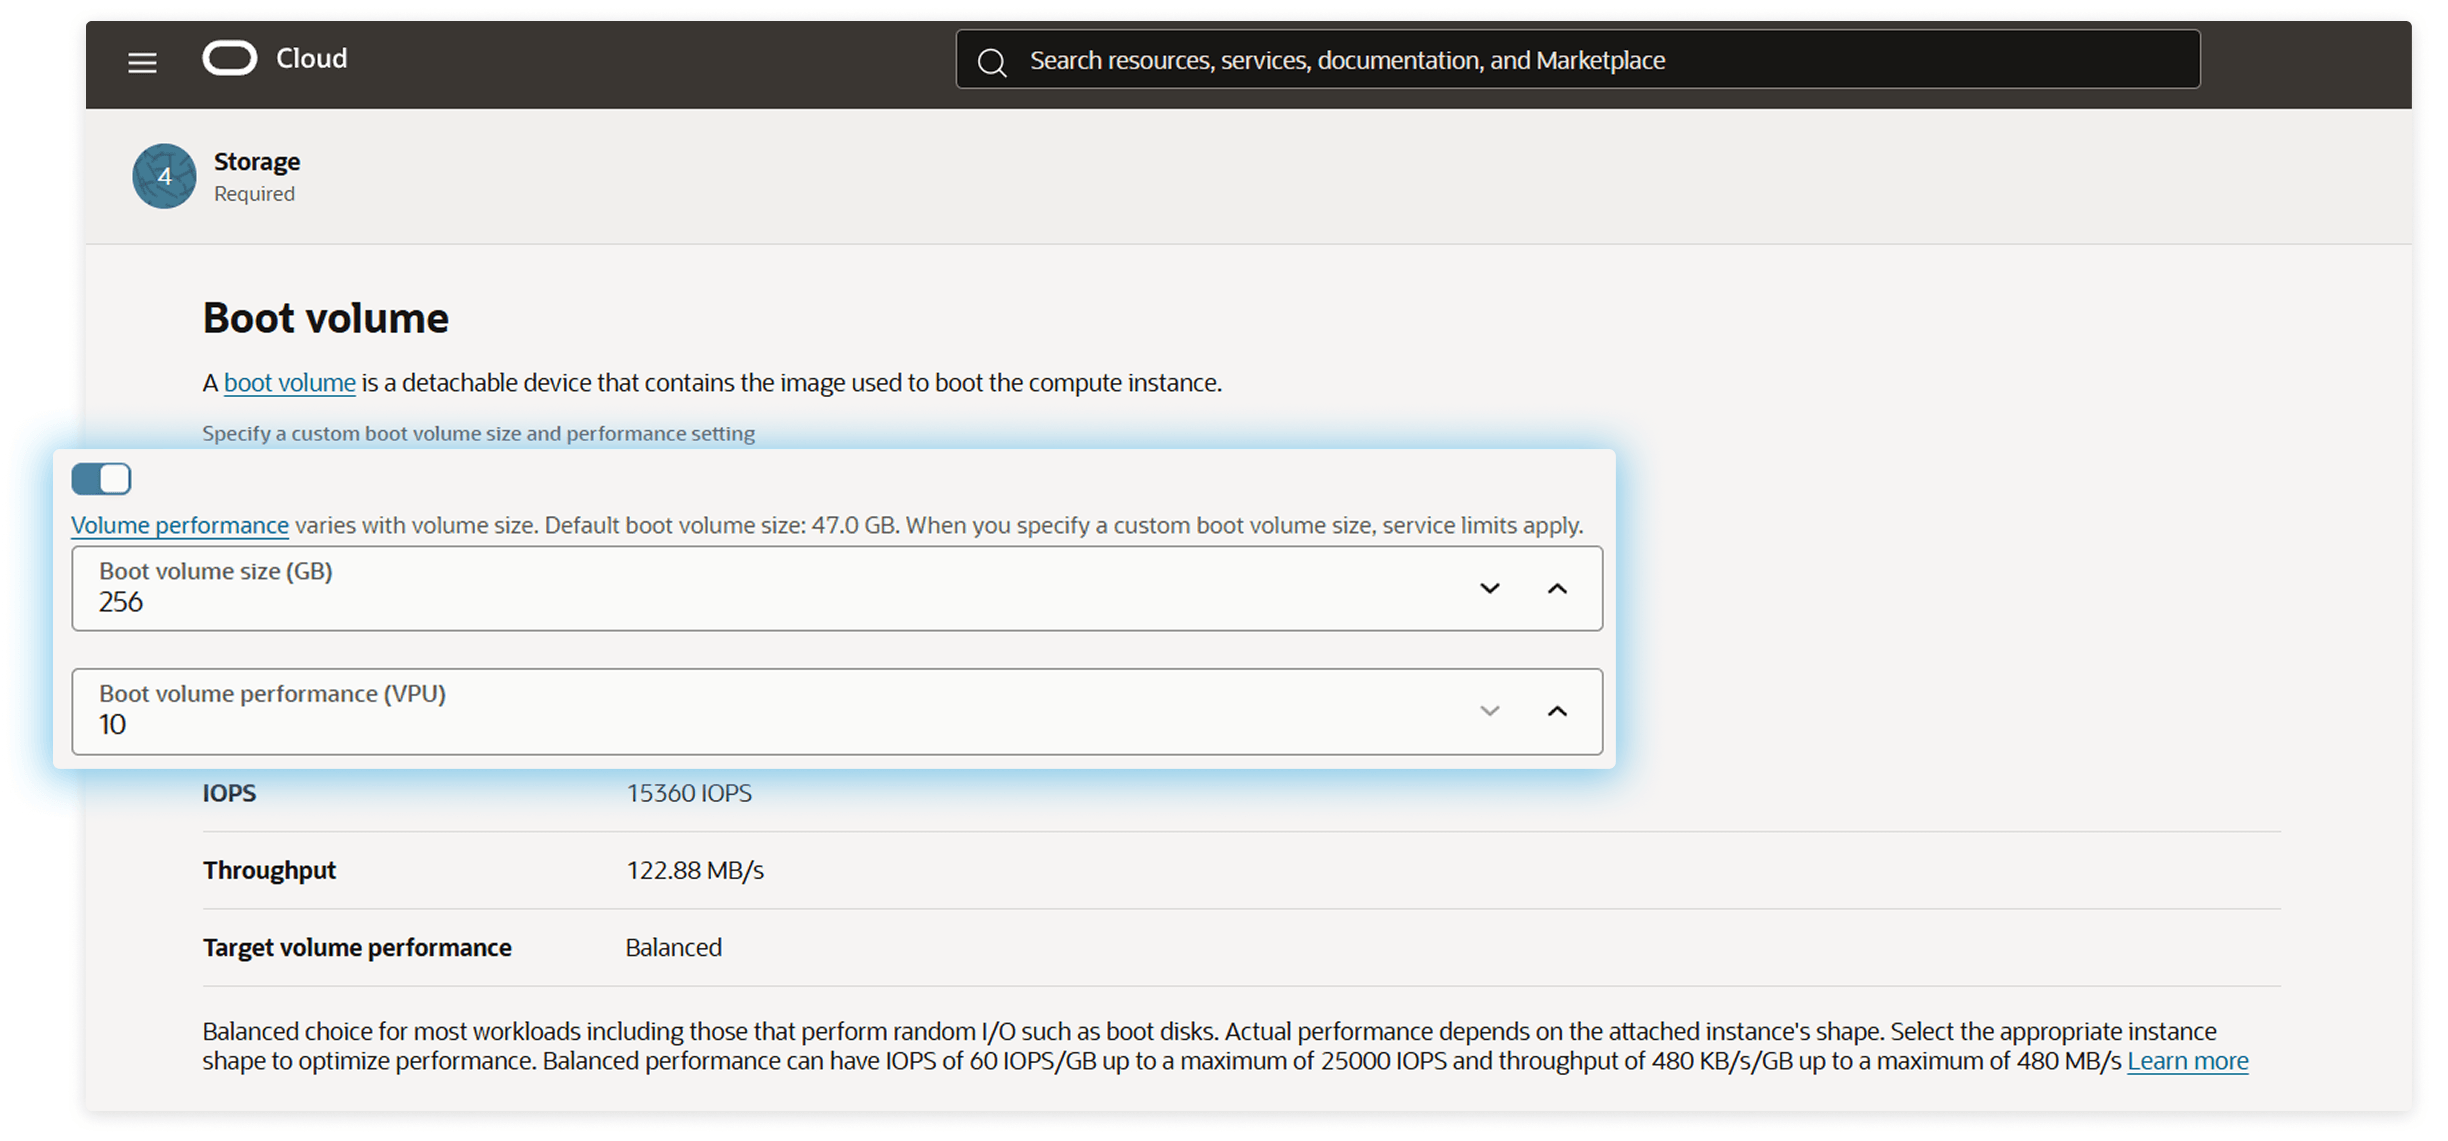
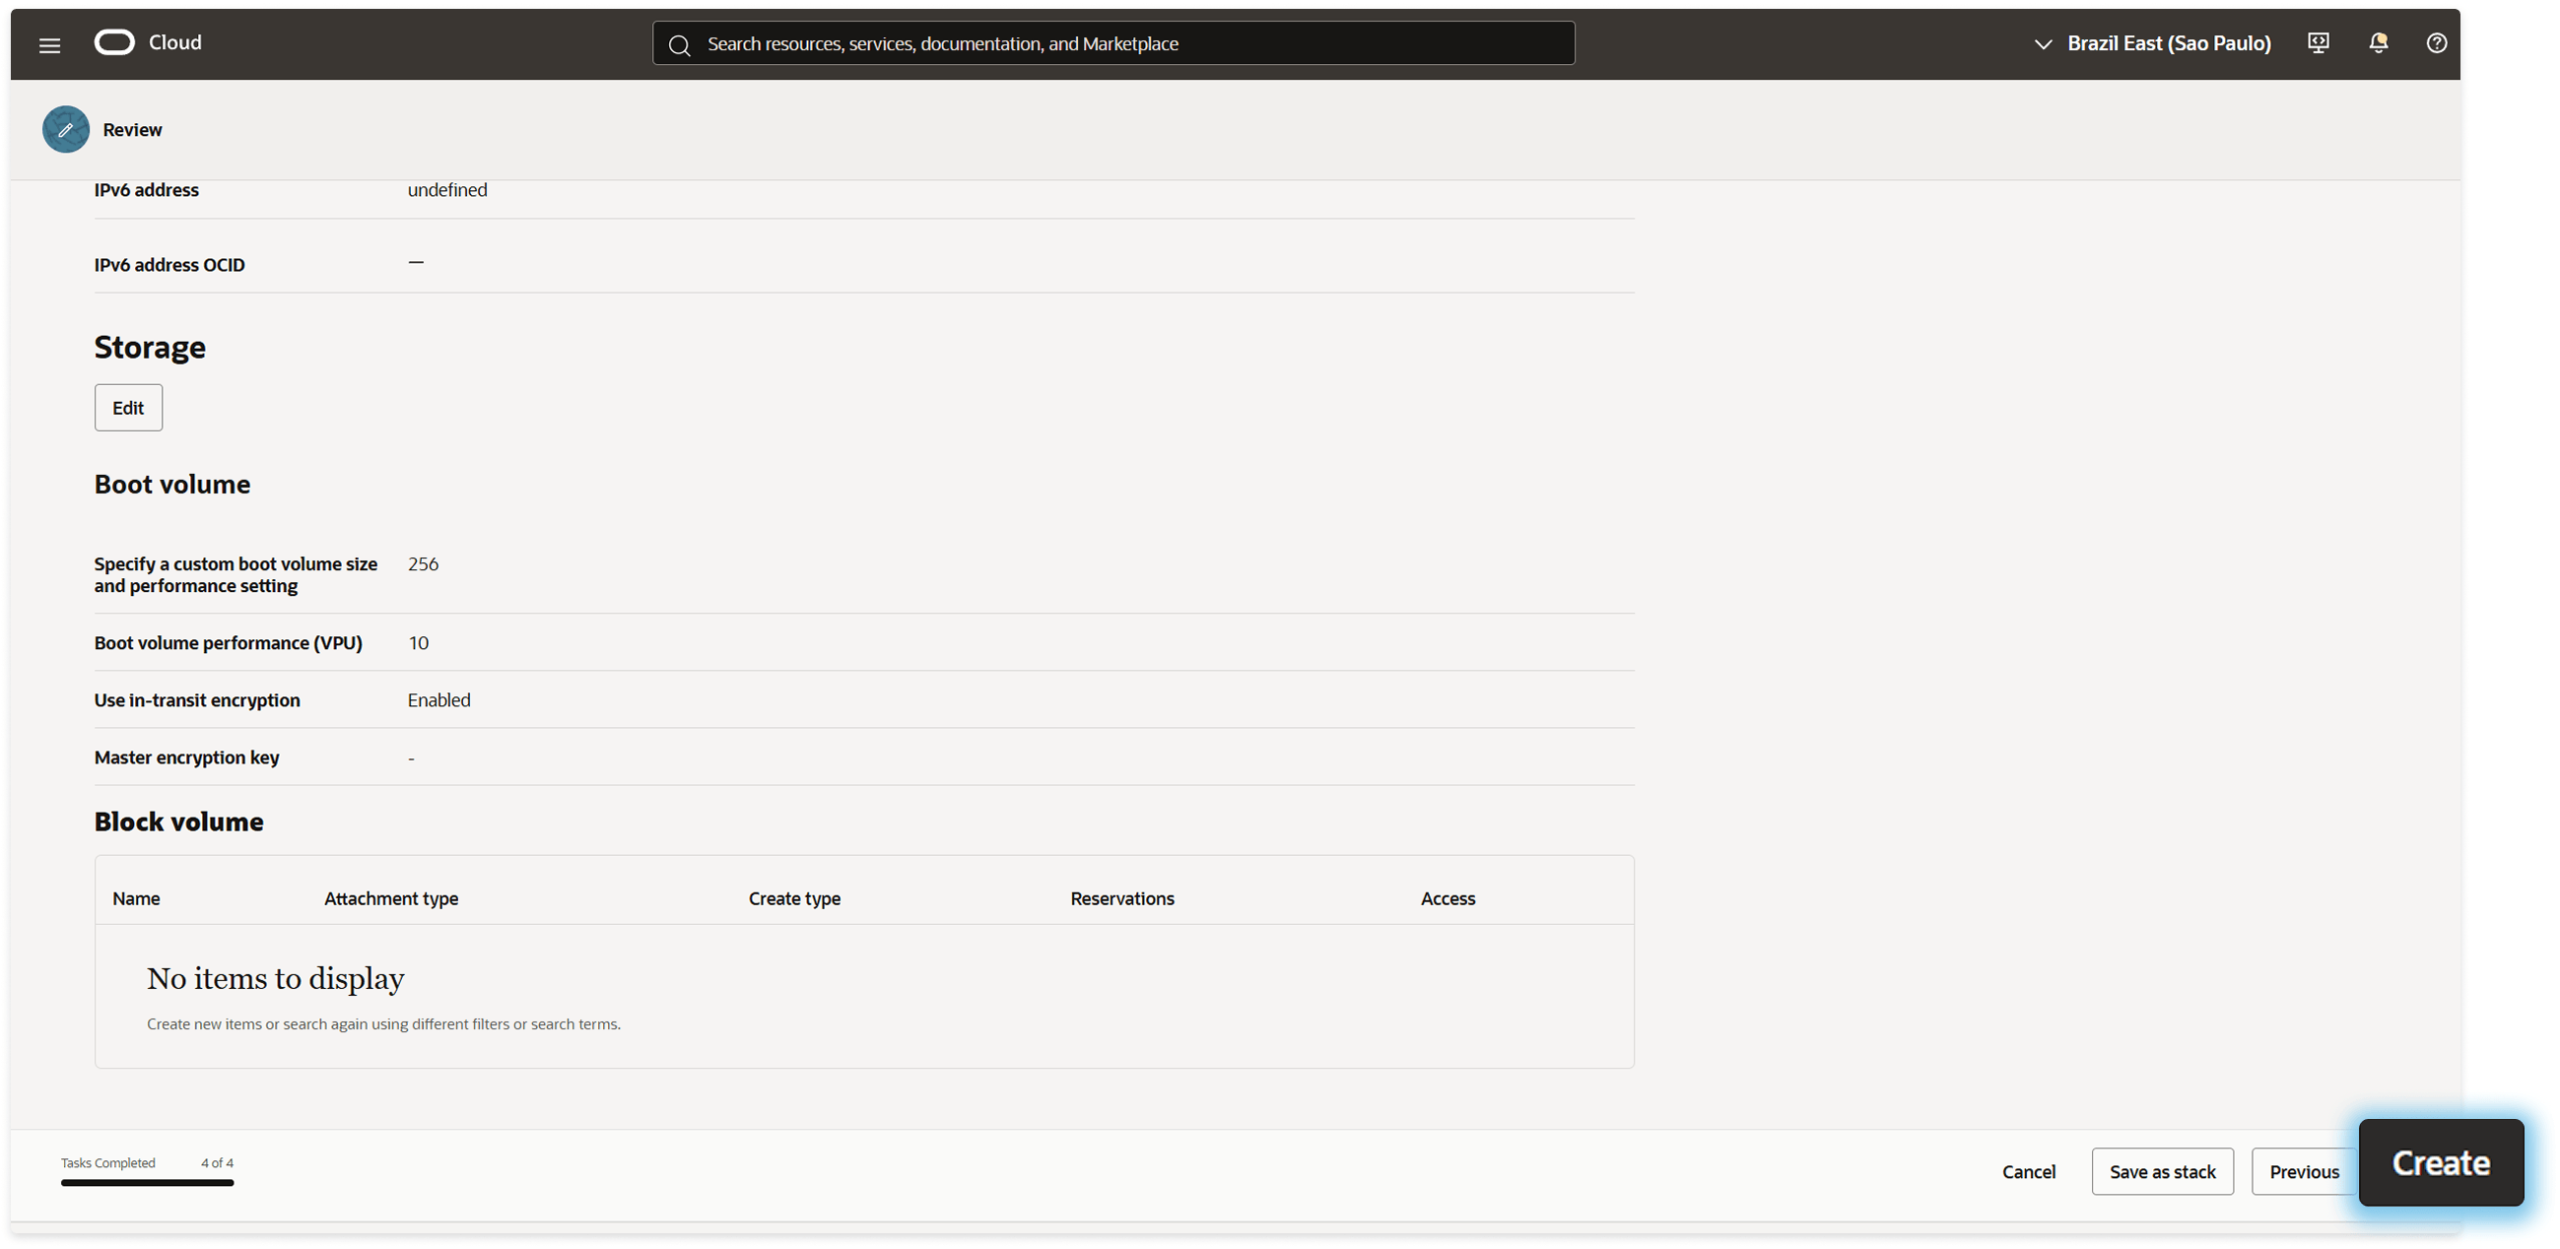
Under Storage, you can override the default boot volume size and set the volume performance in VPUs per GB.
Two things to weigh:
- Size. The default boot volume is around 47 GB. Windows Server plus Thinfinity plus published applications will outgrow that quickly. Setting a larger boot volume at creation time is much simpler than resizing later.
- Performance (VPU). Higher VPU means higher IOPS and throughput, and higher cost. Balanced (VPU 10) is the usual starting point for a Windows server workload; the console shows you the resulting IOPS and throughput as you change the value.
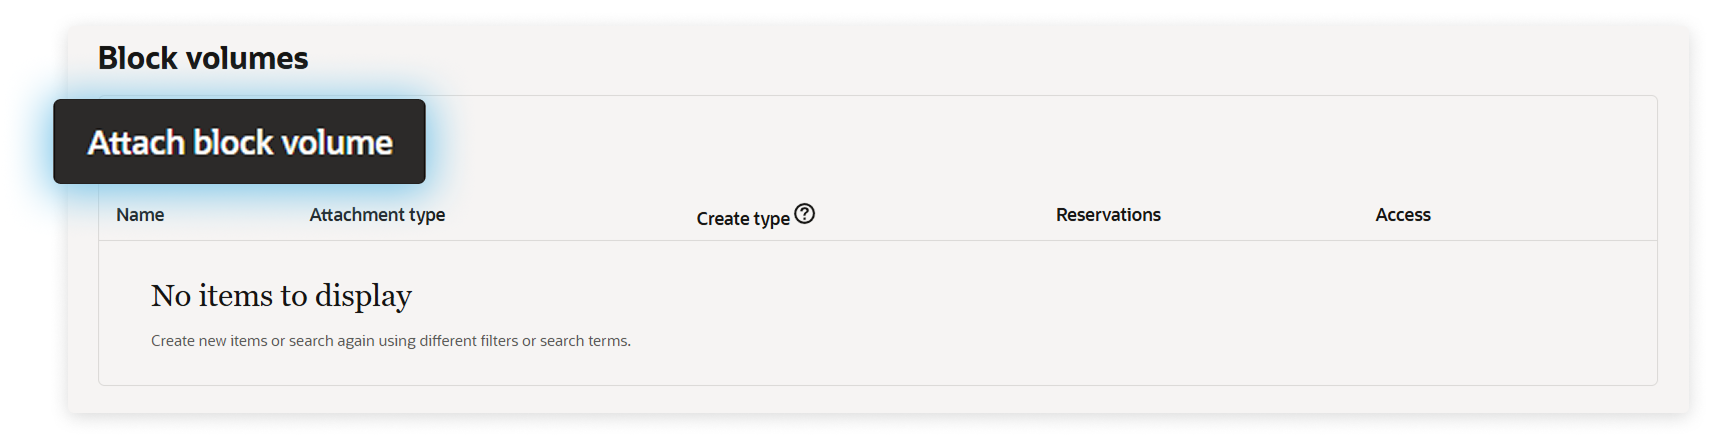
If you need application data or user profiles on a separate disk, attach a block volume at this step — either a new one or an existing one.
1.7 Review and create
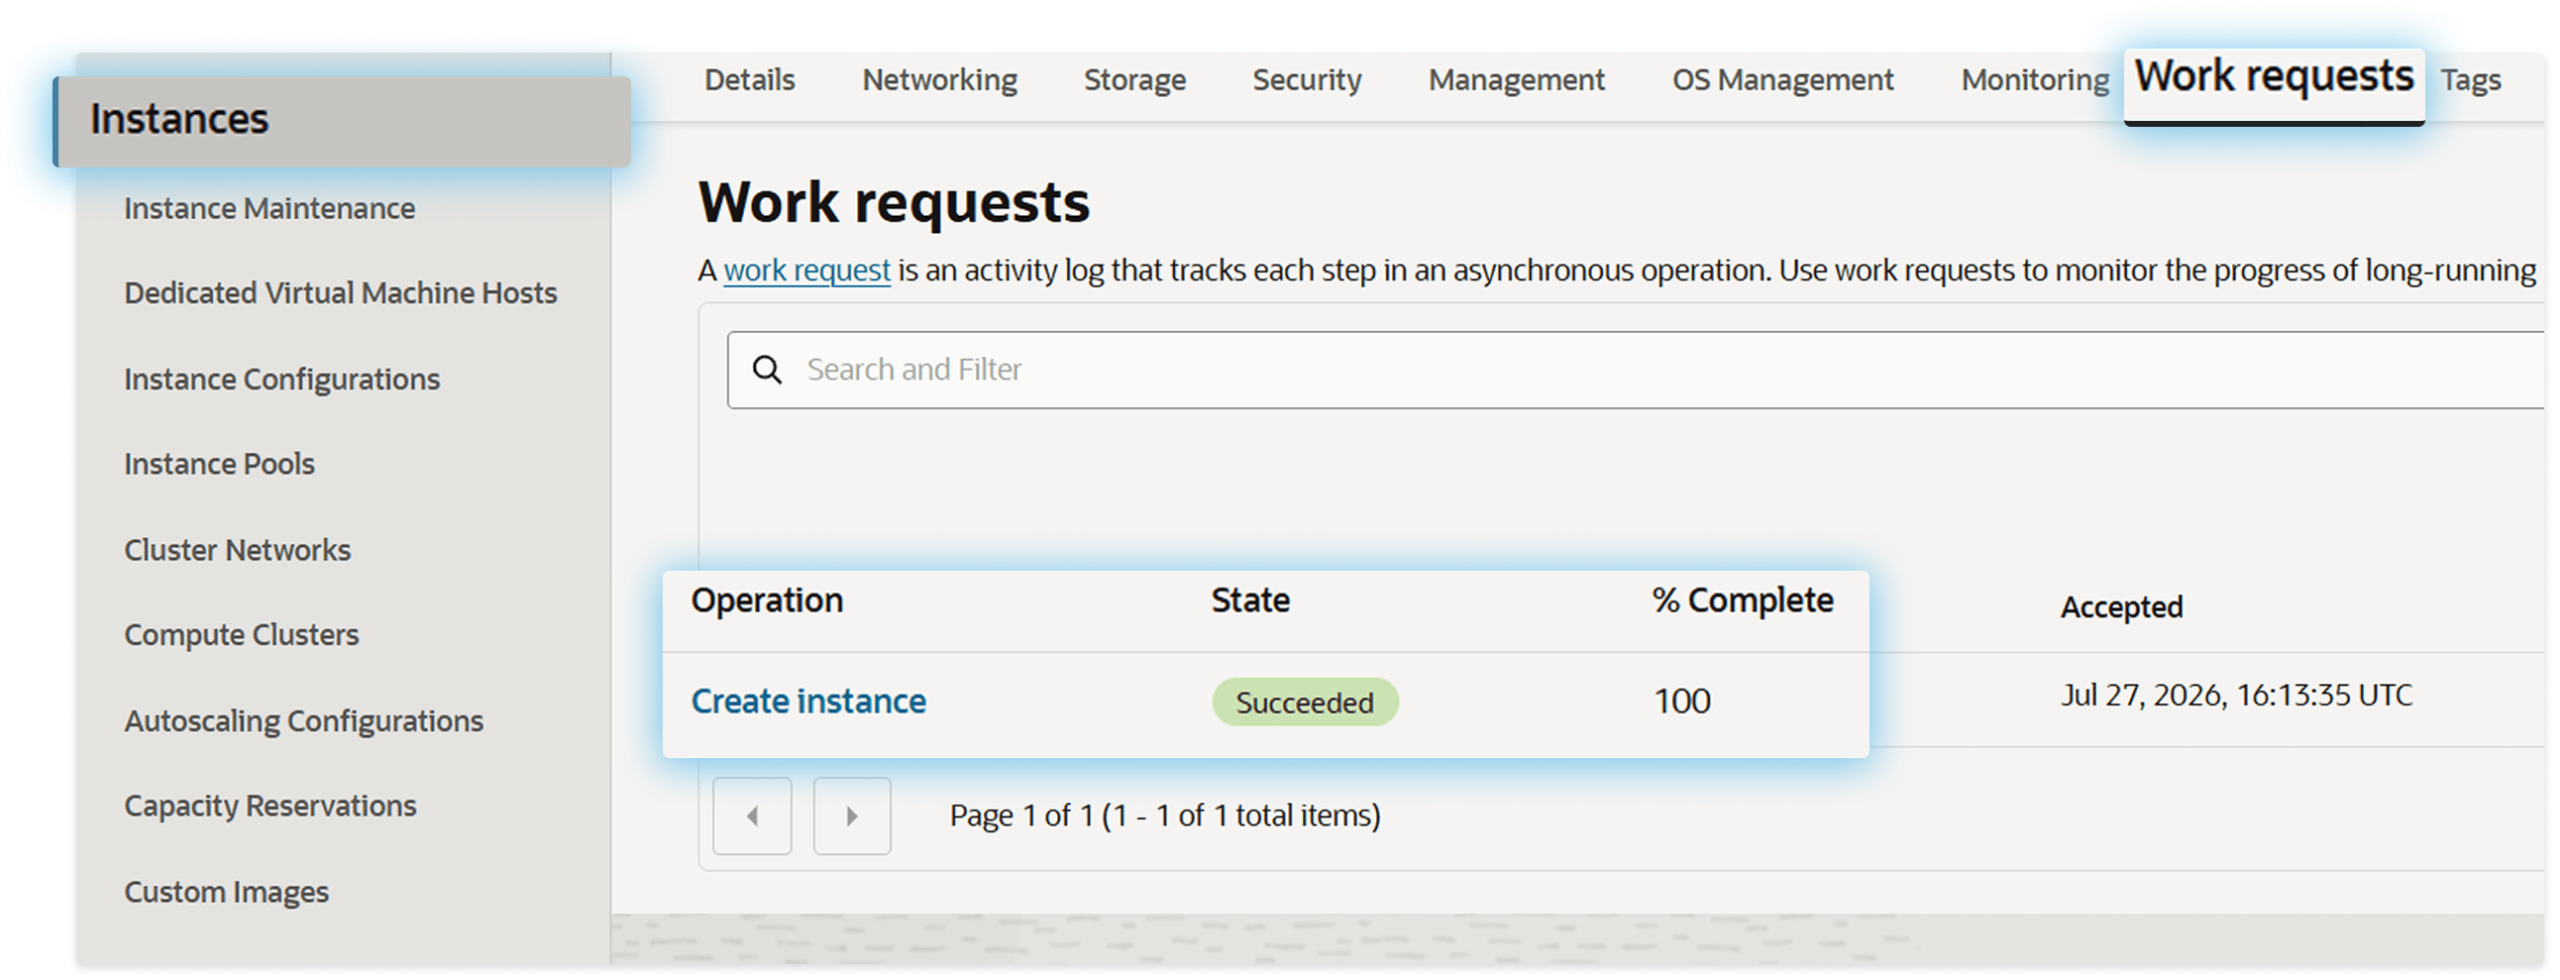
Review the summary and click Create. You can follow provisioning under the instance’s Work requests tab, which logs each step of the operation.
Step 2: Allow access to the instance
A running instance is not a reachable instance. Traffic has to be permitted by the subnet’s firewall in OCI and by the Windows firewall on the instance itself.
2.1 Security lists or network security groups
OCI gives you two ways to write these rules:
- Security lists are attached to a subnet and apply to everything in it.
- Network security groups (NSGs) are attached to individual VNICs, so you can give the Thinfinity gateway a different rule set than the session hosts sharing the same subnet.
The steps below use a security list because it is the shorter path for a first deployment. For anything beyond a single server, NSGs are worth the extra setup.
2.2 Add the RDP ingress rule
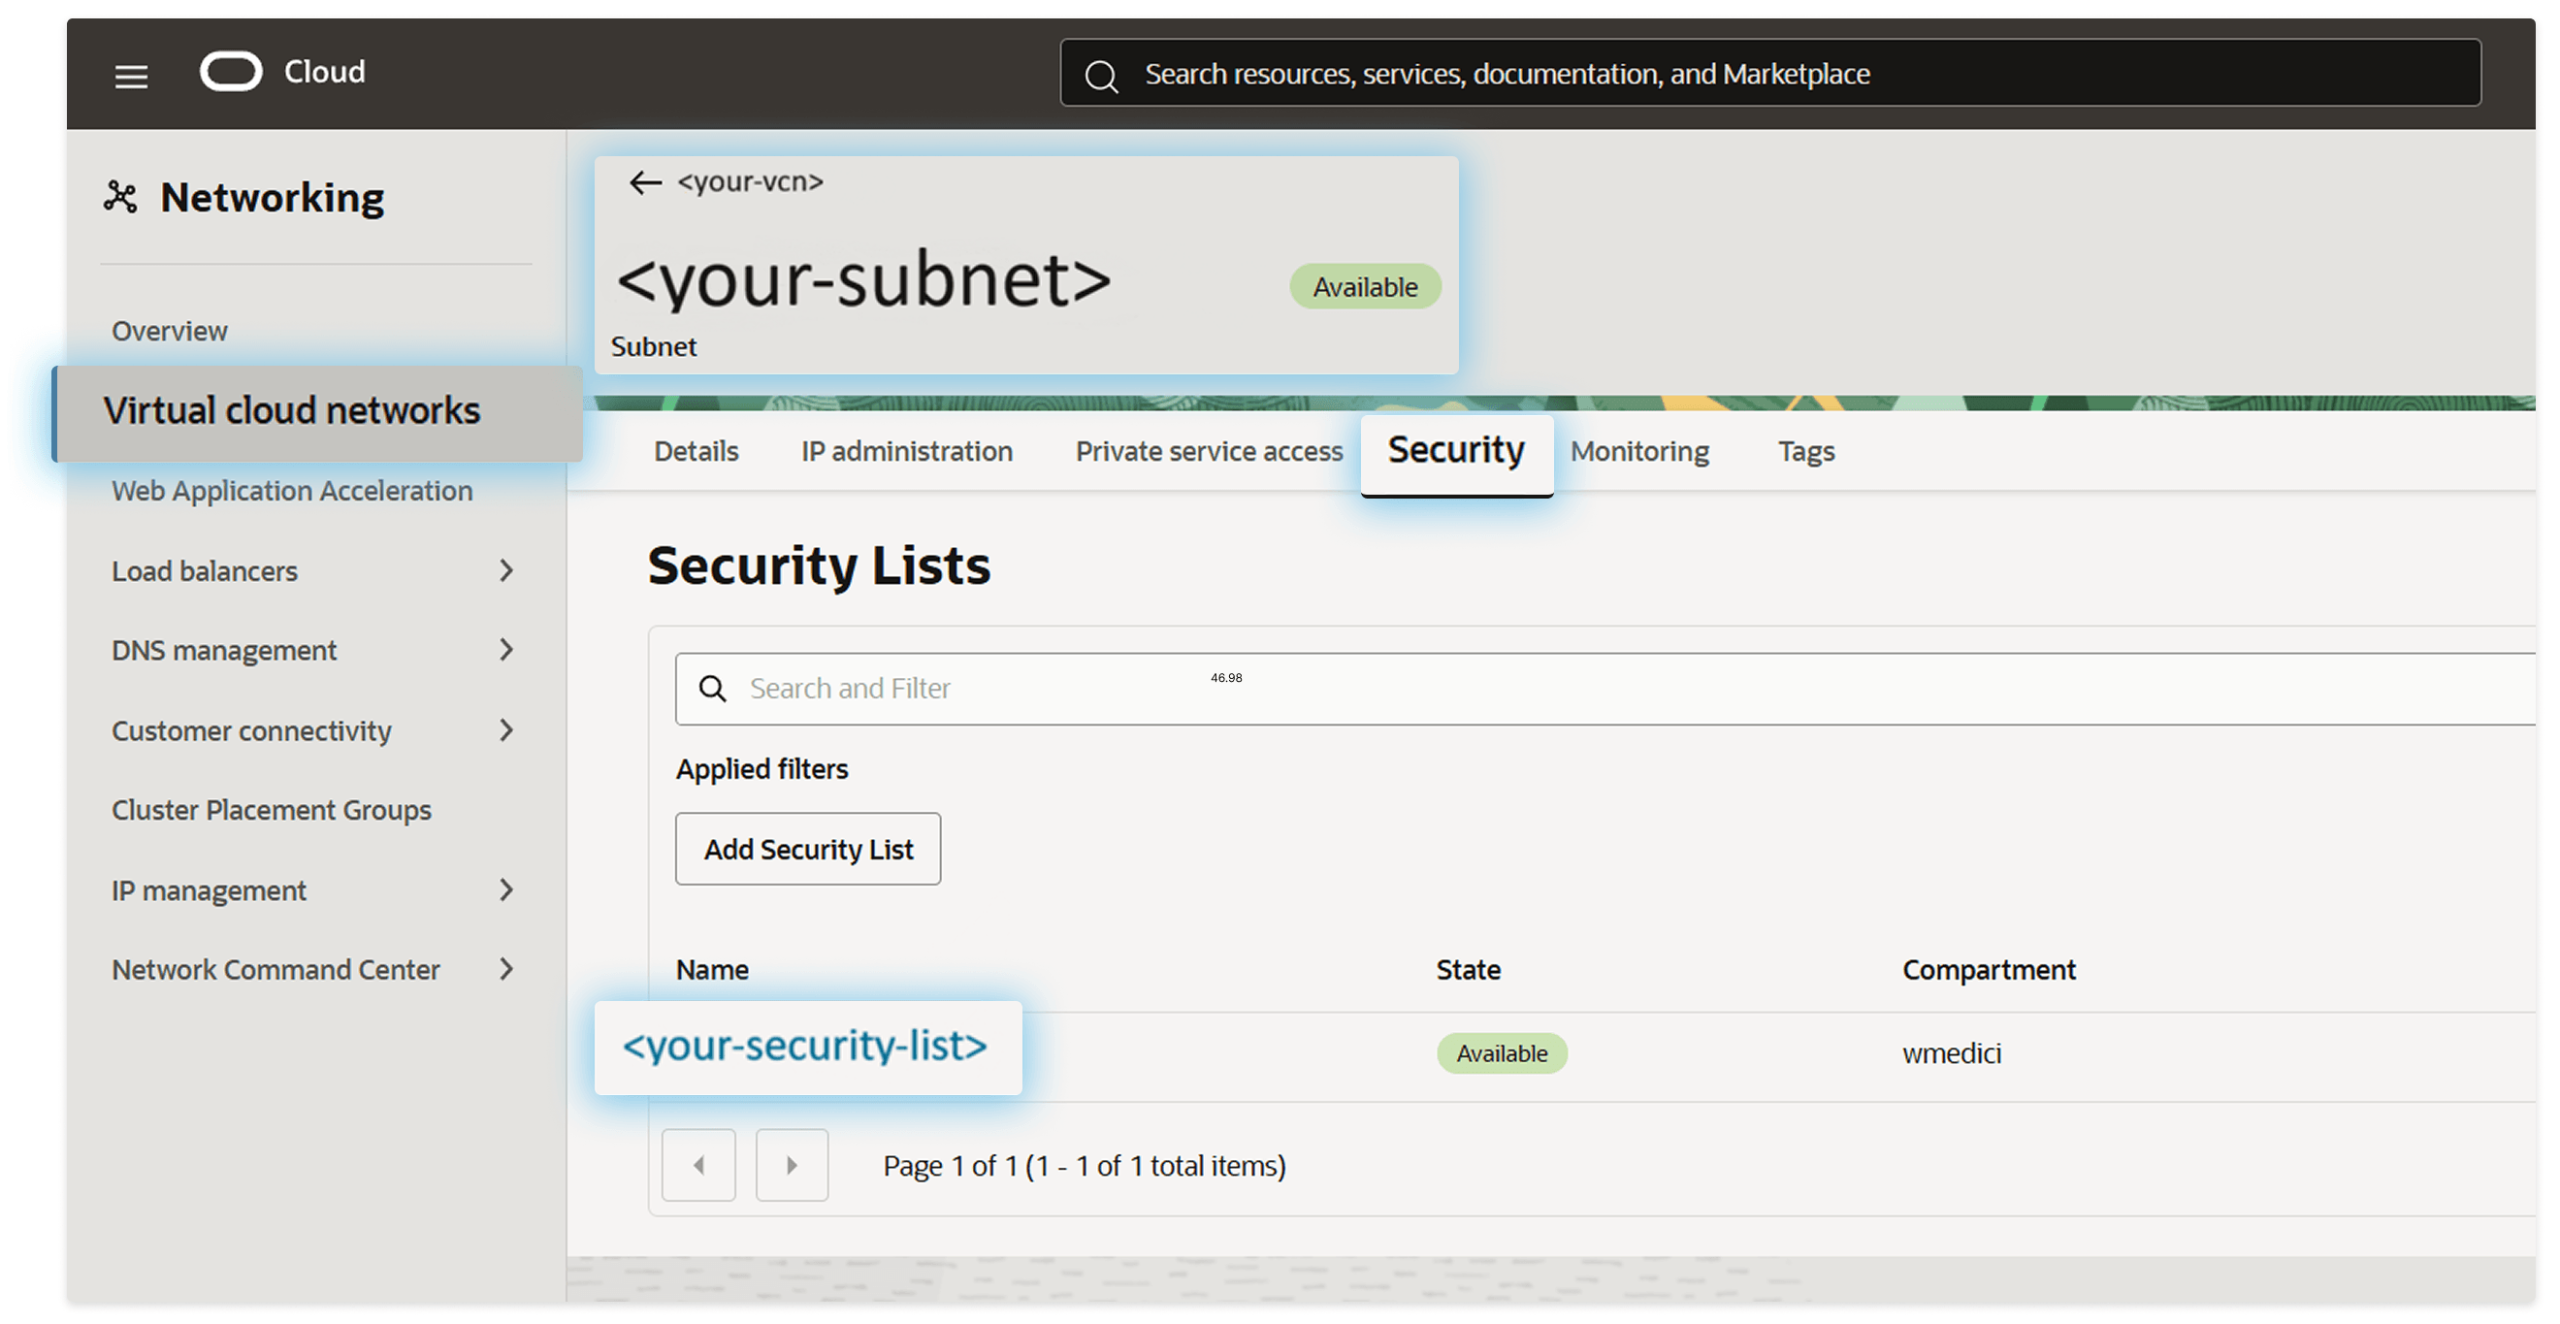
Go to Networking > Virtual cloud networks, select your VCN, then the subnet, open the Security tab and click the security list attached to it.
Open Security rules > Add ingress rules and create a rule for RDP:
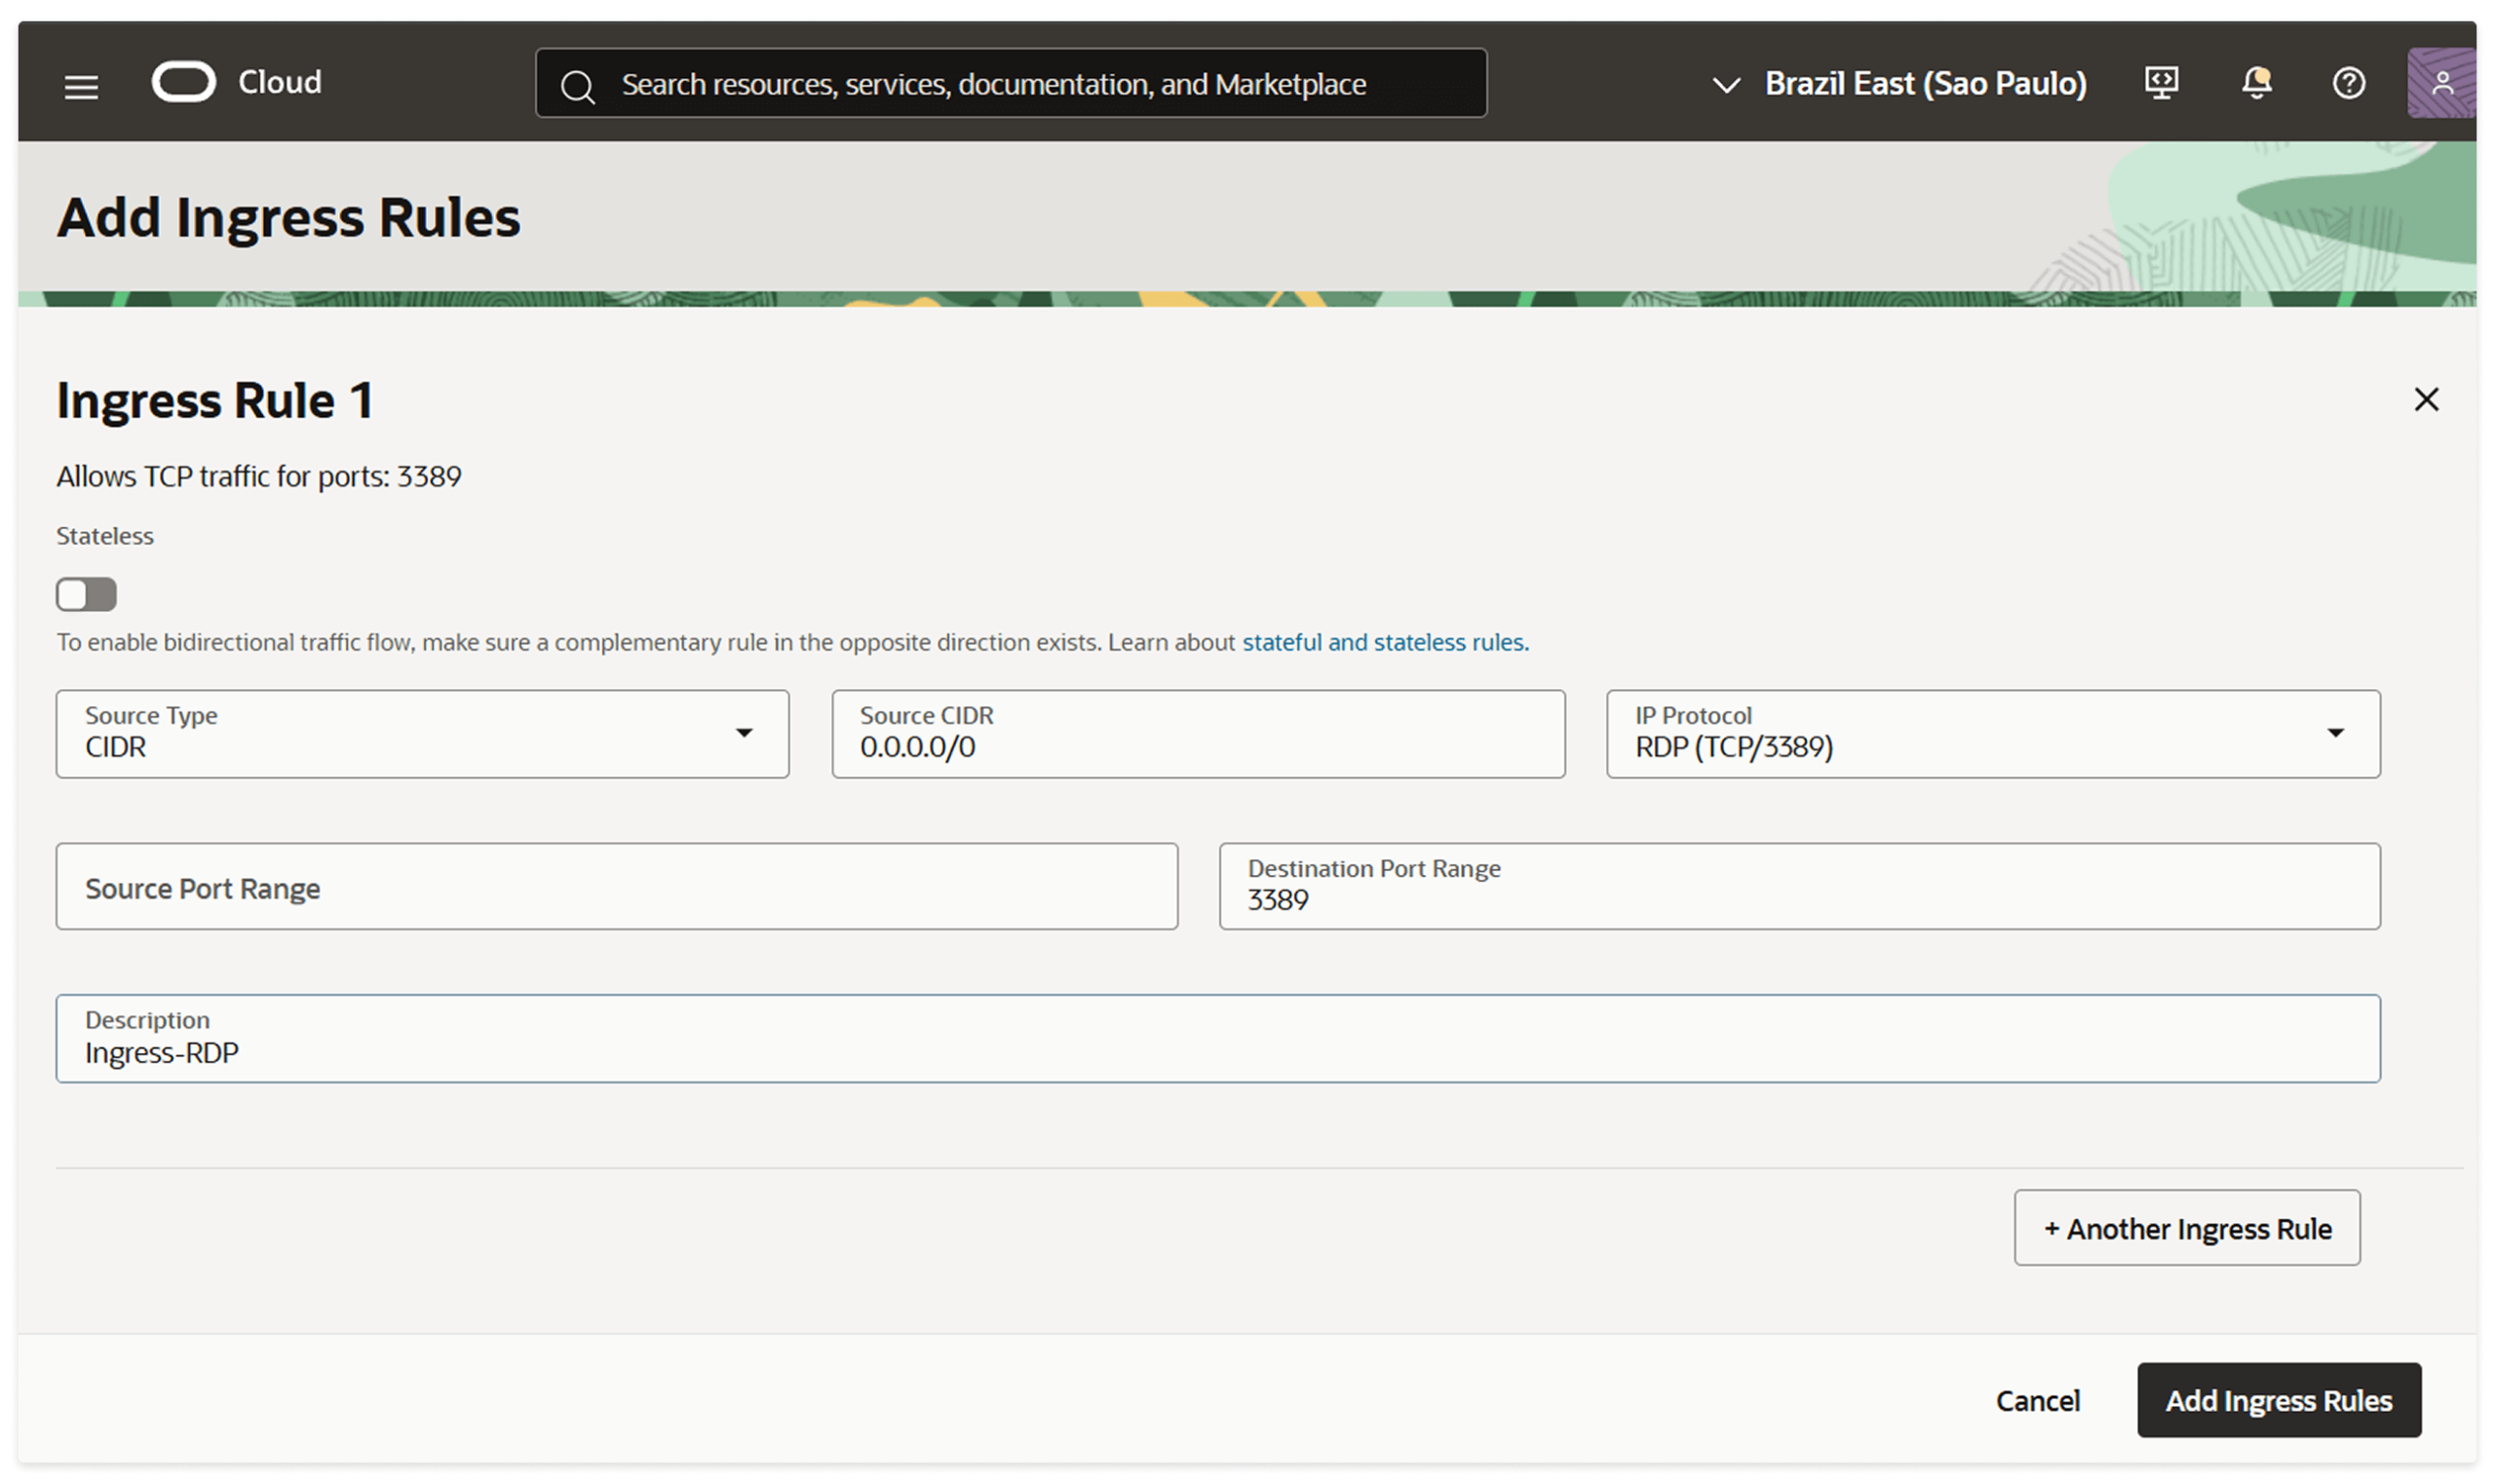
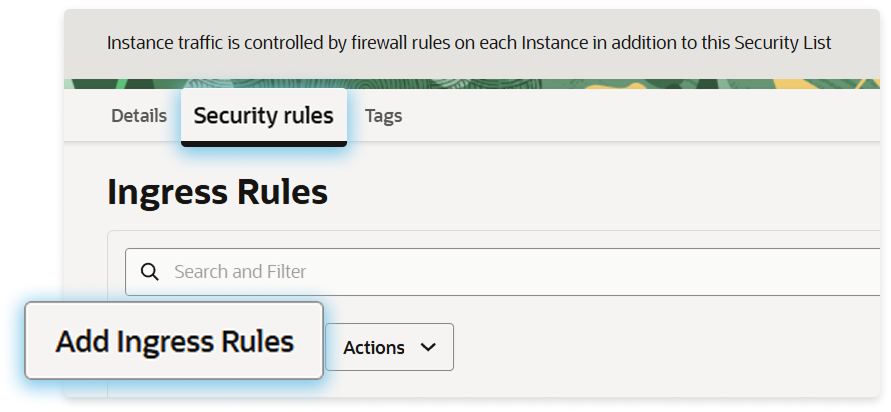
0.0.0.0/0 for RDP. Port 3389 exposed to the whole internet is scanned continuously and is one of the most common initial access vectors in ransomware incidents. Restrict the source to a known IP or network. If administrators connect from changing locations, use the OCI Bastion service or a VPN instead of widening the CIDR.Leave rules stateful unless you have a specific reason not to. Stateful rules automatically allow the return traffic; stateless rules require you to write the matching rule in the opposite direction.
2.3 Check the egress rule
Confirm the subnet also has an egress rule permitting the return and outbound traffic you need. The default security list allows all egress, but hardened environments often narrow this — and if egress is blocked, Windows Update and the Thinfinity installer download will both fail.
2.4 Plan the ports Thinfinity will need
RDP gets you onto the server. It is not how your users will connect. Once Thinfinity Workspace is installed, you will also need an ingress rule for the TCP port the Thinfinity gateway listens on — typically 443 once you have bound a TLS certificate. Confirm the port against your installation before opening it, and open it to the audience that actually needs it rather than to 0.0.0.0/0 by default.
Step 3: Connect to the VM for the first time
Windows platform images on OCI generate a one-time password at launch:
- Open the instance’s details page in the Console and find the initial password and the public IP address.
- Connect over RDP using the username
opcand that initial password. - Windows will require you to change the password immediately. The new password must be at least 12 characters and meet Microsoft’s complexity policy.
If the RDP connection times out, work through it in this order: ingress rule source CIDR → route table and internet gateway → public IP actually assigned → Windows firewall on the instance.
Common issues
| Symptom | Usual cause |
|---|---|
| The shape you want is not listed | Capacity in that availability domain, or a service limit. Try another AD or request a limit increase. |
| Instance launches but RDP times out | Missing ingress rule, or a public subnet with no internet gateway route. |
| Public IP disappears after a stop/start | Ephemeral IP. Reserve a static public IP. |
| Disk fills up shortly after install | Default ~47 GB boot volume. Resize the volume and extend the partition in Windows. |
| Installer download fails on the VM | Egress blocked by a restrictive security list or route table. |
What’s next
- A full VDI platform, not a single server. The Solution Engineer’s Guide to Post-Citrix Virtualization covers how Thinfinity Cloud Manager handles golden images, desktop pools and autoscaling against the OCI Compute APIs — the automated version of the instance you just created by hand.
- Publishing individual applications rather than full desktops. Virtual Applications on OCI explains application-level delivery on Oracle Cloud and when it beats a full desktop.
- The wider architecture. Deploying VDI on OCI with Thinfinity Workspace walks through the native OCI integration, the security model and the automation layer end to end.
- Not sure which one fits your case: Accessing Windows applications remotely compares the two approaches.
If you are an Oracle partner deploying this for customers rather than for your own tenancy, the Thinfinity for Oracle Partners page covers the deployment and co-sell side.