
Did you know that Thinfinity VirtualUI has an easy way to customize the logo and web-styling characteristics?
There are several methods you could follow to change the logo, on the Thinfinity VirtualUI landing page.
You can accomplish this by replacing the image files in the directory “C:\Program Files\Thinfinity\VirtualUI\web\images” or just editing the source file in the ‘index.html’. But the best way is to use web aliases.
Web aliases allows you to leave the original files unaltered. This is very useful when updating Thinfinity VirtualUI, otherwise, when you make an update, the modified files will be replaced by the default ones losing all your customizations.
Customize the company logo
To get started you just need to create a file called “WebAliases.ini” in “C:\Program Files\Thinfinity\VirtualUI\bin64” (or “C:\Program Files (x86)\Thinfinity\VirtualUI\bin32” if you are using the 32-bit version).
In this file you will map the original file to a new one, like this:
[Alias]
/originalLogo.png=newLogo.png
The paths in the “WebAliases.ini” file is relative to the webroot (“C:\Program Files\Thinfinity\VirtualUI\web”). If you want to change the logo, for instance, it should look like this:
[Alias]
/images/Thinfinity_VirtualUI.png=C:\myWebAliasesItems\NewLogo.png
And this is the result when you reload the page:
![]()
Customize the Favicon
To change the favicon you simply have to update the file “web/favicon.ico” with your icon file. This will update the icon you see in the browser tab:
Customize the Styles
Updating the styles will require some CSS knowledge.
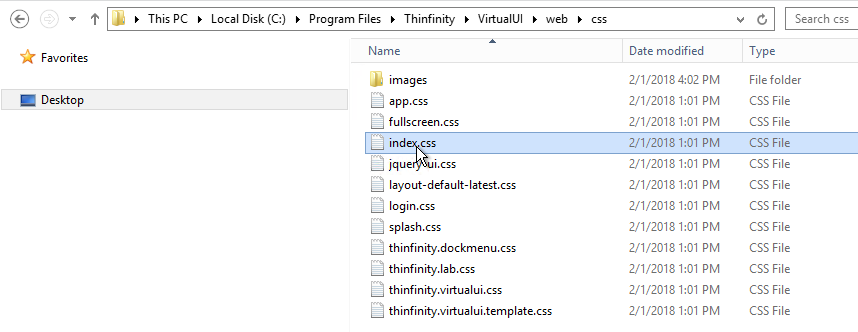
You will find all the CSS files in C:\Program Files\Thinfinity\VirtualUI\web\css.
Once you reach the file you just need to make the changes and save it.
If you don’t have any CSS knowledge we recommend to ask your Web designer for some assistance.
After you complete any of these changes you might need to refresh your browser cache for the updates to take effect.