
Are you a Thinfinity Remote Desktop or Thinfinity VirtualUI user? Want to adopt a FREE 2FA method?
This tutorial will show you how to enable 2FA Auth0 Guardian. Learn more about Guardian MFA here.
NOTE: Auth0 Guardian mobile application is required for 2FA.
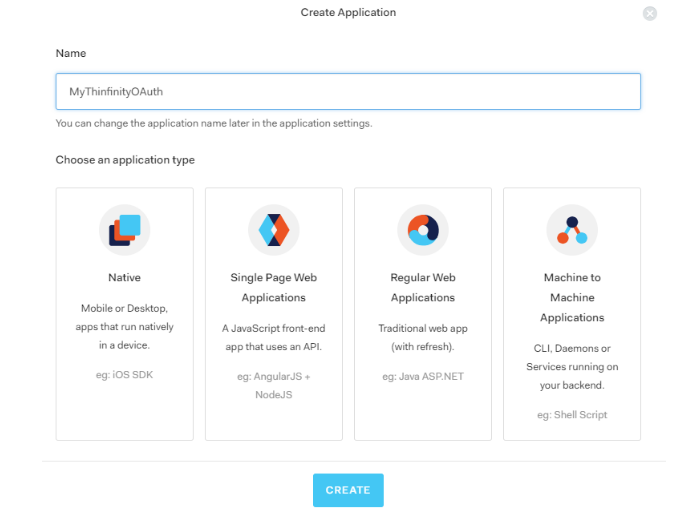
Ready to start? Let’s create a new application on Auth0’s administrator site.
1) Chose “Single Page Web Application”.
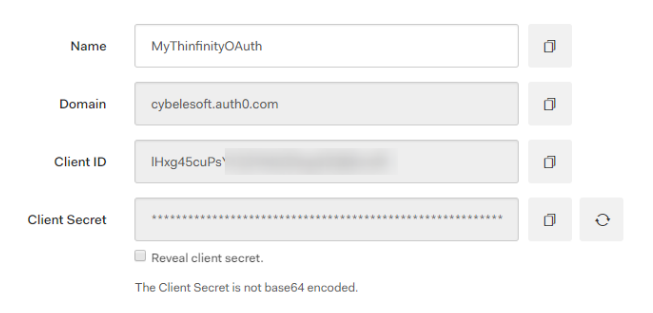
2) Copy your Client ID and Client Secret:
3) In the “Allowed Callback URL”, you need to add the URL that you are going to use to authenticate, and the VirtualPath of the Authentication Method ( OAuth by default ).

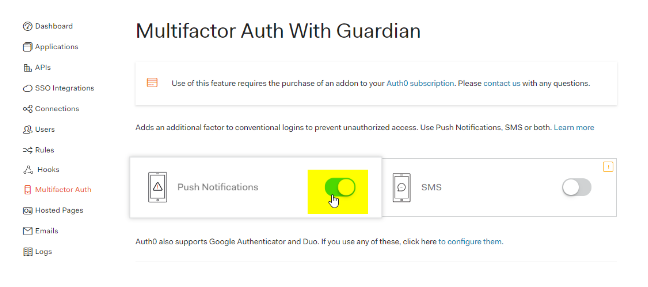
4) To enable 2FA, click on the “Multifactor Auth” and enable “Push Notifications”:

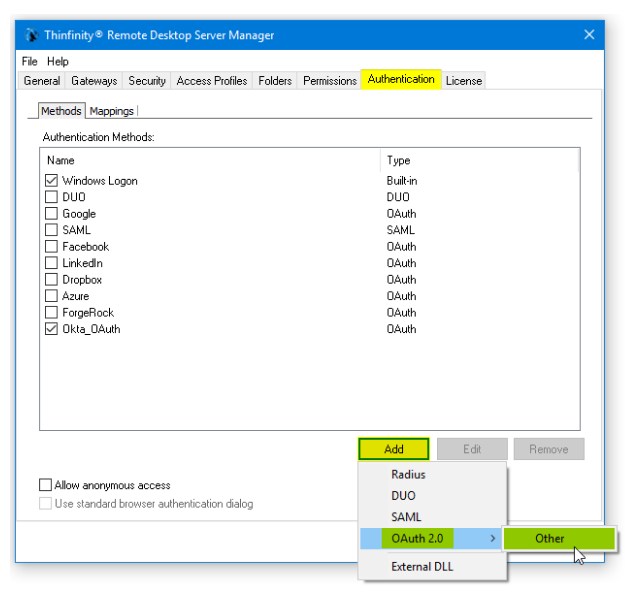
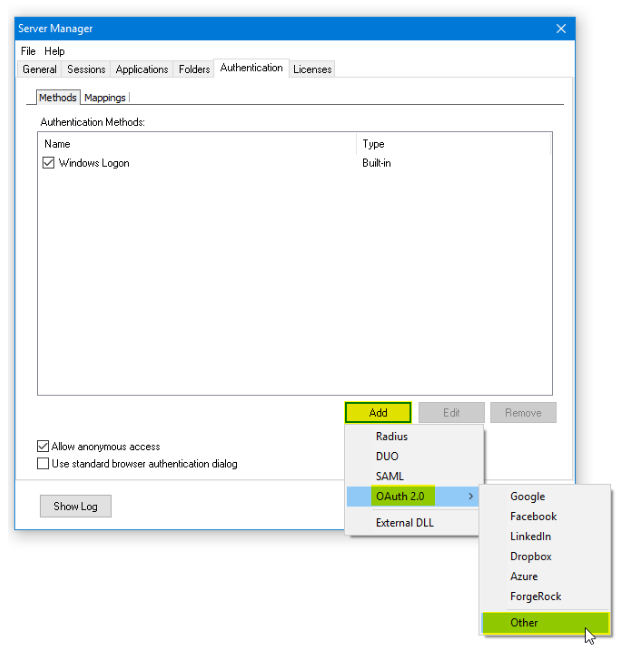
5) Open the Thinfinity Remote Desktop Server Manager or Thinfinity VirtualUI, navigate to the Authentication tab, press “Add” -> ”OAuth2.0” -> ”Other”.
Thinfinity Remote Desktop Server:
Thinfinity VirtualUI:
6) Add the following information:
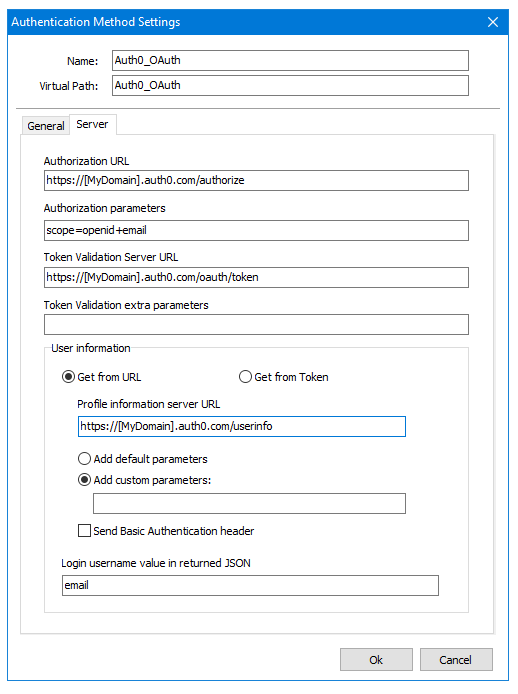
This information can be verified in the “Endpoints” tab under Advanced Settings in the Application you created on Auth0’s interface.
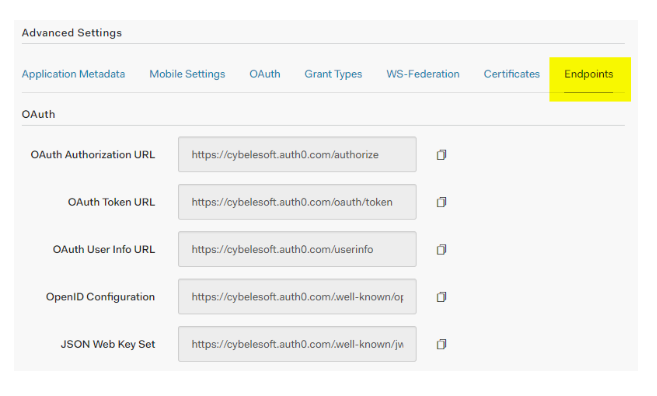
Click on “OK” after you entered the information.
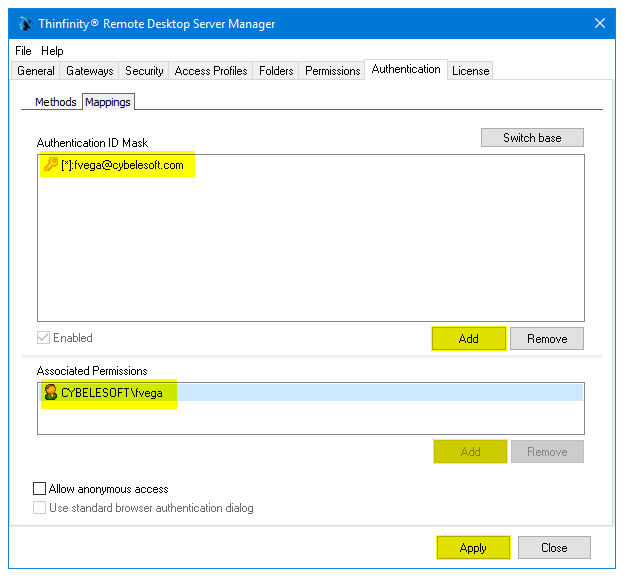
7) Click on the “Mappings” tab and then press “Add” under the Authentication ID Mask.
Add the email address of the Auth0 user you want to validate and press “Ok”.
Then, under the “Associated Permissions” field, press on the “Add” button and search for the Active Directory User.
Thinfinity Remote Desktop Server:
Thinfinity VirtualUI:
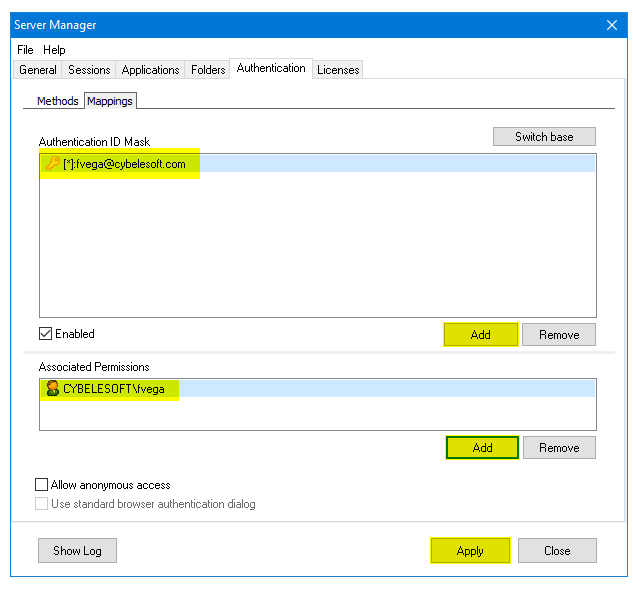
After you add the appropriate mappings, click on the “Apply” button.
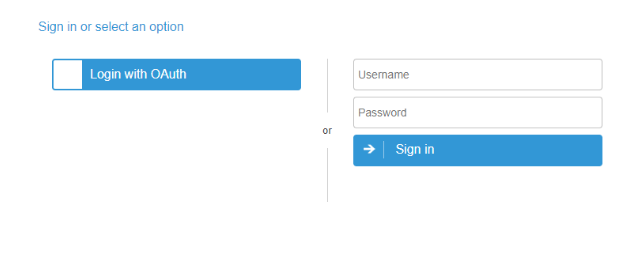
8) Navigate to the Thinfinity’s landing page, and you should see the “Login With OAuth” option listed as an Authentication Method.