
In this new post we will show you a “step by step” on how to setup SAML on Ping Identity’s portal and how to set this up in VirtualUI.
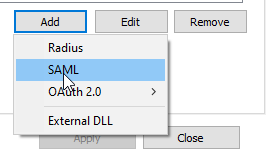
First of all, open the VirtualUI manager and go to the ‘Authentication’ tab. Once there, click ‘Add’ and select ‘SAML’:
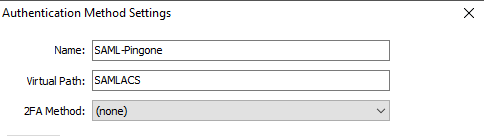
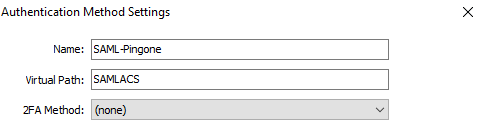
Add a “Name” and “Virtual Path”. For testing purposes use ‘SAMLACS’ as Virtual Path (we will use this information later on):
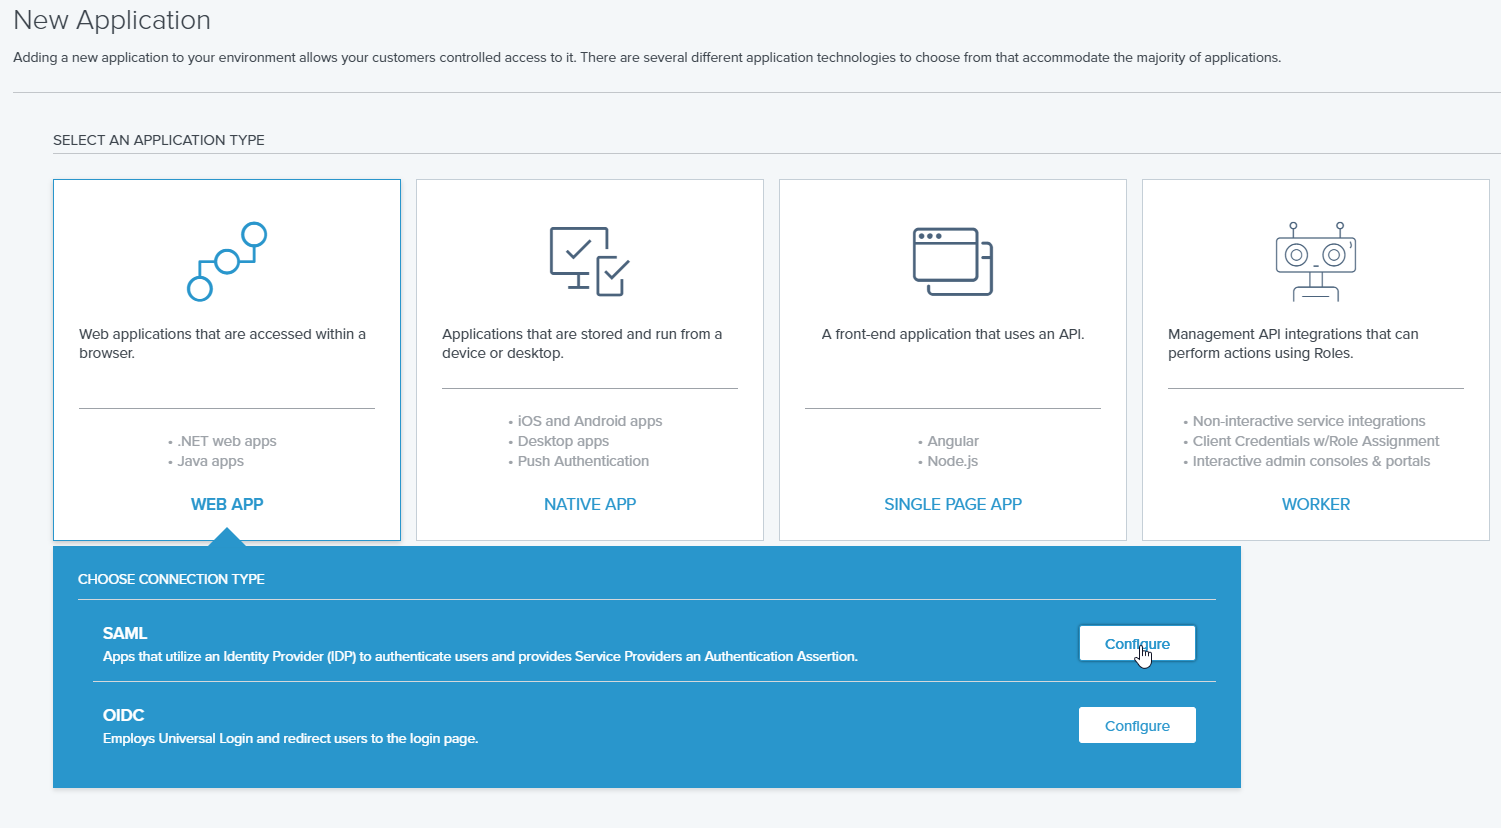
Now, log into your Ping Identity admin portal and create a new “Web App”.
Select the SAML option:
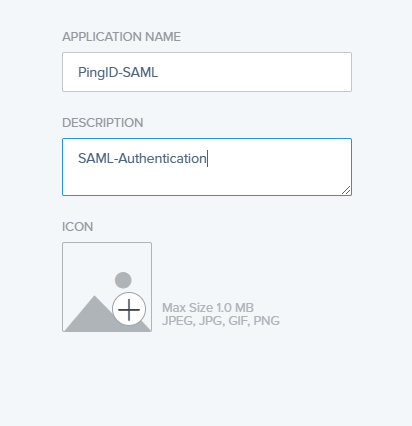
Fill out “Name”, “Description” and click next:
In the next step we have to configure the Assertion Consumer Service URL, you must enter your public URL for your VirtualUI server followed by the Virtual Path of the authentication method you configured in the VirtualUI manager:
So this should look something like this: http(s)://Server_DNS:port/SAMLACS

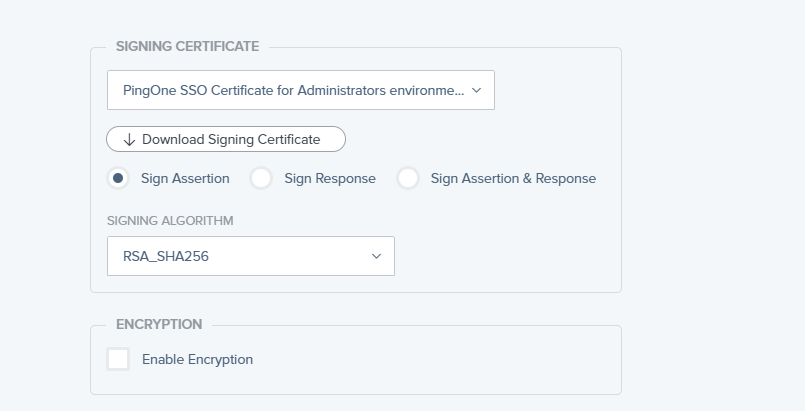
Below the ACS URL you will be able to download the signin certificate. Download this and store it somewhere in your VirtualUI server:
Enter the “Entity ID” URL, this is the public URL for your VirtualUI server (e.g. http(s)://Server_DNS:port):

Set the assertion validity duration, the minimum value is 60 seconds:

In the SAML Attributes, choose ‘Email Address’ and click ‘Save and Continue’.:

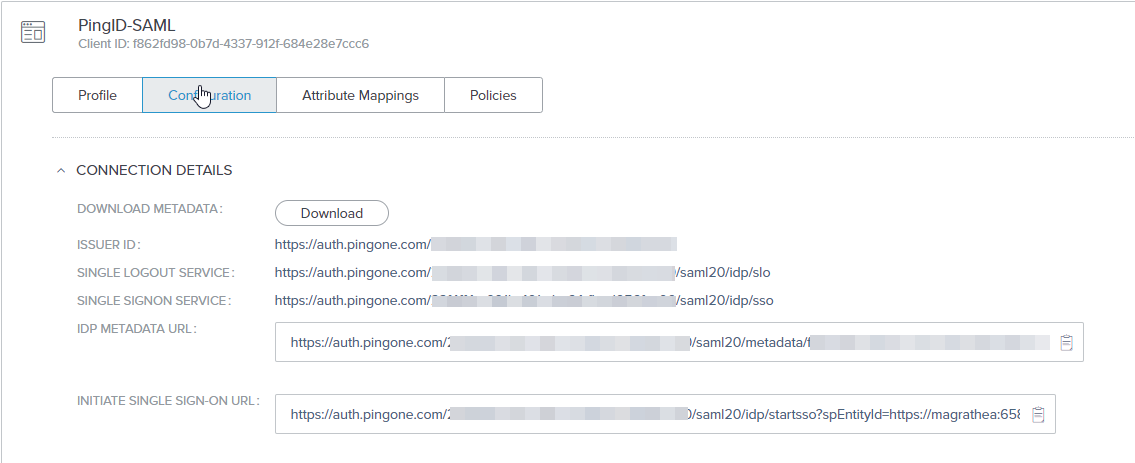
Now that we have SAML configured in Ping Identity, we have to set up VirtualUI. Before we go to the VirtualUI manager, select the ‘Configuration’ tab of your SAML application and copy the ‘Issuer ID’ and ‘Single Signon Service’:
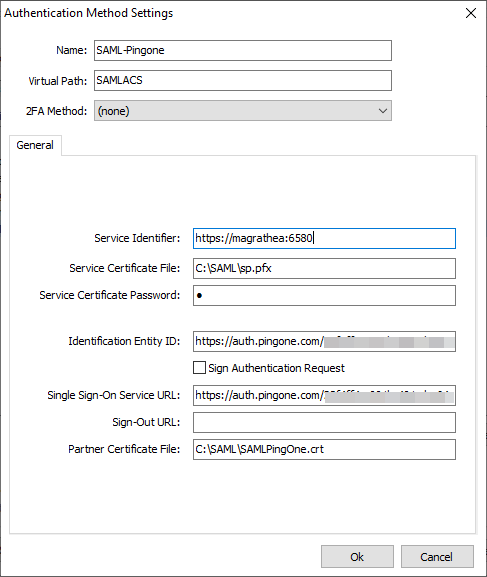
Back in the VirtualUI manager, we need to fill the following information:
-
- Service Identifier = Identity Provider “Entity ID”
- Service Certificate File = Your certificate file
- Service Certificate Password = Your certificate’s password
- Identificacion Entity ID = Issuer ID
- Single Sign-On Service URL = Identity Provider “Single SignOn Service URL”
- Sign-Out URL = This value is optional
- Partner Certificate File = X.509 Certificate provided by Ping Identity
Back in the ‘Authentication’ tab, switch to the ‘Mappings’ tab and map your email address to the local AD user or group:
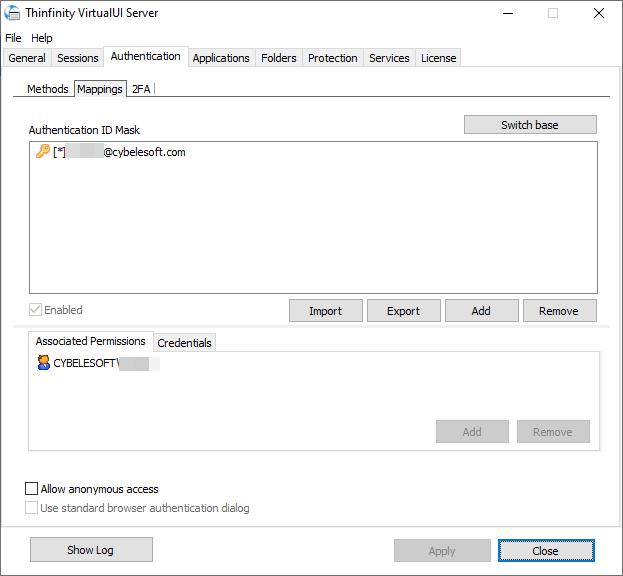
Above, I mapped an email address to an AD user, but you can also use a wild-card. For instance, you can add “*@cybelesoft.com” as “Authentication ID mask” and map this back to the ‘Cybelesoft\Domain Users’ group in your AD.
Finally we have to enable user access to SAML on Ping Identity, you will find a little switch to do so in its settings:

It should look like this:

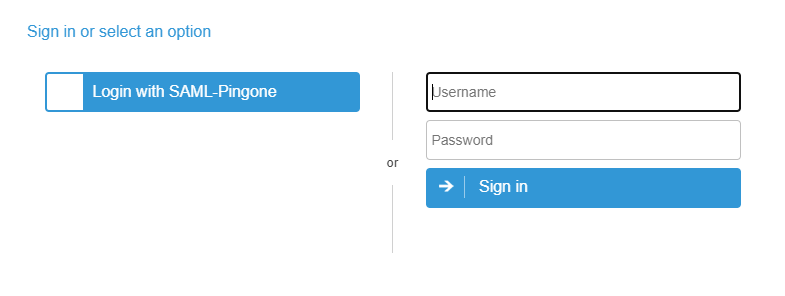
Now after applying the changes to the VirtualUI manager,go to the VirtualUI site and you should be able to see the ‘Ping Identity SAML’ authentication method listed:
If you have any questions regarding the SAML configuration, you can leave a comment below or send us an email at support@cybelesoft.com. Cheers!