
In this step by step tutorial, we will show you how to publish your Thinfinity Remote Desktop server using Google Cloud Computing.
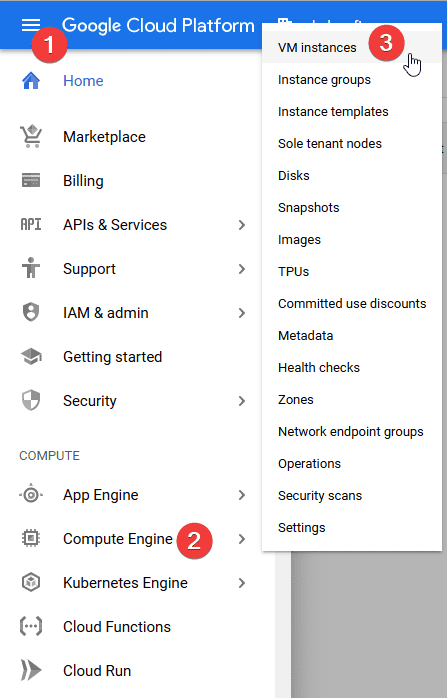
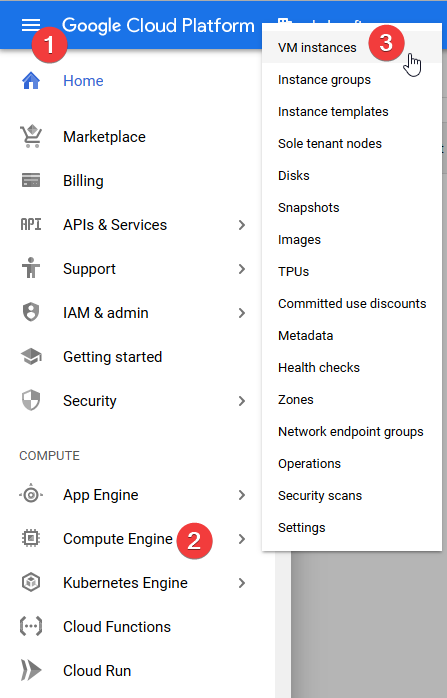
1) Navigate to https://console.cloud.google.com/ , and click on “Navigation Panel” -> “Compute Engine” -> “VM Instances”.
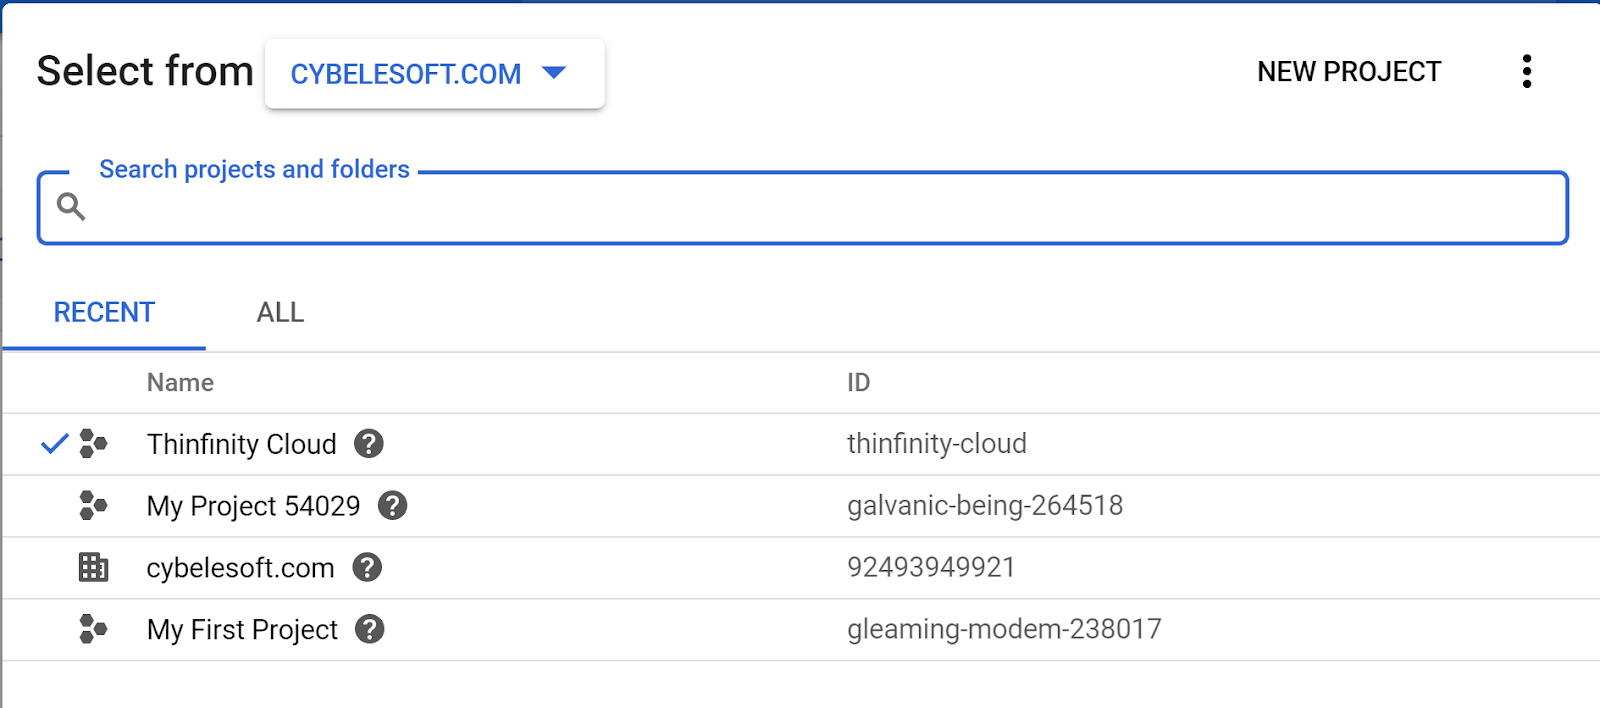
2) Select a project if you have one already, or create a new one if you need to do so.
In this case, we created a project called “Thinfinity Cloud”.
Press “Continue” once you are ready.
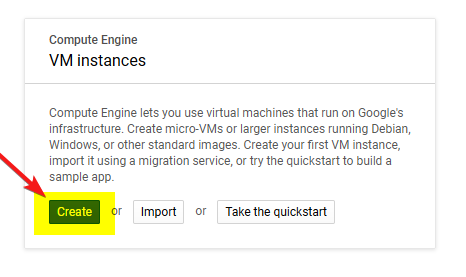
3) Click on the “Create” button in the “VM Instances” menu:
4) Now, we need to configure the VM itself, the important fields here are:
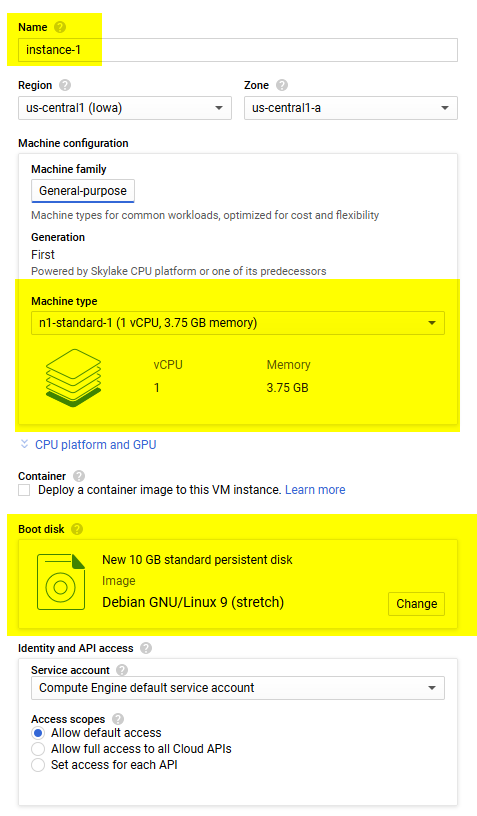
“Name” = The name of the Virtual Machine.
“Region” = Select the region closest to your location.
“Machine type” = This will determine how “big” is the Virtual Machine in terms of CPU and RAM.
In this case, we are going to use a small 1 vCPU, 3.75 GB of RAM, Virtual Machine.
Please note: Large deployments will require bigger Virtual Machines.
“Boot Disk” = Select one of the available Windows versions:
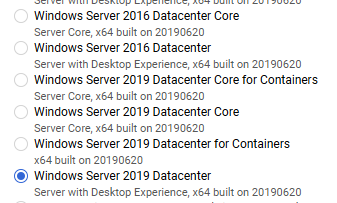
We recommend using “Windows Server 2019 Datacenter”
5) Scroll below and in the “Firewall” section, check both HTTP and HTTPS options.

6) Click the “Create” button.
7) Once the instance has been created, click on the pointing down arrow and on “Set Windows Password”:
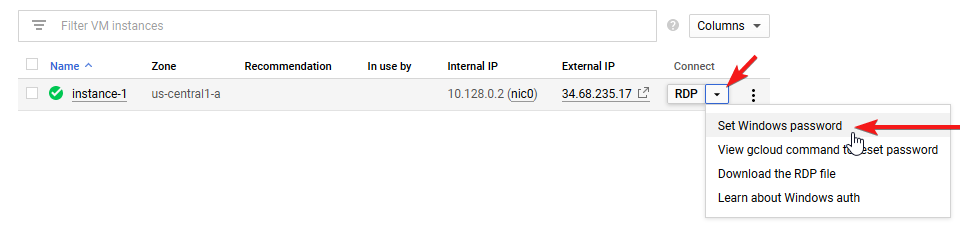
This will allow you to create a Windows user for this machine and will also give you the password used for connecting with RDP.
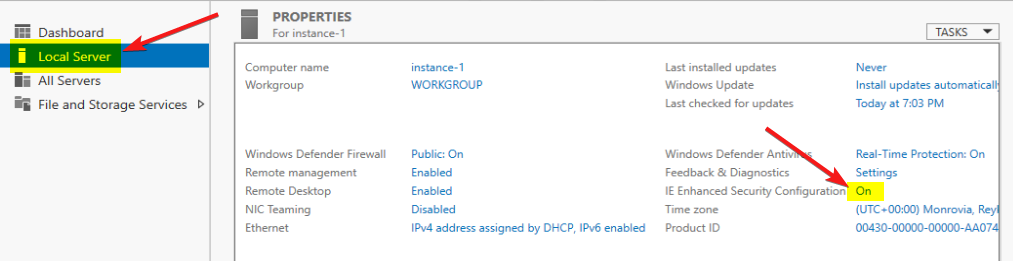
8) Open mstsc.msc ( Remote Desktop ) and establish a connection to your VM using the “External IP” and the credentials you just configured.
Once the “Server Manager” has finished loading, click on “Local Server” and on the “IE Enhanced Security Configuration”.
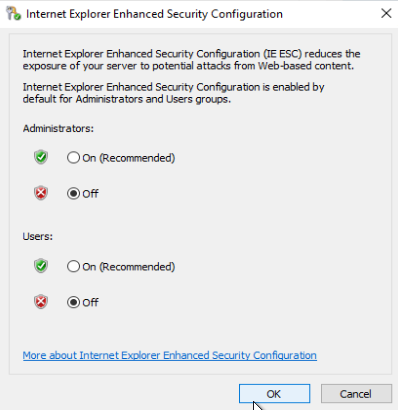
Change both “Administrators” and “Users” to “Off”:
9) After the “IE Enhanced Security Configuration” changes “Off”, open Internet Explorer and download Thinfinity using this link:
https://www.cybelesoft.com/downloads/Thinfinity_Remote_Desktop_Server_Setup_x64.exe
Now that you downloaded the setup file to your Google Cloud Computer Virtual Machine, it’s time to install Thinfinity Remote Desktop Server!
Please, follow this tutorial:
https://blog.cybelesoft.com/install-thinfinity-remote-desktop-server/
Should you have any questions, contact us at [email protected] or leave a message on this same post.