
In this new post, we will show you a “step by step” on how to set up SAML on Ping Identity’s portal and how to set this up in Thinfinity® Worskpace/VirtualUI.
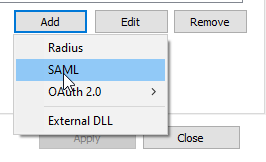
First, open the Thinfinity® Worskpace/VirtualUI manager and go to the ‘Authentication’ tab. Once there, click ‘Add’ and select ‘SAML’:
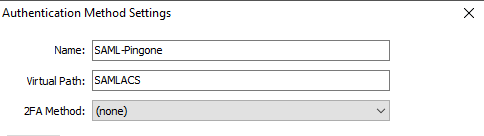
Add a “Name” and “Virtual Path”. For testing purposes, use ‘SAMLACS’ as Virtual Path (we will use this information later on):
Leave this window open in your manager for now, you won’t be able to proceed anymore in it until we fill out the rest of the fields with the information we’re going to get from PingIdentity.
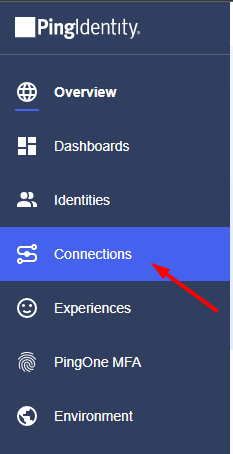
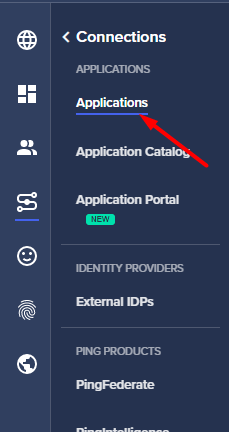
Now, log into your Ping Identity admin portal, on the sidebar, click on ‘Connections’, and then click ‘Applications’.
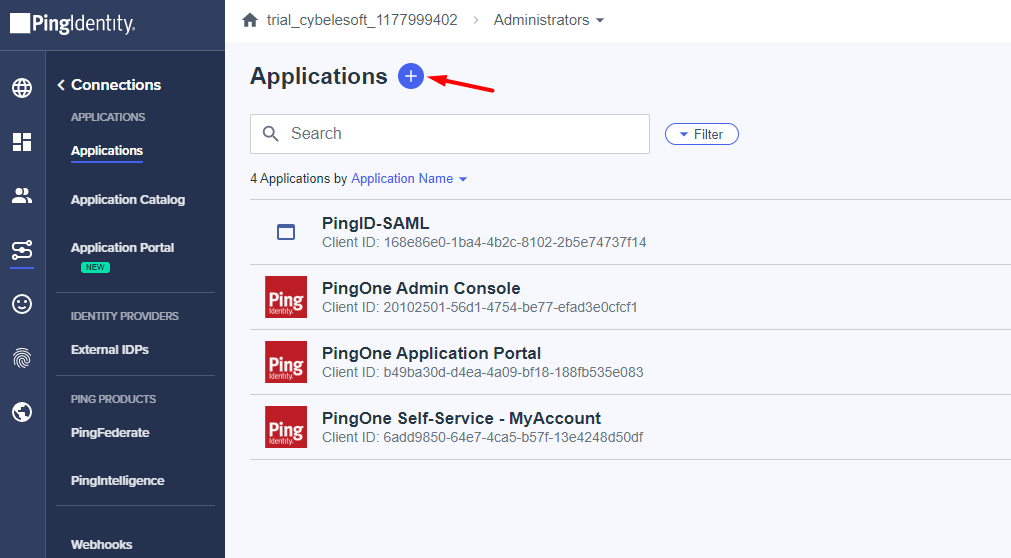
On this screen, click the “+” button to add an application:
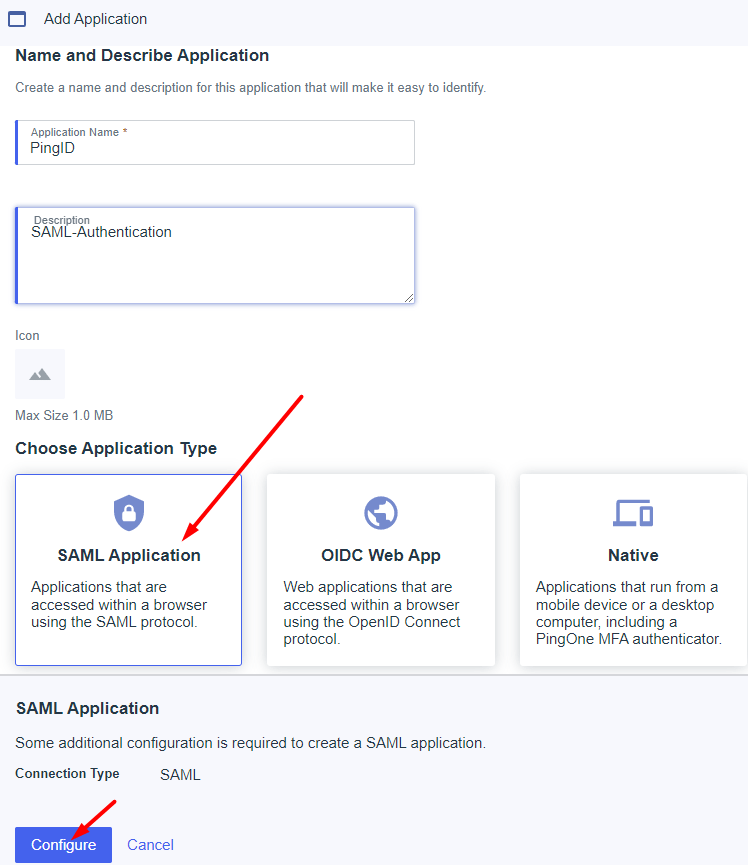
Afterwards, fill out a Name and Description, select ‘SAML Application’ and click on ‘Configure’ below:
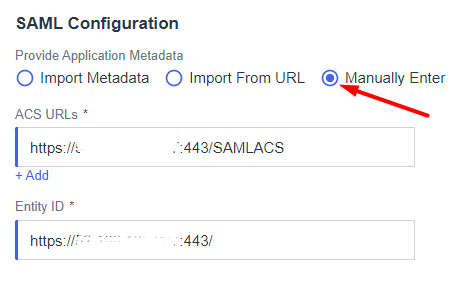
On the next screen, select ‘Manually Enter’ and fill out the fields below.
The Assertion Consumer Service URL (ACS URLs), you must enter your public URL for your Thinfinity Workspace/VirtualUI server followed by the Virtual Path of the authentication method you configured in the Thinfinity Workspace/VirtualUI manager
Enter the ‘Entity ID’ URL, this is the public URL for your Thinfinity Workspace/VirtualUI server (e.g. http(s)://Server_DNS:port)
IMPORTANT: You must declare the binded port in both URLs, otherwise we won’t be able to log in.
Click Save afterwards:
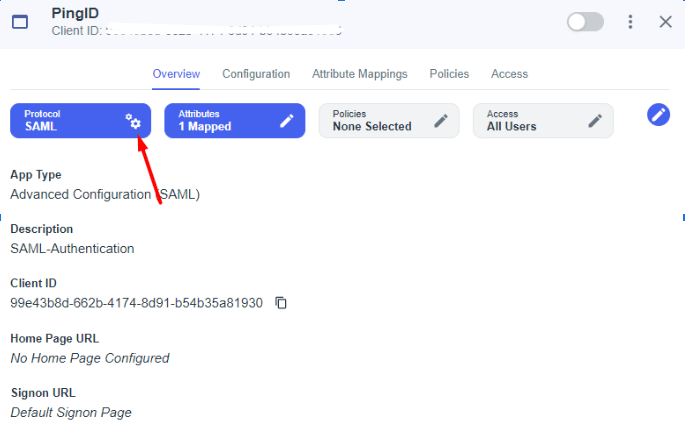
On the next screen, we need to click the gears icon in PROTOCOL
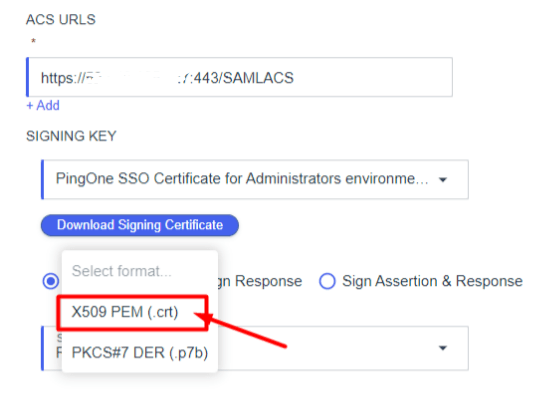
Inside, we want to click ‘Download Signing Certificate’, and choose the X509 PEM (.crt) format.
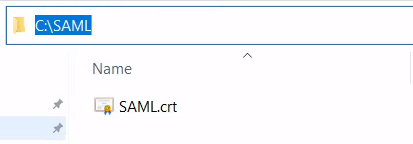
We’ll need this certificate later on, so save it locally in an easy location in your Thinfinity Workspace/VirtualUI server.
You can also rename the file if you wish to, We’ll use ‘C:\SAML\SAML.crt’ as an example, like so:
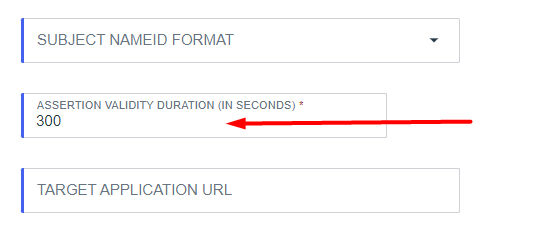
If you scroll further below in this screen, you can set the Assertion Validity Duration, minimum required is 60 seconds:
Click ‘Save’.
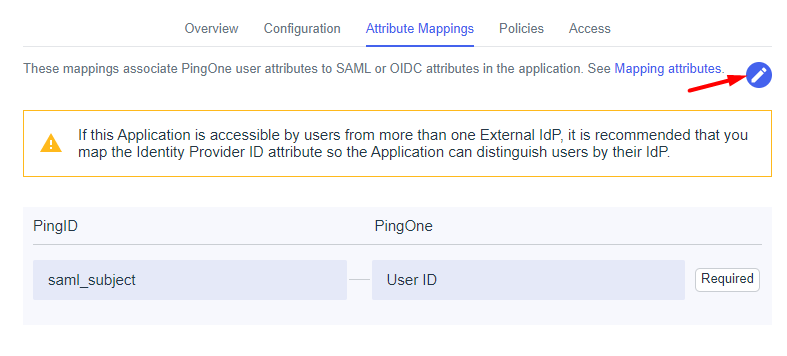
Afterwards, click on ‘Attribute Mappings’ and then click the Edit button:
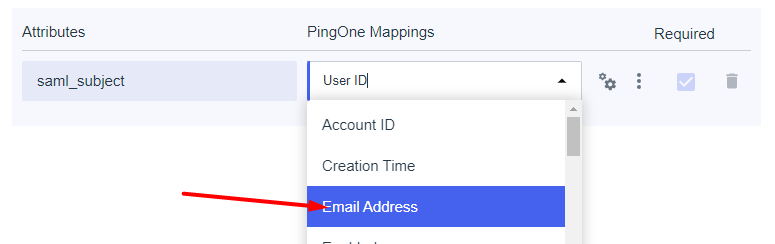
We want to change the setting to ‘Email’, like so:
Click ‘Save’ afterwards.
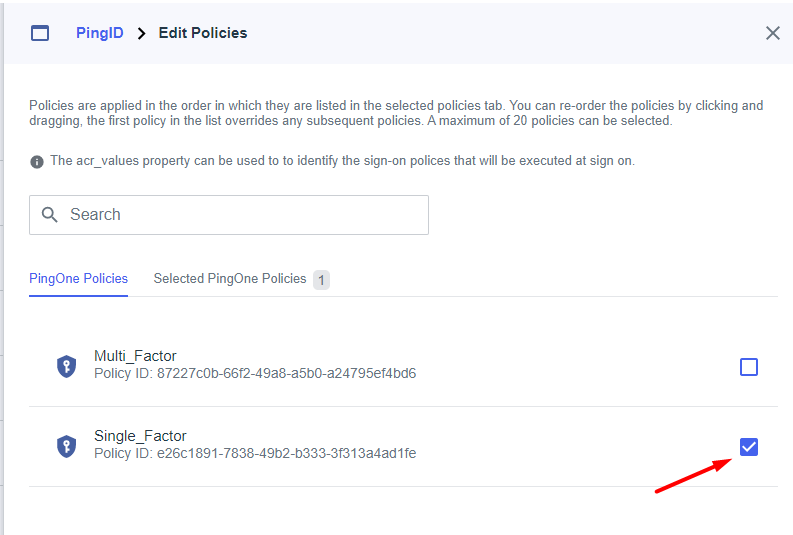
Now click on ‘Policies’ and click the Edit button afterwards:

Here, we can set which authentication policies we’re going to enable for signing in. For testing purposes, we’ll only enable Single Factor, click ‘Save’ afterwards:
Next, click the ‘Configuration’ tab, the following information will be displayed, which we’ll need to complete the SAML authentication method window that we left open in the Thinfinity Workspace/VirtualUI at the beginning of this guide:
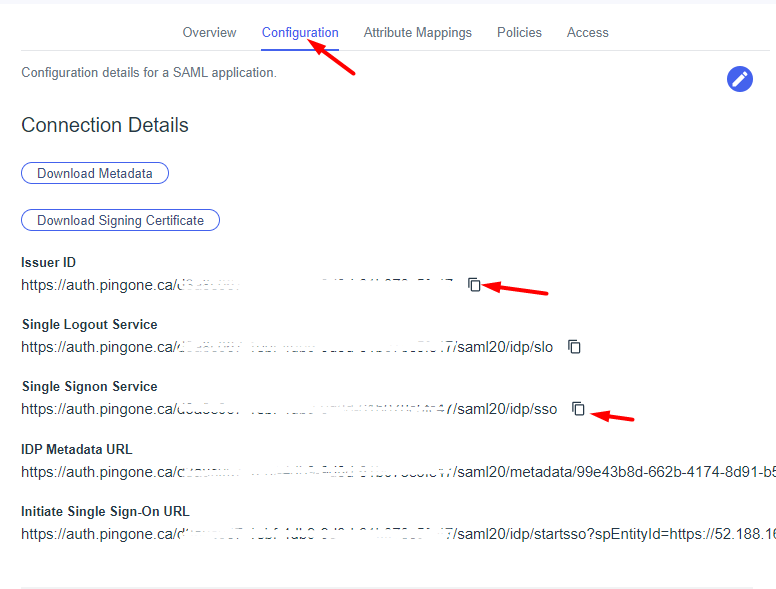
Back to the Thinfinity Workspace/VirtualUI manager, fill the rest of the fields with the information from PingIdentity following this reference:
Service Identifier = Identity Provider ‘Entity ID’
- Service Certificate File = Your certificate file
- Service Certificate Password = Your certificate’s password
- Identificacion Entity ID = Issuer ID
- Single Sign-On Service URL = Identity Provider ‘Single SignOn Service URL’
- Sign-Out URL = This value is optional
- Partner Certificate File = X.509 Certificate provided by Ping Identity
‘Service Certificate File’ is where we declare the name and password of the certificate that will be created for this authentication method, this must not be confused with the certificate we downloaded earlier. Enter a name of your preference and a password of your choice in these fields.
The path to the certificate previously downloaded is the one we declare in the last field ‘Partner Certificate File’.
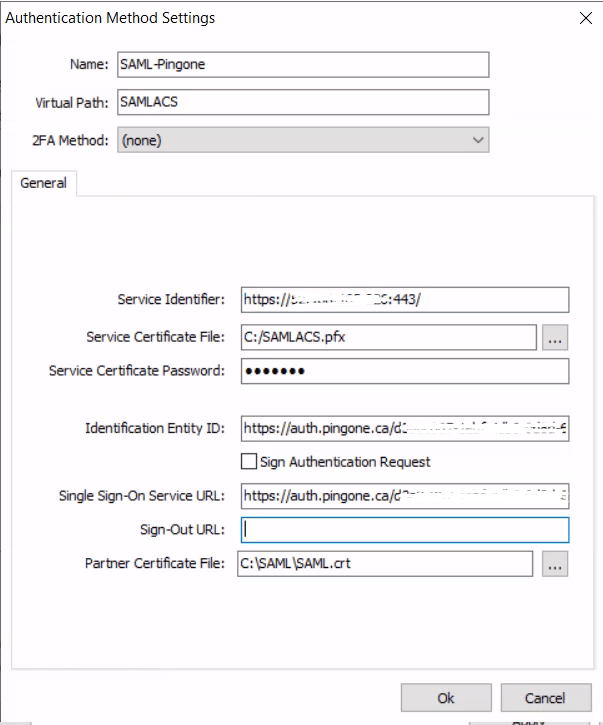
Click ‘OK’.
Back in the ‘Authentication’ tab, switch to the ‘Mappings’ tab and map your email address to the local AD user or group:
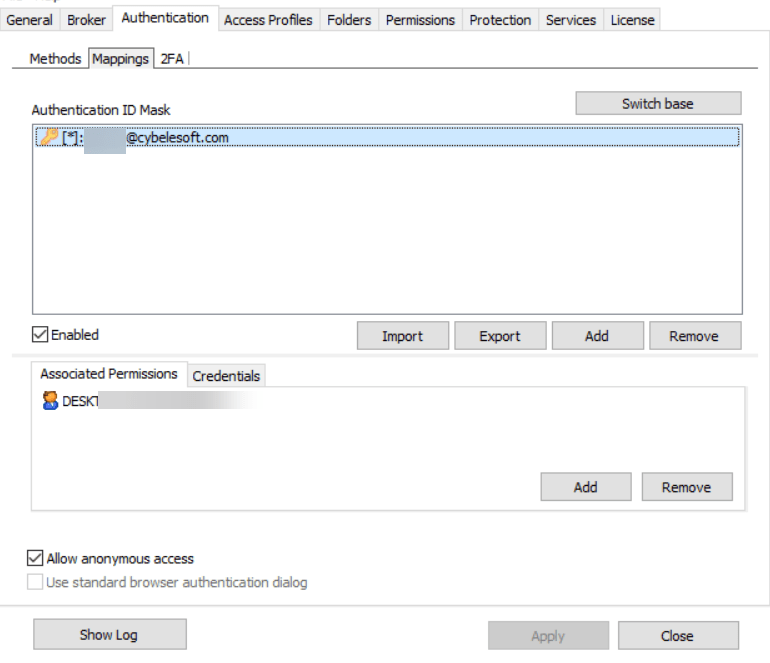
Above, I mapped an email address to an AD user, but you can also use a wild-card. For instance, you can add ‘*@cybelesoft.com’ as ‘Authentication ID mask’ and map this back to the ‘Cybelesoft\Domain Users’ group in your AD.
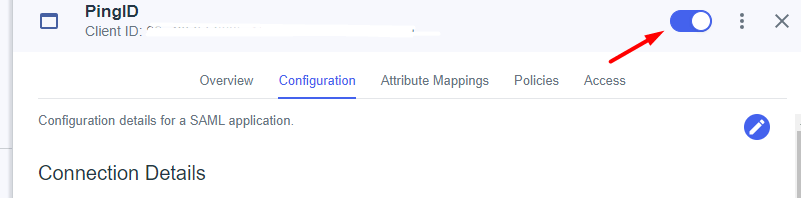
Finally, we have to enable user access to SAML on Ping Identity, you will find a little switch to do so in its settings (Usually disabled by default):
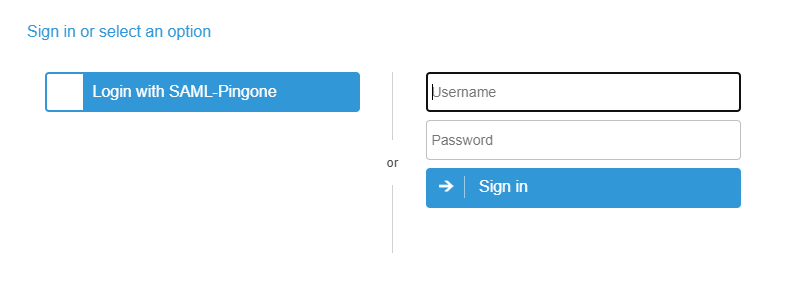
Now after applying the changes to the Thinfinity Desktop manager, go to the Thinfinity Desktop site, and you should be able to see the ‘Ping Identity SAML’ authentication method listed: