
Introduction
We know how much you value remote access to your resources, especially if this access is available securely from any location, and without the need for any software installation on the client device, regardless of the device type. This is how we conceived the Thinfinity Workspace product line: to provide seamless web access for the widest range of scenarios.
Need to connect to Azure VMs from Windows, Mac or Linux?
You should install Thinfinity® Workspace on any Windows computer. This computer will act as a “server”, while any browser will be the “client” that allows the access to the VMs.
You can check these tutorials first:
– How to publish a single application instead of a desktop
Guide to access Azure VMs through RDP with Thinfinity
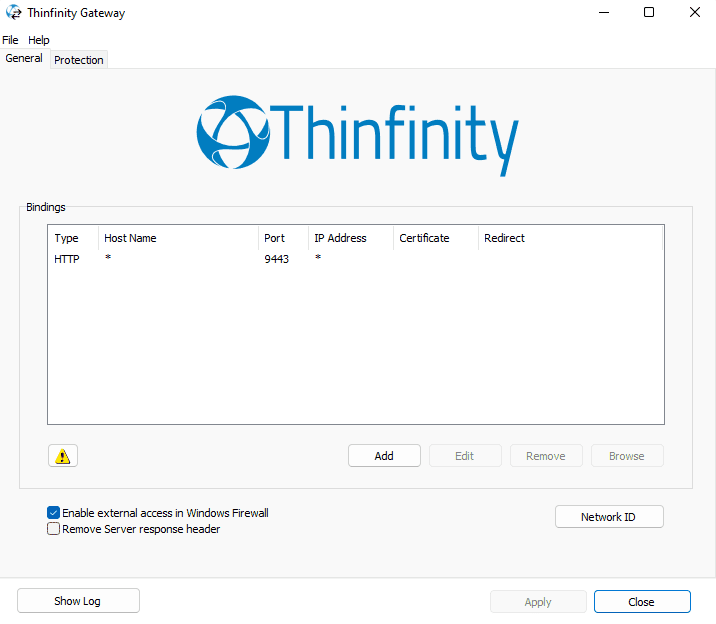
Thinfinity Workspace will listen on port 9443 by default, but you can change it to any available port. To verify this, open Thinfinity Gateway manager:
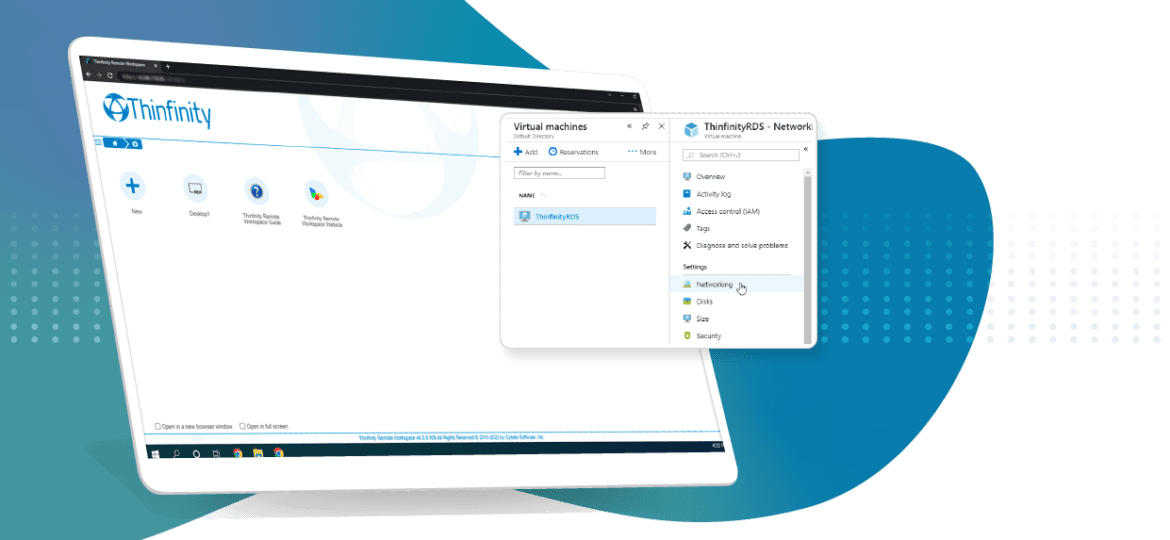
With this information, we can now go to Azure’s portal and open the port for Thinfinity Workspace.
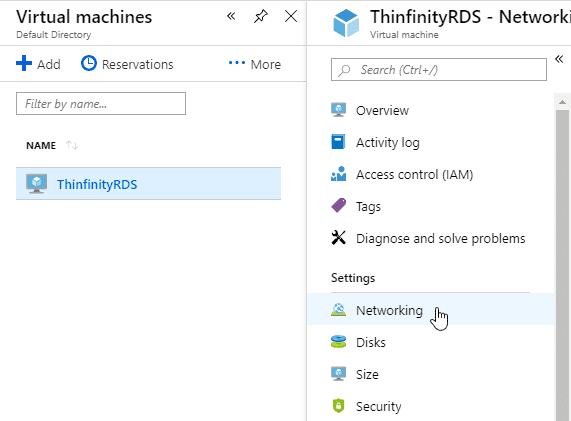
Go to the ‘Networking’ tab of your VM:
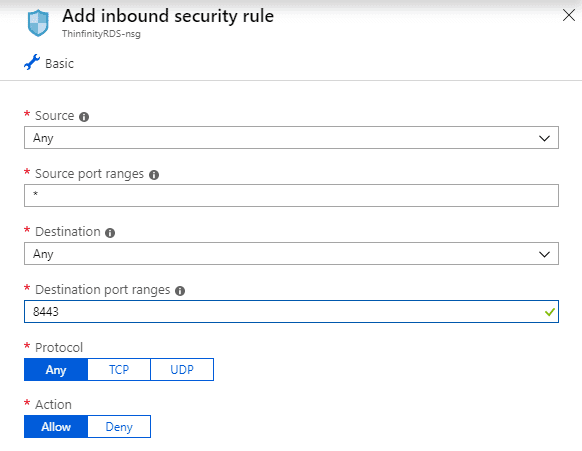
Create a new inbound security rule and add the port you’ve configured on Thinfinity Gateway Manager, in this case, ‘9443’:
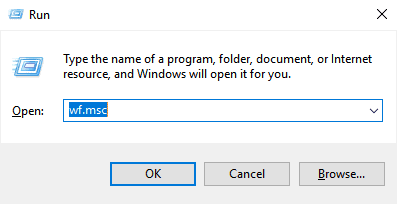
Last but not least, make sure port 9443 is also open on the Windows Firewall in the VM. You can add an inbound rule to be sure. In order to do so:
- Run “wf.msc” to open Windows Firewall:
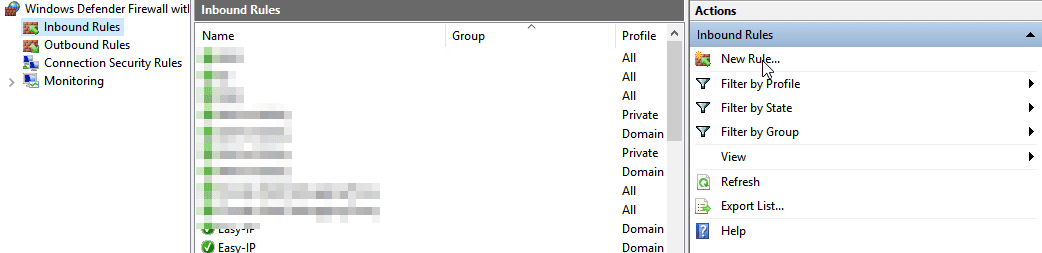
2. Create a new inbound rule:
Select Port and hit “Next”.
- Make sure “TPC” is selected and add the specific port. If you have the default port configured in Thinfinity VirtualUI Server Manager just enter “8443” and hit “Next”.
- Select “Allow all connections” and press “Next”.
- Ensure “Public” is checked and press “Next”.
- Add a name and description and press “Next”.
Finally, you should be able to reach and run your Windows application over the internet from any browser!